Back to featured insights
How to Disable Directory Listing WordPress: Step-by-Step Guide
In today's digital landscape, website security is of paramount importance. As a WordPress site owner, you must be aware of the potential risks that can compromise the integrity of your website. One such risk is directory listing, which exposes sensitive information and increases vulnerability to attacks.
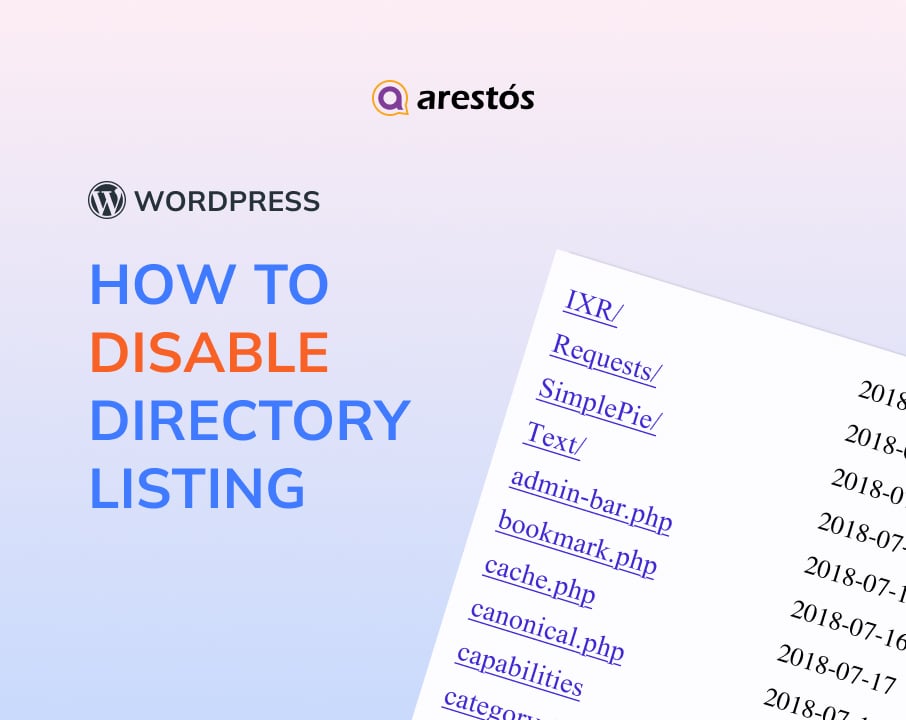
Table of Content
Share
Looking to strengthen your WordPress website’s security? One quick and effective way is to disable directory listing WordPress. Leaving it enabled can expose sensitive parts of your site to potential threats.
In this step-by-step guide, we’ll show you exactly how to turn off directory listing in WordPress using different methods, all of which are simple and beginner-friendly.

What is a Directory Listing?
Directory listing is a server-side feature that displays the contents of a directory when no default index file, such as index.html or index.ph,p is present. In this case, the web server automatically generates a visible list of all files and subfolders within that directory.
This list typically includes file names, sizes, and last modified dates. Depending on the server configuration, it may also show additional details like file types or permissions. The directory structure can be presented as a plain text list or a clickable HTML interface, allowing users to navigate through the folder hierarchy.
Also referred to as folder listing or folder browsing, directory listing is often enabled by default on many servers and may unintentionally expose sensitive files if not properly configured.
Why Disable Directory Listing in WordPress?
There are several important reasons why disabling directory listing in WordPress is a smart and necessary step:
- Protecting privacy and security: When directory listing is enabled, it can reveal detailed information about your site’s file system, such as folder names, file types, and internal structures. This visibility can aid attackers in mapping your website and identifying files that may be exploited, increasing the risk of security breaches.
- Preventing exposure of sensitive files: Some files on your server, like backups or configuration settings, are not meant to be accessed publicly. However, with directory listing turned on, users might unintentionally gain direct access to these critical files simply by navigating through open directories.
- Avoiding SEO issues: From a search engine’s perspective, open directory listings can cause duplicate content problems. Multiple URLs pointing to similar file listings can confuse crawlers, weaken page relevance, and ultimately harm your site’s search engine performance.
- Improving user experience: Instead of a clean, structured webpage, visitors may be met with a raw file list when accessing an unprotected directory. This not only looks unprofessional but also makes site navigation more difficult and disorienting.
Before jumping into the process of disabling directory listing, it’s best to first check whether the feature is currently active on your WordPress site.
How to Check Whether the Directory Listing is Enabled or Not
The simplest way to find out if directory listing is active on your WordPress site is to append “/wp-includes” to the end of your domain.
For example, try visiting: https://yourdomainname.com/wp-includes in your browser.
If a list of files and folders appears, it means that directory listing is currently enabled on your website.

On the other hand, if your browser displays a 403 Forbidden error or a similar message, it means that directory listing has already been disabled on your website.

How to Disable Directory Listing in WordPress
Disabling directory listing in WordPress is straightforward. Below are the main methods you can use:
- Via cPanel
- Using FTP
- With a Plugin
We’ll walk you through each method step by step so you can choose the one that best fits your setup and technical comfort level.
Disable Directory Listing in WordPress from cPanel
If you have access to cPanel and are comfortable using it, you can easily turn off directory listing for your WordPress site. Start by logging into your cPanel account using the credentials provided by your hosting provider.
Next, navigate to the Files section and select File Manager to begin.
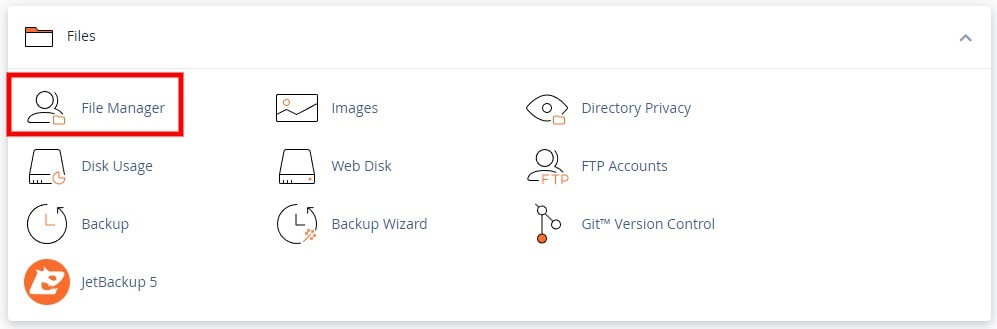
Inside File Manager, you’ll be able to view all the files and folders associated with your WordPress website. Navigate to the “public_html” directory, then locate the .htaccess file within it.
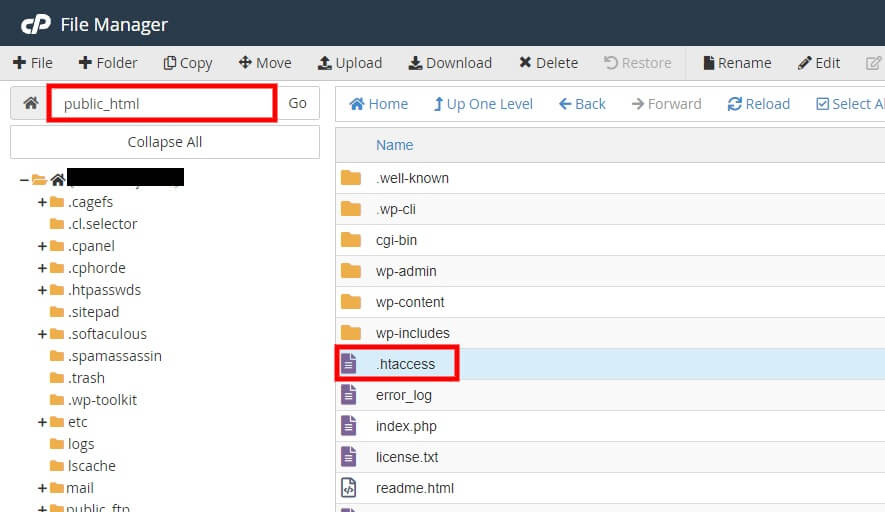
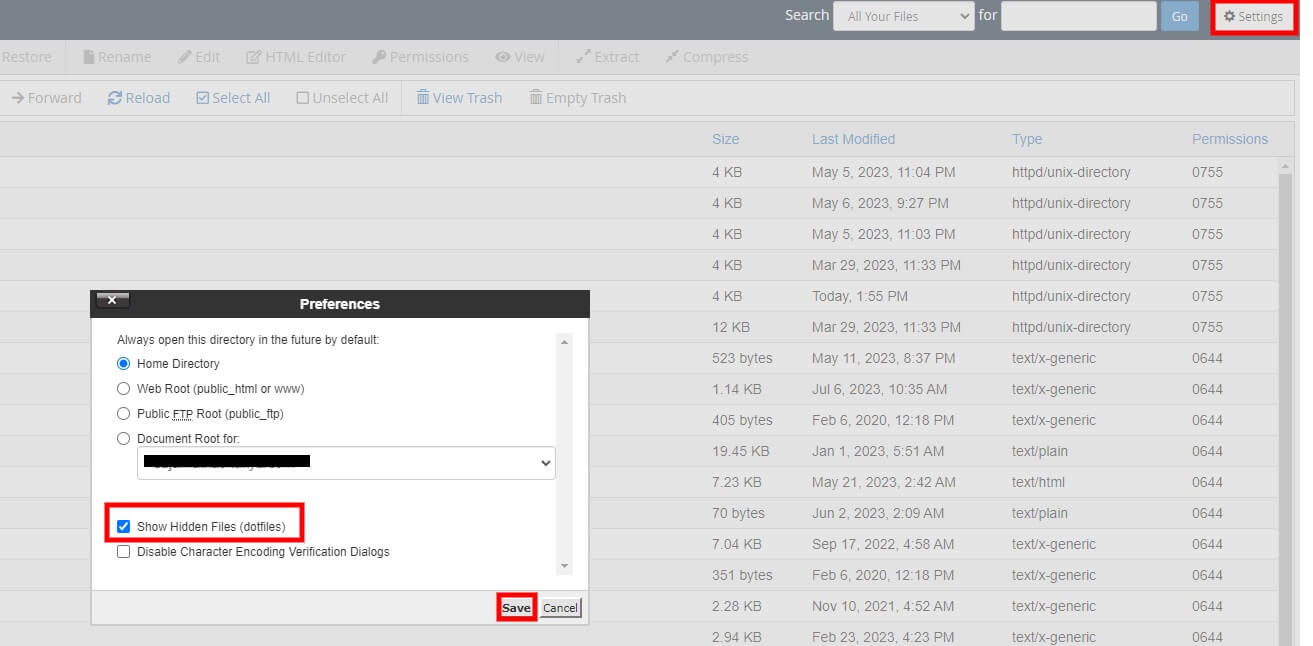
Note: If the .htaccess file isn’t visible, click on Settings in the top-right corner of File Manager. Then, enable the “Show Hidden Files” option and make sure to save your changes.
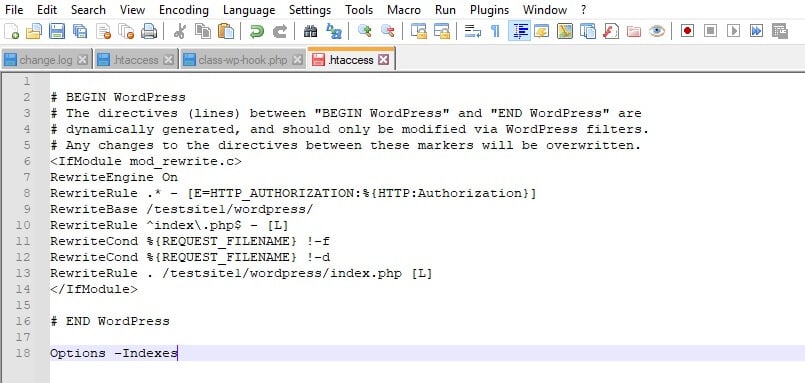
Once you’ve located the .htaccess file, download it to your computer and open it using a plain text editor such as Notepad++.
Before making any modifications, it’s highly recommended to create a backup copy of the original file. You can rename it to something like .htaccessbackup to keep it safe.
After creating the backup, scroll to the bottom of the .htaccess file and add the following line of code: Options -Indexes
Your file may look something like this:
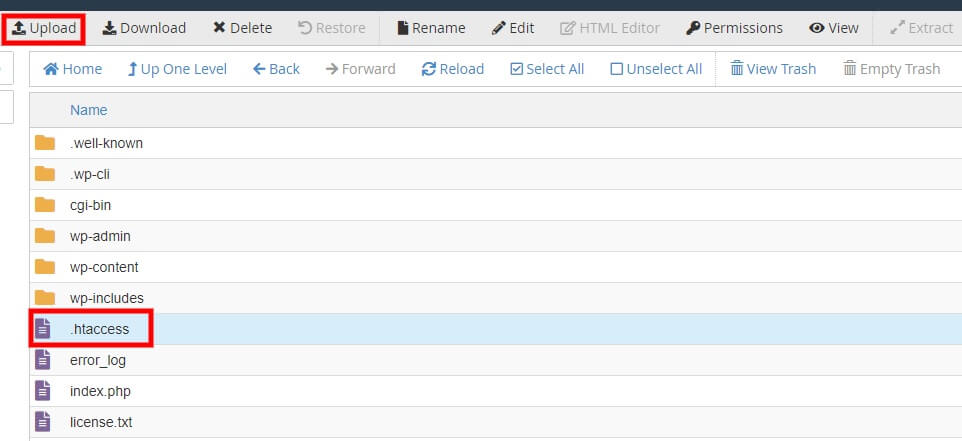
Finally, after adding the code, save the updated .htaccess file and upload it back to the File Manager in cPanel.
Since an .htaccess file already exists in your WordPress directory, you’ll need to overwrite the existing file when prompted during the upload.
To confirm that directory listing has been disabled, revisit your website by adding “/wp-includes” to the end of your domain.
If everything was done correctly, the file listing should no longer appear, indicating that directory browsing is now successfully disabled.
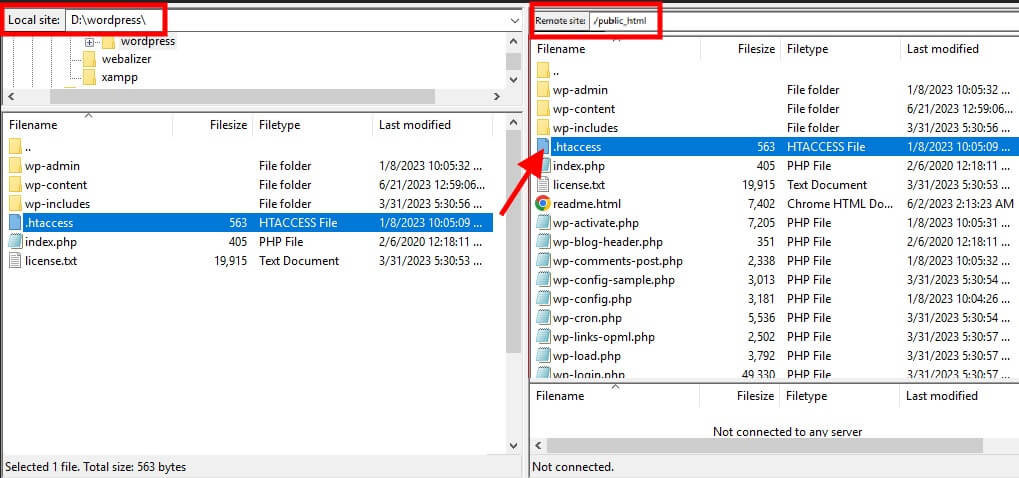
Disable Directory Listing in WordPress with FTP
If you don’t have access to cPanel, using FTP is a reliable alternative for editing your WordPress website’s files. Disabling directory browsing via FTP follows a process similar to the cPanel method. You’ll need to manually edit your site’s .htaccess file and upload the updated version using an FTP client.
Let’s begin by connecting your website to an FTP client.
There are several FTP clients available, such as FileZilla and Cyberduc,k that allow you to connect to your website and manage file transfers. While most of them work in a similar way, we’ll be using FileZilla for this tutorial. You can download and install it from the official website.
Once FileZilla is installed, launch the application and navigate to File > Site Manager. You can also open it quickly using the keyboard shortcut Ctrl + S.
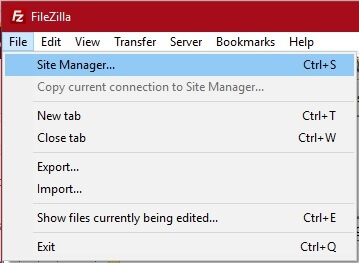
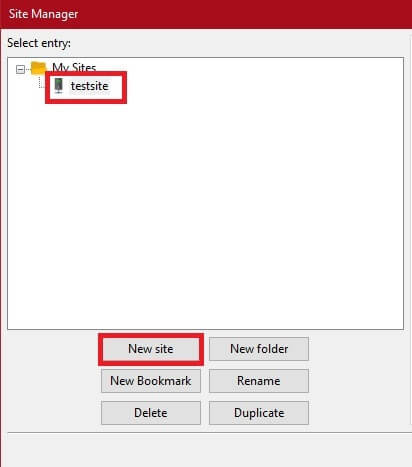
Next, click “New Site” in the Site Manager and enter a name for your website in the panel on the left side of the dialog box.
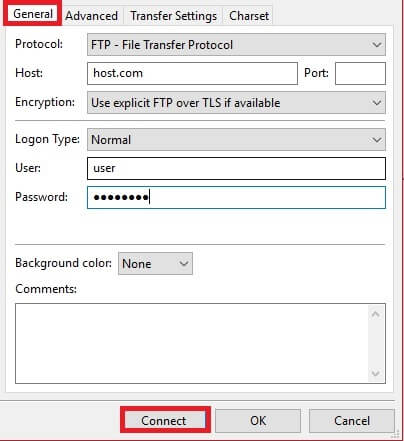
Then, under the “General” tab on the right side of the window, enter the login credentials provided by your hosting provider.
Once you’ve filled in the required information, click “Connect” to establish the connection.
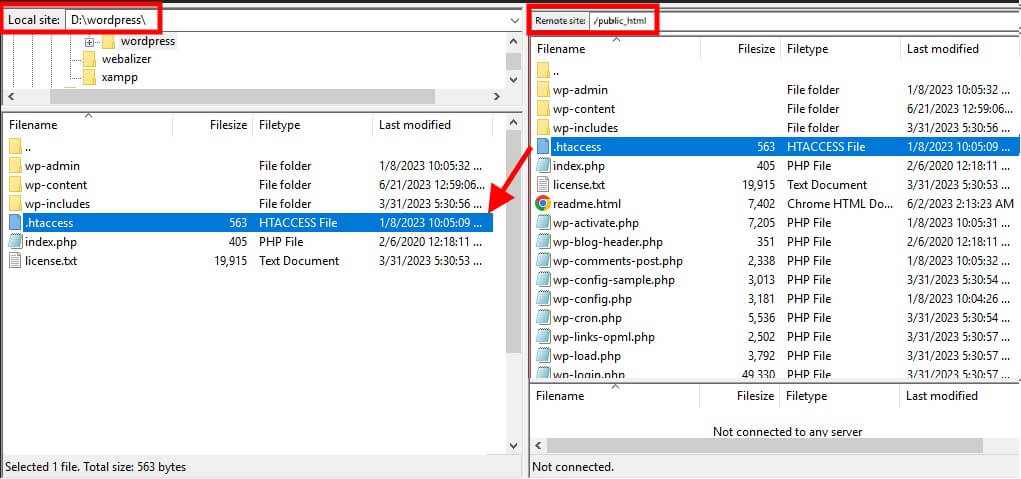
You should now see your website’s files displayed in the Remote site section.
In the Remote site section, you’ll see all the directories associated with your website. Locate and open the public_html folder—this is where the .htaccess file is stored.
To download it, simply drag and drop the file into the Local site section, which represents your computer’s file system.
Next, open the .htaccess file with a plain text editor such as Notepad++, and add the following line of code at the very end of the file: Options -Indexes
Note: This step is the same as in the previous method. However, make sure to create a backup copy of the .htaccess file before making any changes, just as mentioned earlier.
After adding the code, save the file and upload it back to the Remote site by dragging and dropping it into the original directory.
This should successfully disable directory listing on your WordPress website. To verify, add “/wp-includes” to the end of your domain and check that the file listing no longer appears.
Disable Directory Listing in WordPress Using a Plugin
If you don’t have the necessary credentials to access cPanel or an FTP client, but you can still log in to the WordPress dashboard, don’t worry. You can still disable directory browsing using a plugin. Plugins allow you to extend your website’s functionality beyond what WordPress or your current theme offers. Disabling directory browsing is no exception.
Several plugins let you modify the .htaccess file to turn off directory browsing. In fact, many popular security and SEO plugins already include this capability if you’re using them on your site.
Alternatively, you can install a dedicated plugin specifically designed to automatically disable directory browsing with minimal effort.
We will use two plugins for this tutorial. They are straightforward tools that allow you to disable directory listing on your website with just a single click.
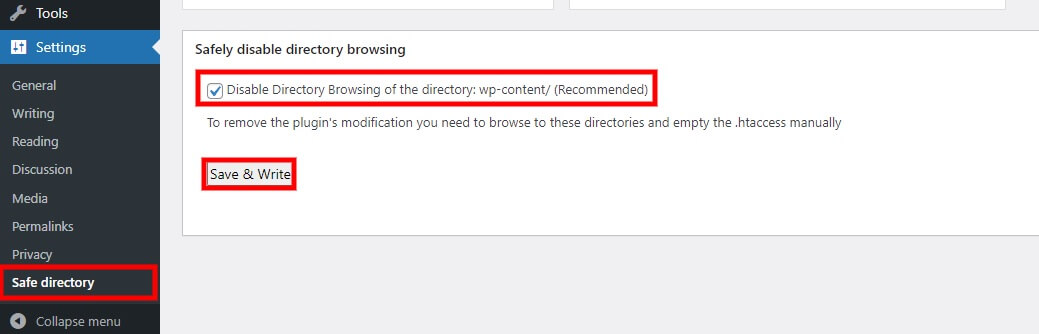
Plugin 1: WP safely disable directory browsing
To install the plugin, navigate to Plugins > Add New from your WordPress dashboard. Then, use the search bar to enter the plugin’s name or relevant keywords. Once the plugin appears in the search results, click Install Now to begin the installation.

The installation should only take a few seconds. Once it’s finished, click “Activate” to enable the plugin on your site.
After activating the plugin, go to Settings > Safe Directory in your WordPress dashboard to access its settings. You’ll find a single option available.
Simply check the Disable Directory Browsing box and click “Save & Write” to apply the changes.
And that’s it. Directory listing is now disabled on your WordPress site. To confirm, simply add “/wp-includes” to the end of your domain and check that no file listing appears.
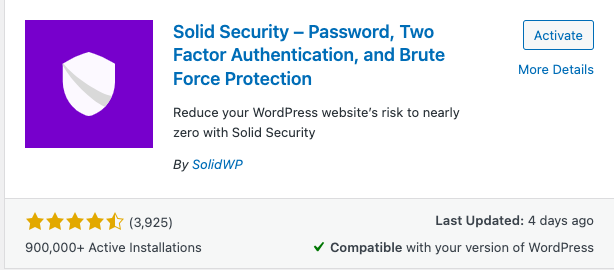
Plugin 2: Solid Security
Solid Security (formerly known as iThemes Security) is one of the many security plugins that have been tested. It offers a range of useful features to enhance your website’s security, including the ability to disable directory listing.
Below are the steps to disable directory listing using this plugin:
To install and activate the iThemes Security plugin (now called Solid Security), go to the sidebar and hover over Plugins, then click “Add New”.
In the search bar, type “Solid Security”, click “Install Now”, and once the installation is complete, click “Activate”.
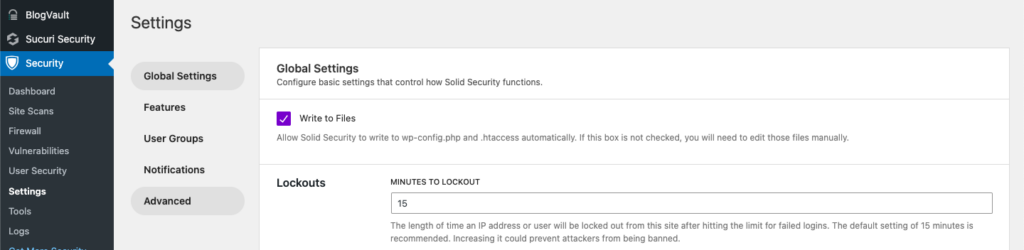
From the WordPress sidebar, click on “Security” to open the Solid Security settings page. Next, select “Advanced” from the menu on the left.
On this page, you’ll find several sections with different security settings. Locate the System Tweaks section and look for the option labeled “Disable Directory Browsing.”
Check the box next to it, then scroll down and click Save to apply the changes.
Troubleshooting
Having trouble disabling directory browsing? Try these troubleshooting steps:
- Review your code carefully: Even a small mistake like a missing character or incorrect syntax can cause issues. Go back and verify the line of code you added to the .htaccess file to ensure it’s written correctly.
- Make sure you’re editing the correct .htaccess file: WordPress installations may contain multiple .htaccess files. Confirm that you’re modifying the one located in your website’s root directory, as that’s typically the one that controls directory access.
- Look for plugin conflicts: Some plugins—especially those related to security or caching—may override or interfere with .htaccess changes. Try disabling your plugins one at a time to identify if any of them are causing the issue.
- Contact your hosting support: If you’ve tried all the above and the problem persists, consider reaching out to your hosting provider. They may be able to assist directly or provide additional guidance specific to your server environment.
Frequently Asked Questions
1. What happens if I don’t disable directory listing on my WordPress site?
Failing to disable directory browsing can expose details about your website’s file structure to potential attackers, increasing the risk of security vulnerabilities and unauthorized access.
2. Is it necessary to disable directory listing?
Yes, disabling directory listing is strongly recommended for security purposes. It helps prevent hackers from exploring your site’s file structure and accessing potentially sensitive information.
3. What are the risks of leaving directory listing enabled on my site?
Keeping directory listing enabled may expose sensitive information, reveal your website’s file structure to attackers, and increase the risk of targeted exploits through known vulnerabilities in plugins or themes.
4. Are there any SEO and user experience considerations related to directory listing?
Directory browsing doesn’t directly affect SEO or user experience. However, improving site security by disabling directory browsing can indirectly boost user trust and search engine rankings.
Conclusion
Disabling directory listing in WordPress is a simple yet crucial step to strengthen your website’s security. Throughout this guide, we’ve walked you through multiple methods to turn off directory browsing using cPanel, FTP, or plugins so you can choose the one that best fits your setup. Taking this small action can prevent unauthorized access and help protect your sensitive files from potential threats.
At Arestós, we specialize in delivering tailored WordPress solutions that combine performance, security, and scalability. Whether you need custom theme development, plugin optimization, site hardening, or a complete WordPress build, our expert team is here to help. We understand the unique needs of your business and provide reliable support to keep your site running at its best.
Contact us today to find out how our WordPress solutions can elevate your website’s performance and security.
Subscribe to our newsletter!
Get updated to
the lastest IT trends
Related Posts
Update the latest technology trends for your business