Back to featured insights
How to Migrate from Shopify to WordPress WooCommerce: The Complete Guide
Looking to move your store from Shopify to WordPress WooCommerce? This guide walks you through every step, from exporting products to launching your new WooCommerce site, so you can switch platforms with confidence, control, and minimal disruption.
Table of Content
Share
If you’re running your store on Shopify but starting to feel restricted by its customization limits, ongoing costs, or lack of full control over your data and design, migrating to WordPress WooCommerce could be a smart move.
This guide will walk you through the process of transferring your store from Shopify to WooCommerce safely, efficiently, and without disrupting your business operations.
A quick look at the sections covering the top hosting choices and what to expect from each one:
- What is WooCommerce
- What is Shopify
- Why choose WooCommerce instead of Shopify?
- Considerations before migrating from Shopify to WooCommerce
- How to migrate from Shopify to WooCommerce (8 Steps)
- Frequently Asked Questions
What is WooCommerce
WooCommerce is a flexible, open-source ecommerce solution designed to integrate seamlessly with WordPress. As the most widely used e-commerce platform, powering over 3.6 million online stores, it offers all the essential tools to launch and manage a digital storefront, including product listings, payment processing, and order fulfillment. Its expansive library of extensions allows businesses to enhance and tailor their store’s functionality with ease.
Pairing WordPress with WooCommerce gives website owners powerful e-commerce capabilities, along with full control over design, features, and user experience.
What is Shopify
Shopify is a proprietary, closed-source ecommerce platform that operates exclusively on paid subscription plans. These plans offer a complete package for managing an online store, including hosting, site management tools, and essential e-commerce features.
Although this all-in-one solution may suit certain businesses, it tends to limit flexibility and control compared to open-source alternatives like WooCommerce.
Why choose WooCommerce instead of Shopify?
Full ownership and control over your business
- Open-source platform: Gives you complete access to the source code to modify and build the exact store you want, without limitations.
- Contrast with Shopify: With Shopify, you’re “leasing” space and are subject to their rules and platform constraints.
- Complete SEO Control: Edit every technical aspect of your site’s SEO, leveraging WordPress’s powerful content-first architecture.
- Payment Gateway Freedom: Connect to a wider variety of niche and local payment gateways.
- No Extra Transaction Fees: WooCommerce doesn’t charge you extra for using third-party payment gateways, unlike Shopify’s 0.5% to 2% fee.
- Easy & Free Backups: Access excellent, free plugins like Jetpack Backup to save your entire site. Shopify charges a fee for full site backups.
- Hosting Freedom: Choose any hosting provider that fits your budget and performance needs, unlike Shopify, where you are locked into their hosting.
Limitless flexibility and customization options
- The Power of Open-Source: Anyone can create themes and plugins, leading to endless customization possibilities. Shopify is closed-source and limits core access.
- Massive Ecosystem: Access over 54,000 WordPress plugins and 800+ WooCommerce-specific extensions.
- Custom Development Ready: Easily hire a developer to build unique functionality using the WordPress REST API.
Full control over the cost of ownership
- Free Core Platform: WordPress and WooCommerce are free. You only pay for what you need, like hosting, a domain, and premium extensions.
- Avoid Shopify’s hidden costs: Shopify charges fixed monthly fees, with key features locked behind higher-tier plans. Many apps require costly subscriptions, and transaction fees of 0.5%–2% apply if you don’t use Shopify Payments, all cutting into your profits.
Access to more shipping costs and tools
- Affordable Live Shipping Rates: Display real-time carrier rates with an inexpensive extension, a feature that requires Shopify’s expensive Advanced plan ($299/month).
- Diverse Shipping Options: Integrate with numerous international and niche carriers and create complex, conditional shipping rules.
- Convenient and Discounted Label Printing: The free WooCommerce Shipping extension lets you print labels and get discounted rates directly from your dashboard.
Unlimited variations
- Break Free from Limits: Shopify limits you to 100 variations per product.
- True Unlimited Options: WooCommerce allows you to create an unlimited number of product variations, essential for many types of businesses.
Access to a close-knit community and top-notch support
- A Massive Global Community: Join millions of users and developers who help each other through forums, Meetups, and online groups.
- Diverse Support Options: Get help from free community forums, premium support for complex issues, and dedicated enterprise-level consulting.
- More Accessible Than Shopify: Dedicated support on Shopify is often reserved for high-cost Shopify Plus members.
Considerations before migrating from Shopify to WooCommerce
When migrating a website to a new platform, it’s important to take several key factors into account. These might include selecting the right hosting environment, ensuring proper data backups, and handling other technical aspects. Let’s explore each of these considerations in detail.
Find a WordPress-friendly hosting provider
Don’t overlook this step. Your hosting provider is the engine that powers your entire WooCommerce store. The wrong choice can undermine all your future efforts. When evaluating hosting options, keep these key criteria in mind:
- Optimized Performance: Ensure fast loading speeds with hosting that offers SSD drives, server-side caching, and enough resources (RAM, CPU) to handle WooCommerce.
- Reliability & Uptime: Downtime equals lost revenue. Choose a provider with a minimum 99.9% uptime guarantee to ensure your store is always online.
- Scalability: Your business will grow. Select a host that lets you easily upgrade your plan to handle traffic spikes, especially during sales seasons.
- Easy WordPress Installation: Save time with a “1-click WordPress install” feature, commonly available in the hosting control panel.
- Dedicated Security: Look for essential security features like a free SSL certificate, a Web Application Firewall (WAF), and automatic malware scanning to protect your store.
- WordPress-Savvy Support: When issues arise, you’ll need fast help. Look for 24/7 support from a team with deep expertise in both WordPress and WooCommerce.
Back up your Shopify store
Before making major changes to your online store, it’s essential to create a full backup of your data. Unfortunately, one limitation of Shopify is its lack of built-in backup features.
While Shopify does allow you to export product information in CSV format, which can be helpful during migration, other elements like your store’s layout and broader content can’t be backed up natively.
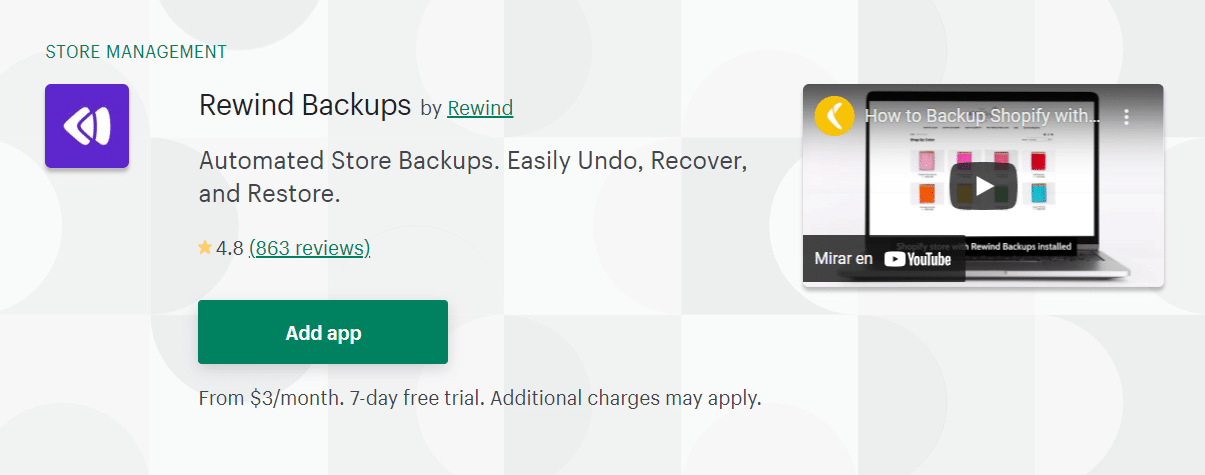
To implement comprehensive backup solutions, you’ll need to rely on third-party apps from the Shopify App Store. Tools like Rewind Backups can help fill in this gap by providing core backup capabilities.
Keep in mind that even with apps like Rewind Backups, creating a full replica of your Shopify store may not be possible. Additionally, these backup tools are not designed to handle store migrations.
Although migrating from Shopify to WooCommerce is generally safe and doesn’t delete your existing store’s data, it’s still wise to back up everything beforehand. This extra step ensures you’re protected in case anything goes wrong during the transition.
How to migrate from Shopify to WooCommerce (8 Steps)
With your web hosting ready, the next step is to begin transferring your store from Shopify to WooCommerce. This includes importing all your products and rebuilding the store’s appearance within WooCommerce. But before diving into that, the first thing to do is install and configure WordPress.
Here’s a quick overview of the 8 essential steps to successfully migrate your store from Shopify to WordPress WooCommerce:
- Step 1: Set up WordPress
- Step 2: Install WooCommerce
- Step 3: Export products from Shopify
- Step 4: Import your Shopify products into WordPress
- Step 5: Point your domain to WooCommerce
- Step 6: Configure Your WordPress Permalinks
- Step 7: Recreate your Shopify store’s design (or start over)
- Step 8: Configure your WooCommerce settings
Now, let’s walk through each step in detail to ensure a smooth and successful migration.
Step 1: Set up WordPress
To set up WordPress, you can choose between two main methods:
One-click installation (the easiest option):
Did you know that getting started with WordPress can be as easy as a single click? Many hosting providers offer a “one-click install” feature, making the setup process incredibly simple. Just sign up for a hosting plan, go to your hosting dashboard, and click “Install WordPress.” It’s the fastest and most beginner-friendly way to launch your website.
Manual installation (requires some technical know-how):
If your hosting provider doesn’t support automatic installation, you can still set up WordPress manually. This method requires downloading the WordPress software to your computer and uploading it to your hosting server using FTP or a file manager. While it’s a bit more complex, it’s a great opportunity to gain a deeper understanding of how your website works.
If you’re not sure where to start, check out our detailed WordPress installation guide for beginners.
Step 2: Install WooCommerce
After installing WordPress, you’ll be able to access the dashboard — the control center for your website. From this panel, you can manage everything from site settings and layout to the content you create and share.
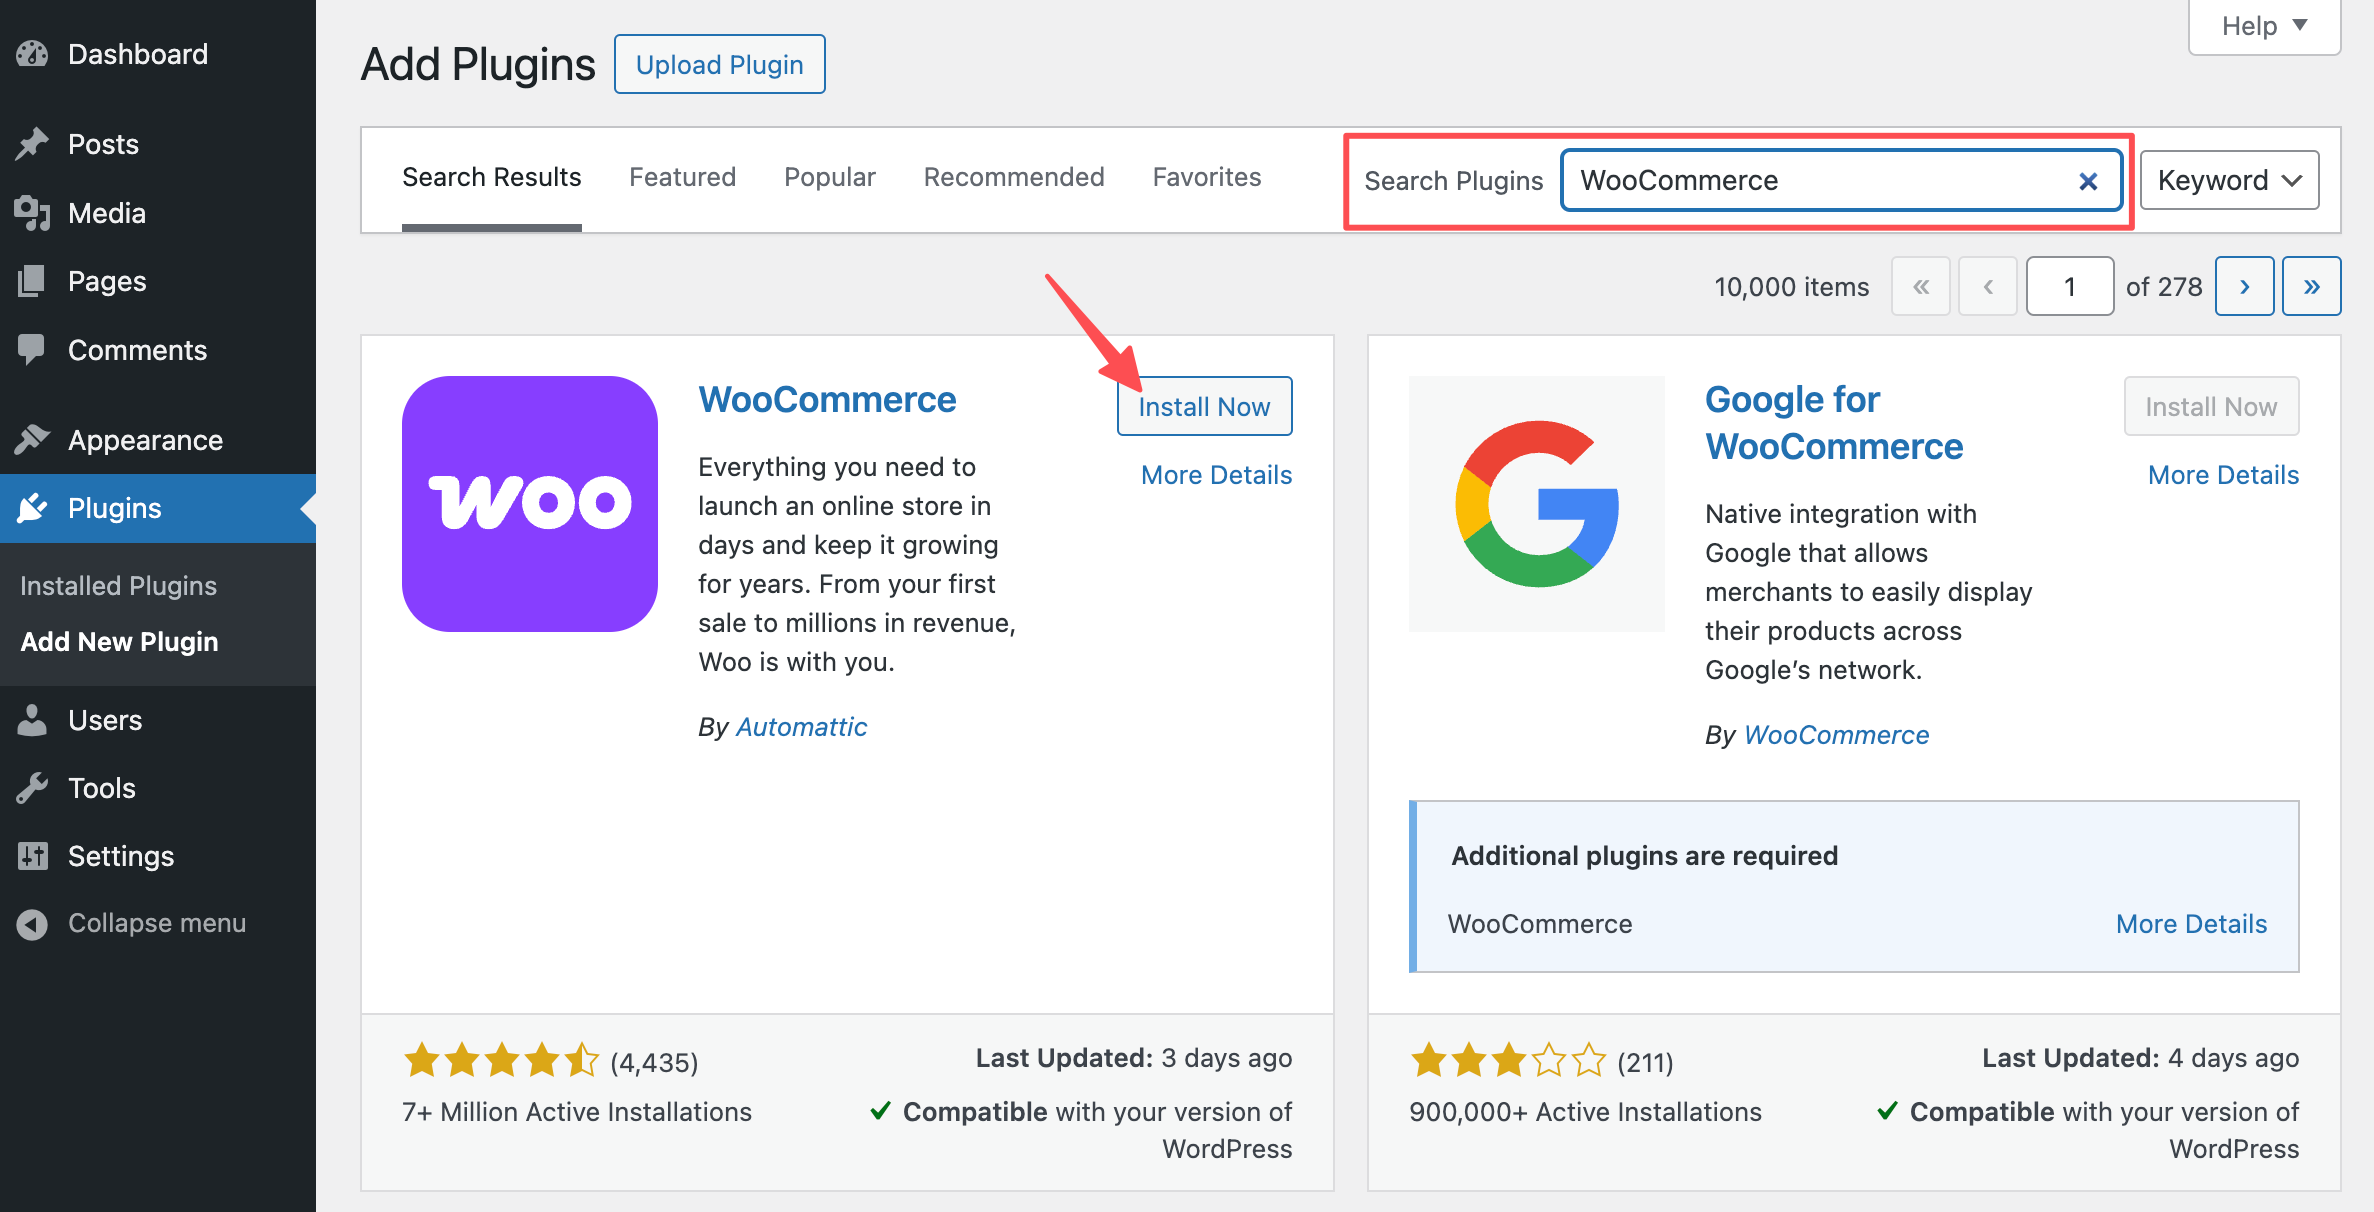
Since you want to move to an online store, the first step is to install the WooCommerce plugin. Navigate to Plugins > Add New in your WordPress dashboard, then enter “WooCommerce” into the search bar at the top to locate the plugin.
WooCommerce will typically appear among the top results in the search list:
Select the “Install Now” button next to the WooCommerce plugin. WordPress will begin downloading and installing it automatically.
The installation runs in the background, so stay on the page until the “Activate” button shows up. Once it appears, go ahead and click it to enable the plugin.
For detailed instructions, take a look at this step-by-step WooCommerce setup guide.
Great, WooCommerce is now active and ready for use. You can begin adding and selling products right away. But since your existing product catalog is already on Shopify, the next step is to transfer that inventory into WooCommerce.
Step 3: Export products from Shopify
As previously noted, Shopify allows you to download your full product catalog as a CSV file. This file contains important details such as product names, URLs (slugs), tags, variants, and pricing information for everything you plan to migrate.
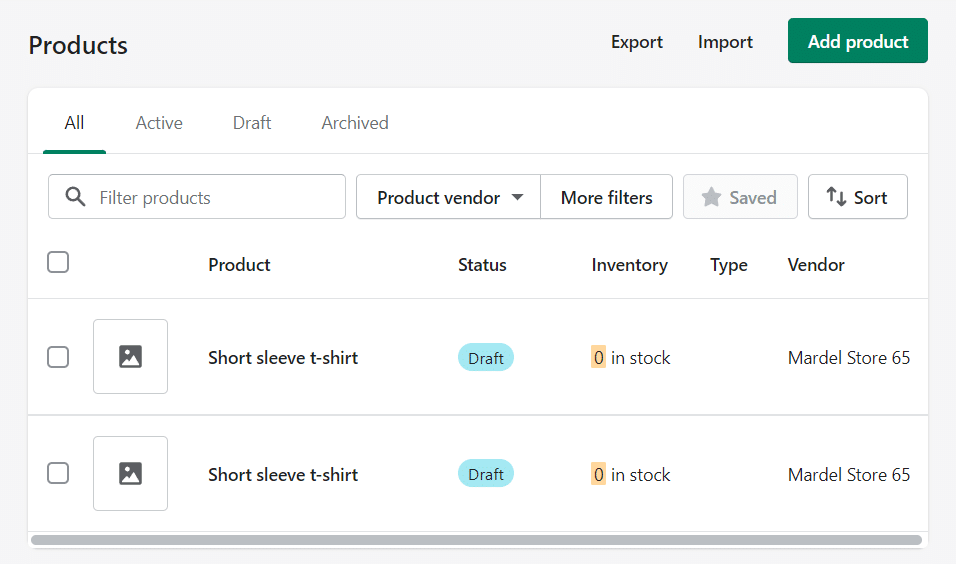
To export your product data, log into your Shopify account and go to Products > All Products. On this page, you’ll see your entire inventory along with options to import or export your product list:
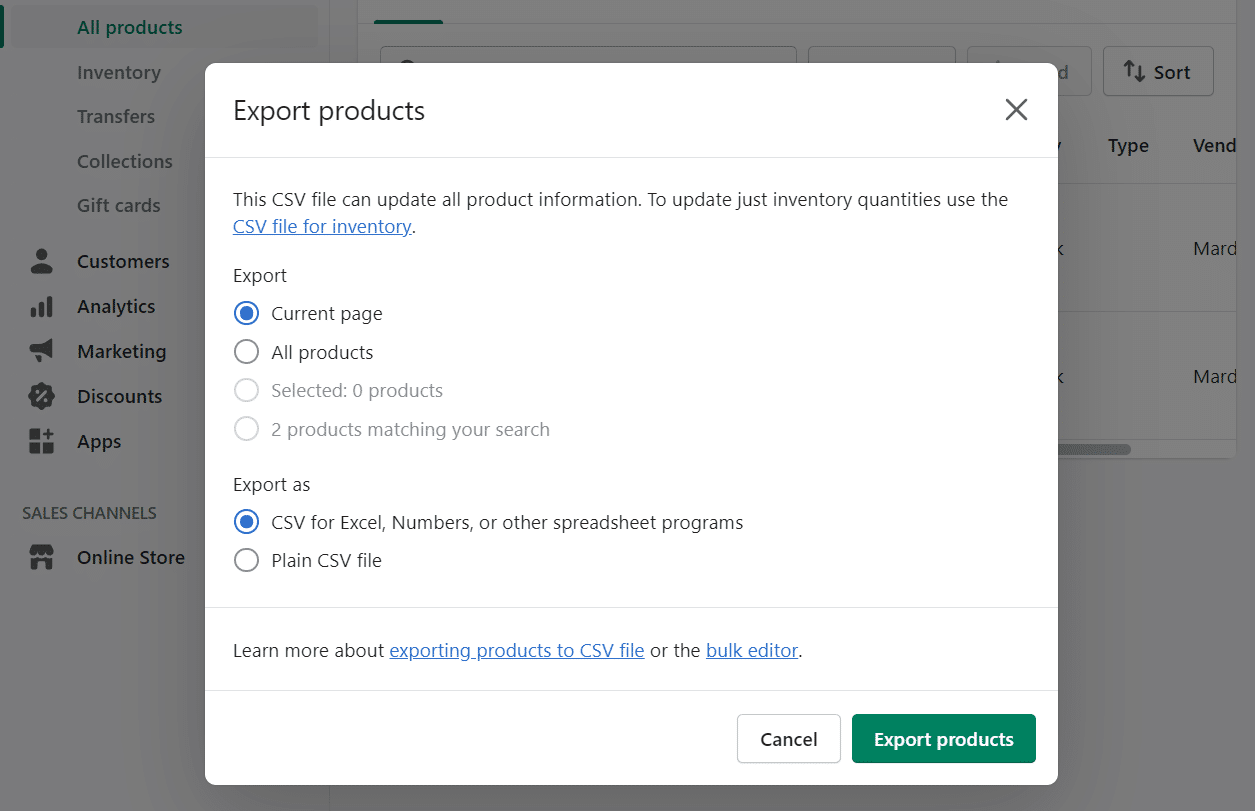
Click the “Export” button located at the top of the screen. Shopify will ask you to specify which products to export. Select “All products”. Under the Export as section, choose the option labeled CSV for Excel, Numbers, or other spreadsheet programs:
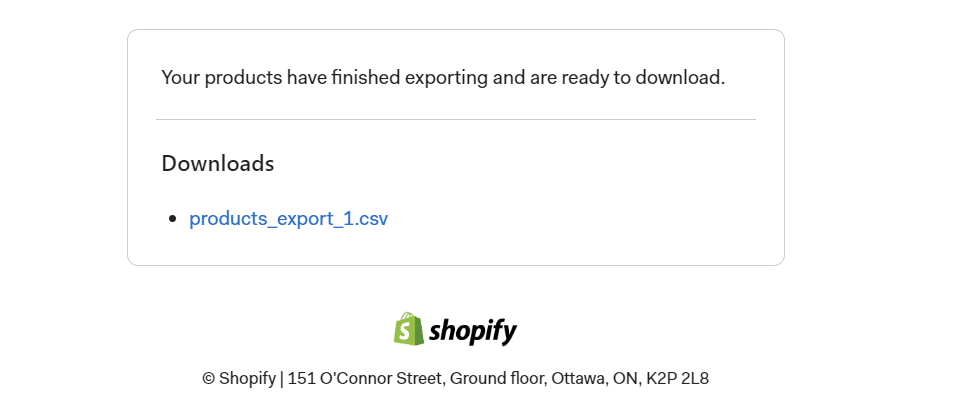
After you select “Export products”, Shopify will generate a CSV file containing all your product information and deliver it to your email inbox. The delivery time may vary based on the size of your product catalog.
The email from Shopify will provide a download link for the CSV file containing your full product data. Be sure to save this file to your computer, as you’ll need it in the following step.
Step 4: Import your Shopify products into WordPress
This is a critical step in the migration process. You have two main options for bringing your Shopify products into WooCommerce: using WooCommerce’s built-in product importer or opting for a dedicated migration service.
We’ll begin by exploring the manual method first.
Use the WooCommerce product importer
WooCommerce includes a built-in tool that allows you to import product data using CSV files. Since you already downloaded your Shopify product catalog in CSV format, the process is straightforward.
However, keep in mind that this method only brings in product information. Other store data like customer accounts, order history, images, and reviews won’t be transferred. Essentially, you’ll be starting fresh in WooCommerce with just your product listings.
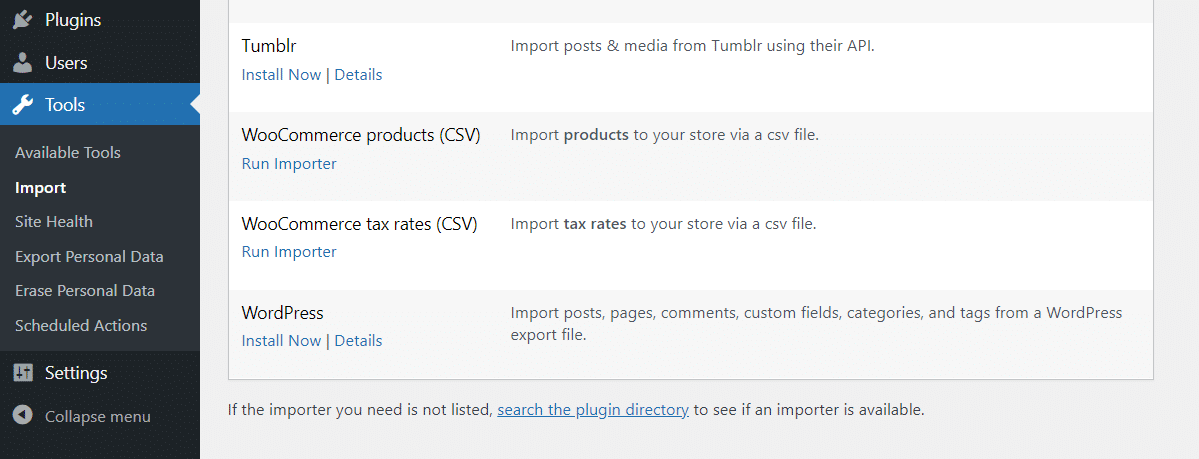
If that limitation works for you, the next step is to upload your CSV file. In your WordPress dashboard, navigate to Tools > Import, find the WooCommerce products (CSV) option, and click “Run Importer”:
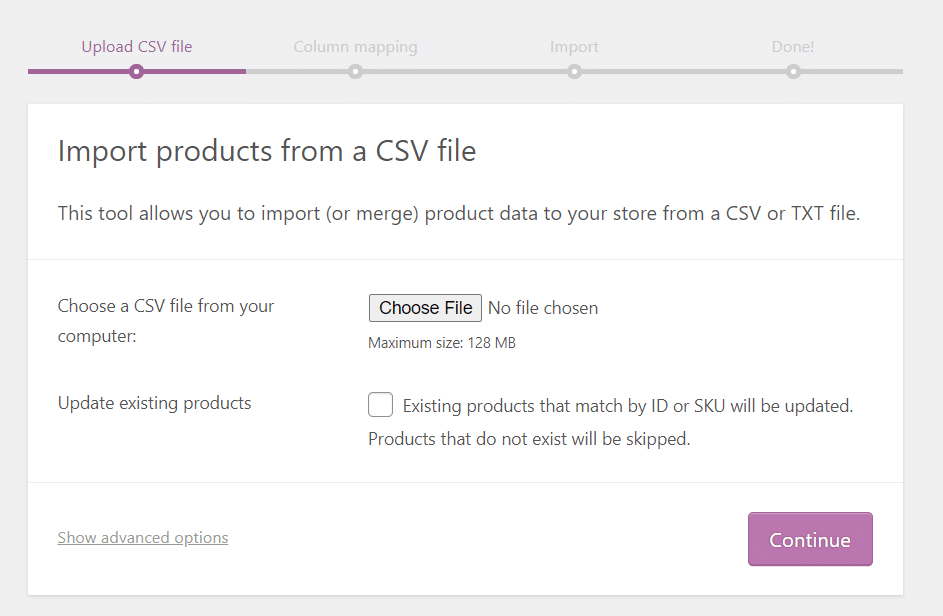
On the following screen, WooCommerce will prompt you to select the CSV file you wish to upload. You’ll also see an option to update existing products using the imported data. Since this is a fresh setup, you can leave that box unchecked:
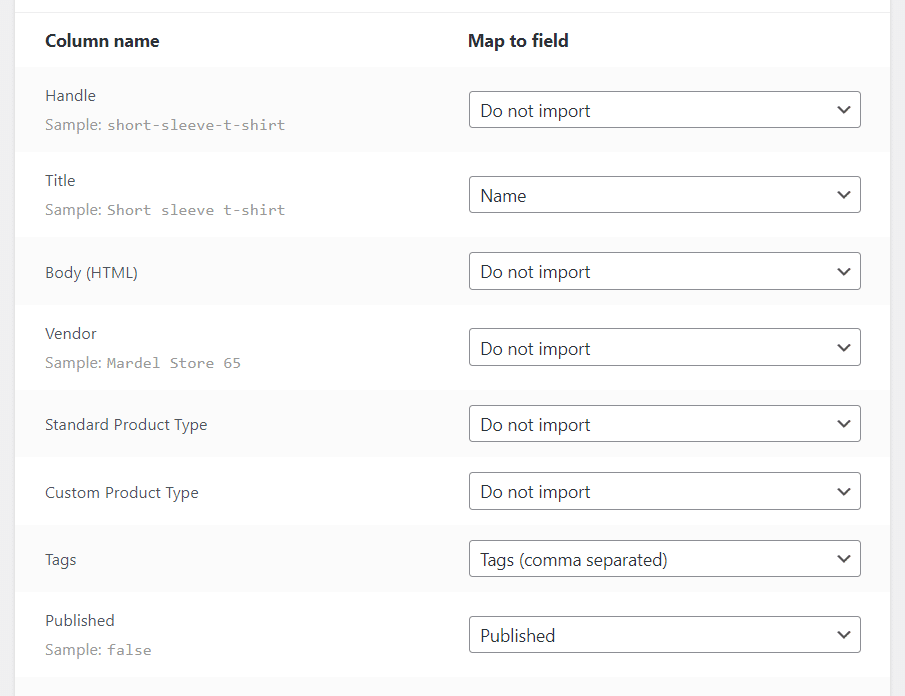
Choose the CSV file you saved earlier in step three and click “Continue”. On the next screen, you’ll see various settings that allow you to map the data from your CSV file to the appropriate WooCommerce product fields:
Review the list of available fields and select which product details you’d like to bring into WooCommerce. Certain fields, like SEO Title and SEO Description, may not have direct equivalents in WooCommerce, so it’s fine to skip those.
After finalizing your selections, click “Run the importer”. WooCommerce will begin processing your product data, which may take a minute or longer, depending on the size of your catalog.
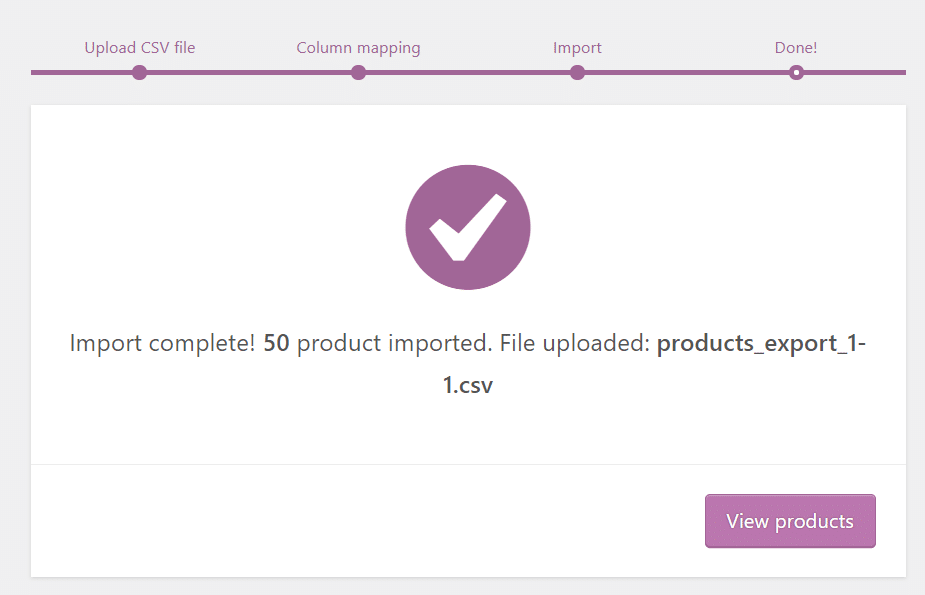
Once the import is complete, a confirmation message will appear on your screen.
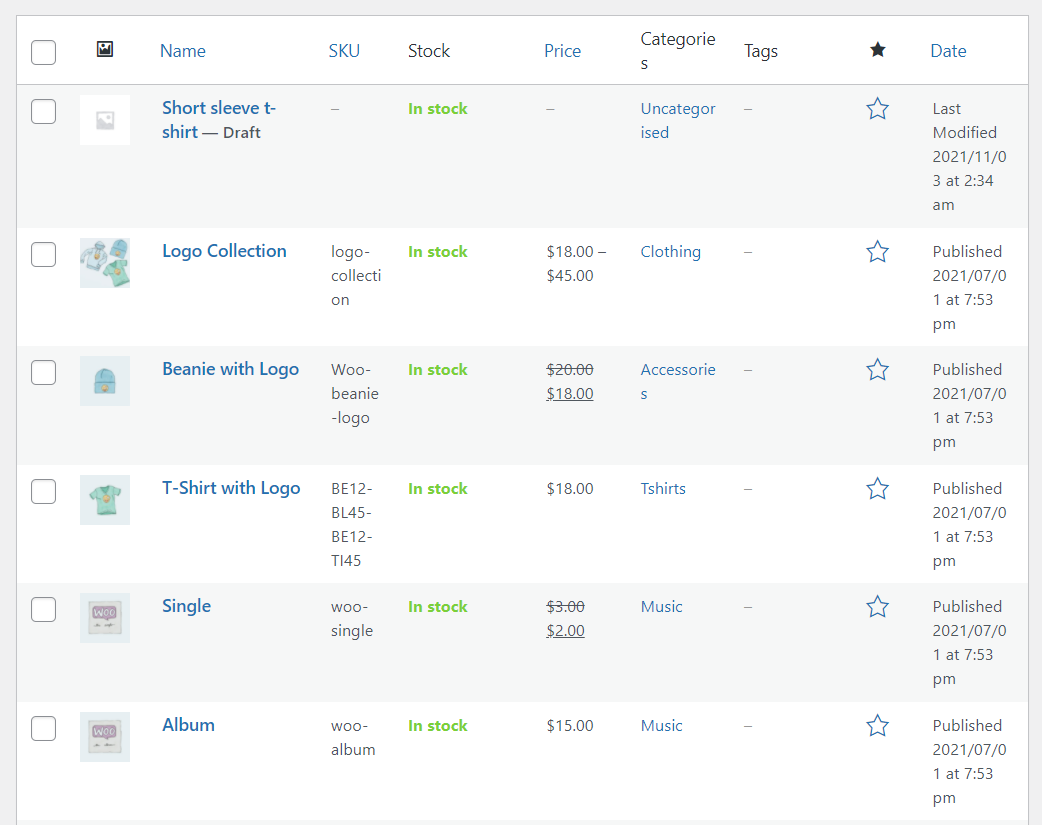
By clicking “View products”, you’ll be taken to the Products > All Products section in your WordPress dashboard. This page displays a full list of the items that were successfully imported:
Keep in mind that product images aren’t transferred during the import process, so you’ll need to add them manually. It’s also a good idea to review each product to confirm that all key information is in place.
If you notice missing details, you can run the import process again and double-check that the correct fields are mapped properly. While the manual import method is straightforward, it does require a bit of hands-on attention to ensure everything transfers smoothly.
Use a service to import Shopify data into WooCommerce
Switching from Shopify to WooCommerce is a frequent move for many store owners, and there are plugins and services specifically designed to make the transition easier. These migration tools have the benefit of automating the process and transferring data types that a basic CSV file can’t handle.
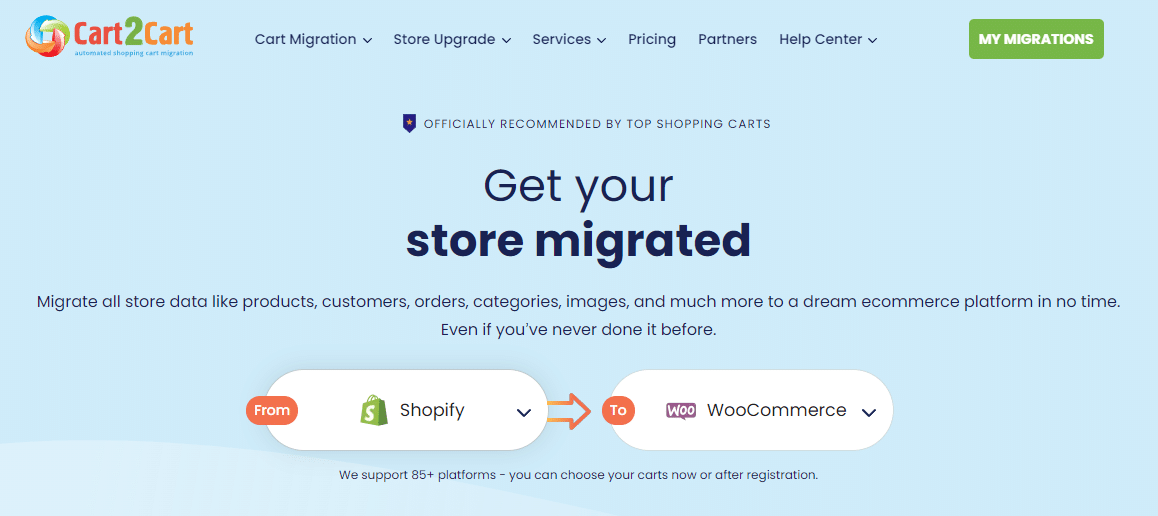
One such tool is Cart2Cart, which allows you to link your Shopify and WooCommerce stores and migrate individual data elements seamlessly between the two platforms.
Cart2Cart provides limited free migration options that let you transfer a portion of your Shopify inventory to WooCommerce. To unlock the full functionality, such as importing all products, customer details, order history, and blog content, you’ll need to purchase a paid plan.
The cost depends on the volume of data you’re migrating. For example, moving an entire Shopify store with around 100 products to WooCommerce typically costs about $120. You can also use Cart2Cart’s pricing calculator on their website to get a more accurate estimate.
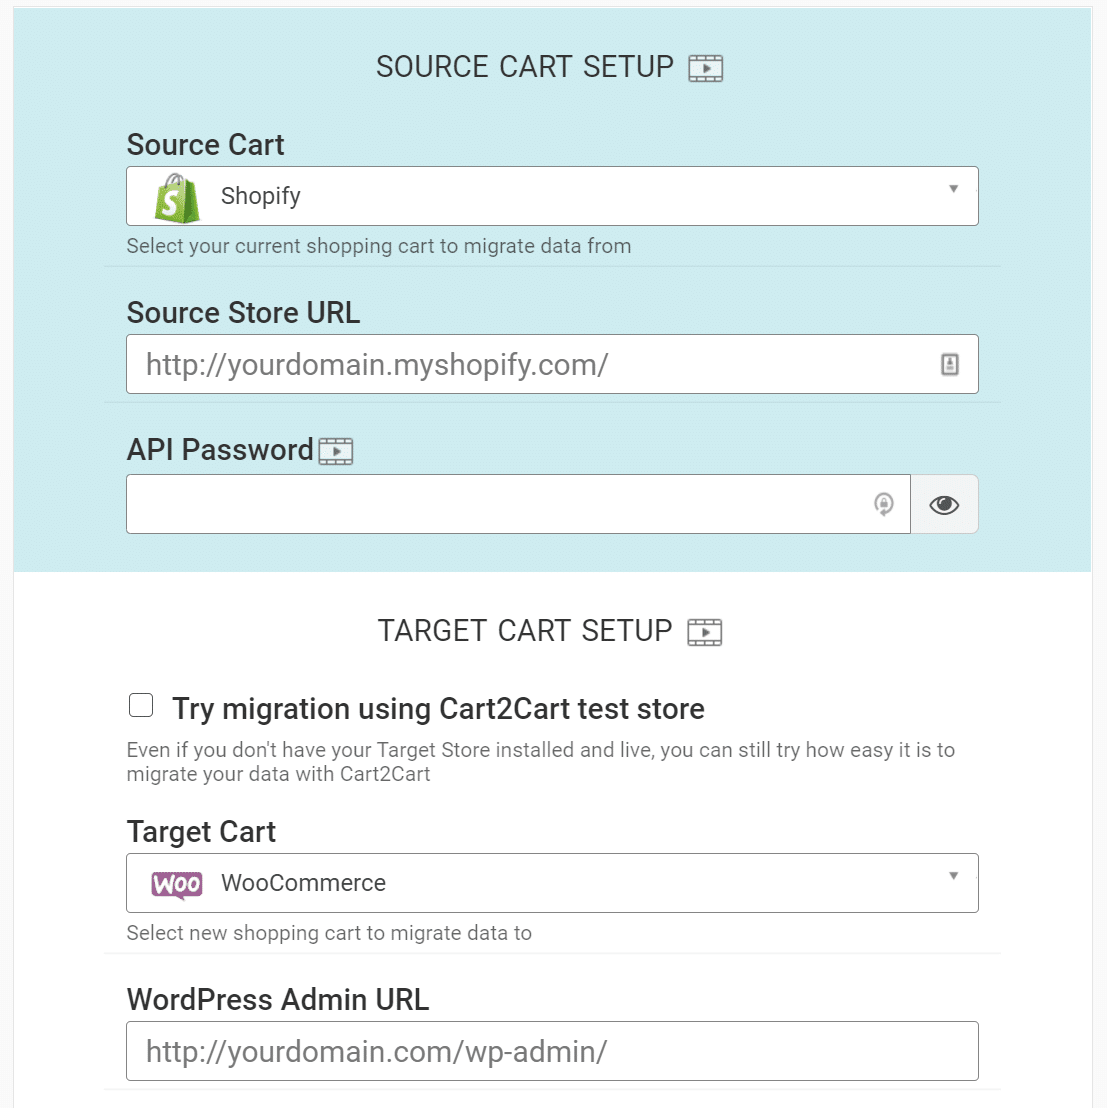
To get started with Cart2Cart, create an account on their platform. After logging into your dashboard, you’ll be prompted to select your source and target platforms.
In this case, Shopify will be your source cart, and WooCommerce will be the destination.
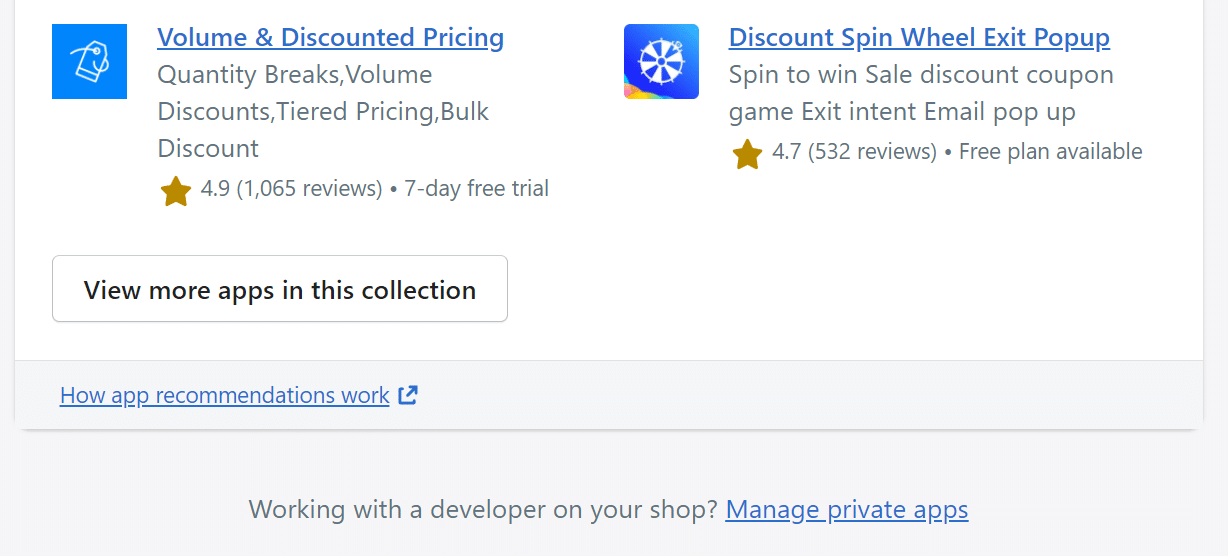
To use the Cart2Cart importer, you’ll first need to create a Shopify API key. Head back to your Shopify admin panel and open the Apps section. Then, scroll down to the bottom of the page and click on the Manage private apps link.
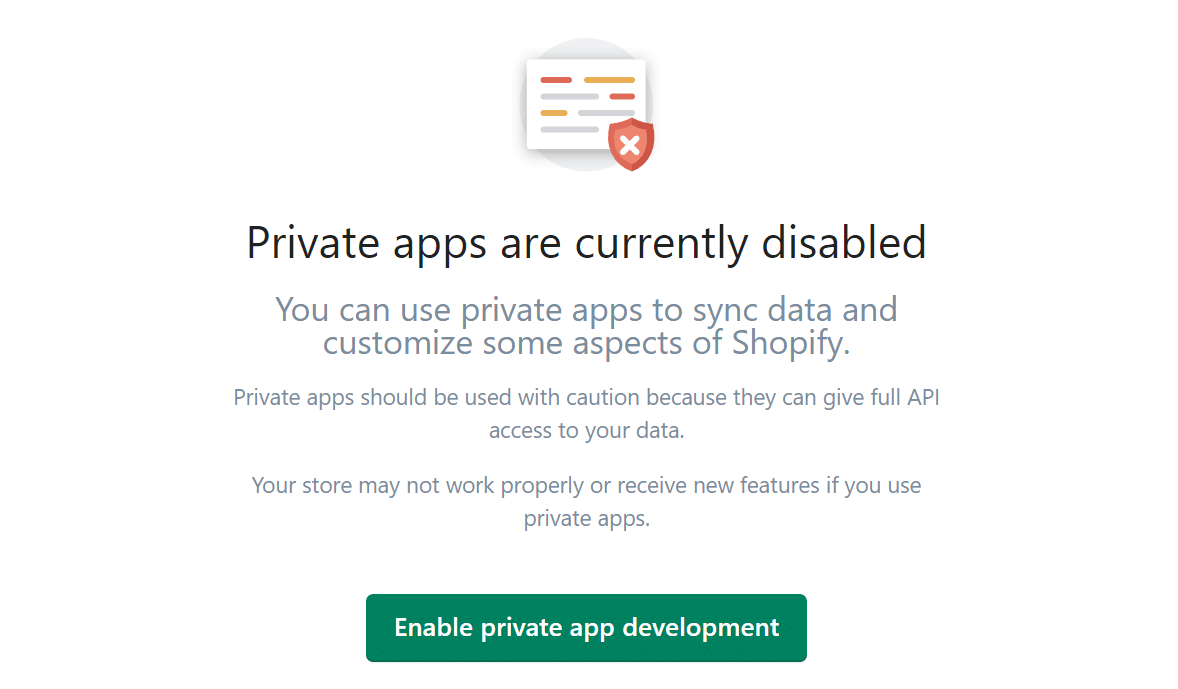
If private app development hasn’t been enabled in your Shopify account, you’ll be prompted with a screen indicating that. Simply click the “Enable private app development” button to proceed:
Shopify will prompt you to confirm that you want to enable private app development and will display a warning about the risks of sharing your API key with untrusted sources.
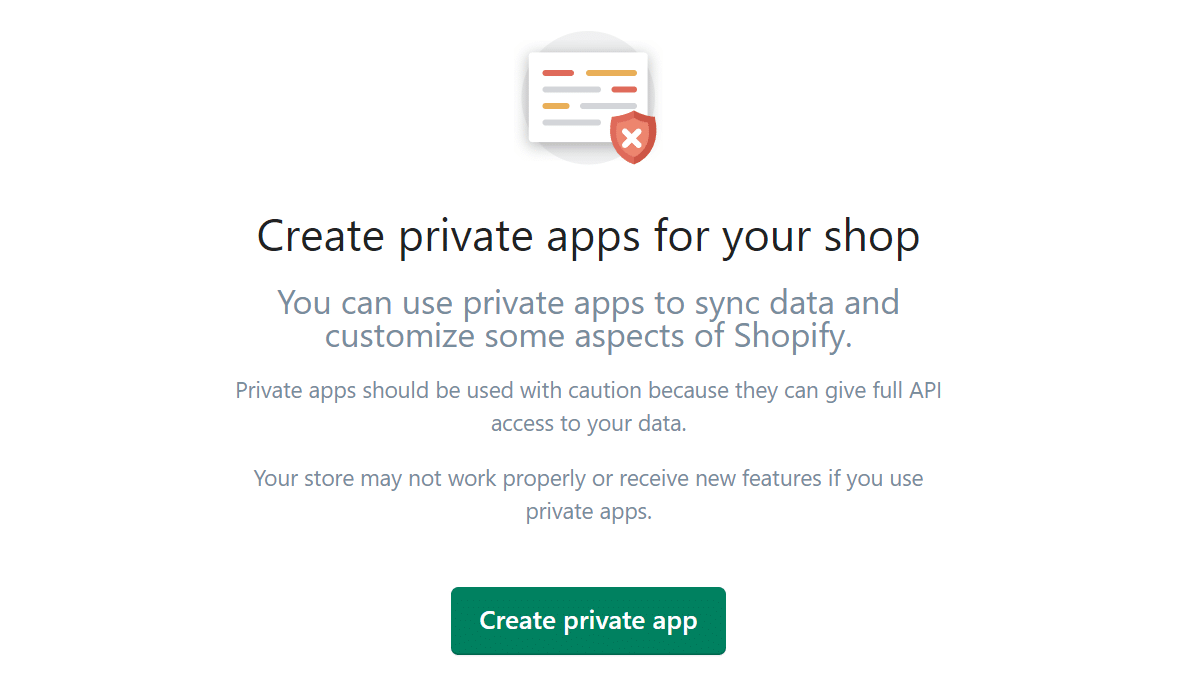
Once you confirm, you’ll be able to proceed with creating a private app.
When you create a private app, Shopify will generate the API password that Cart2Cart requires to connect and retrieve your store’s data.
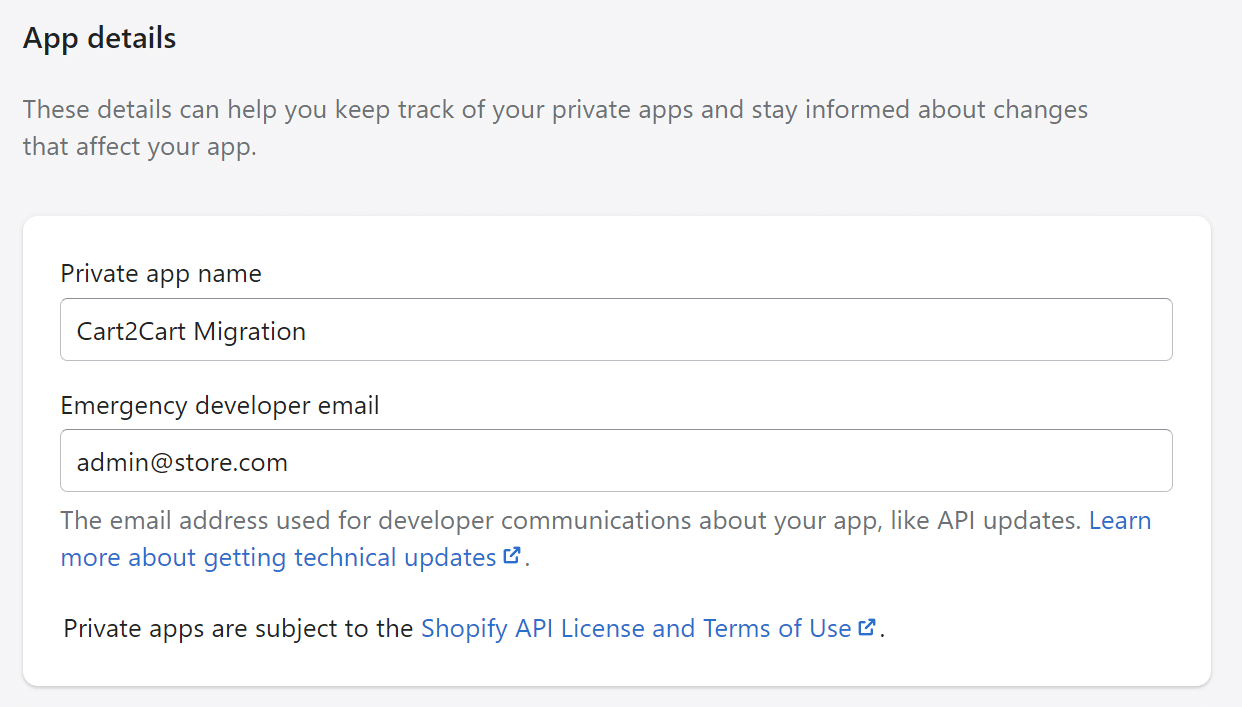
Start by giving your app a name (you can choose any name) and providing your email address.
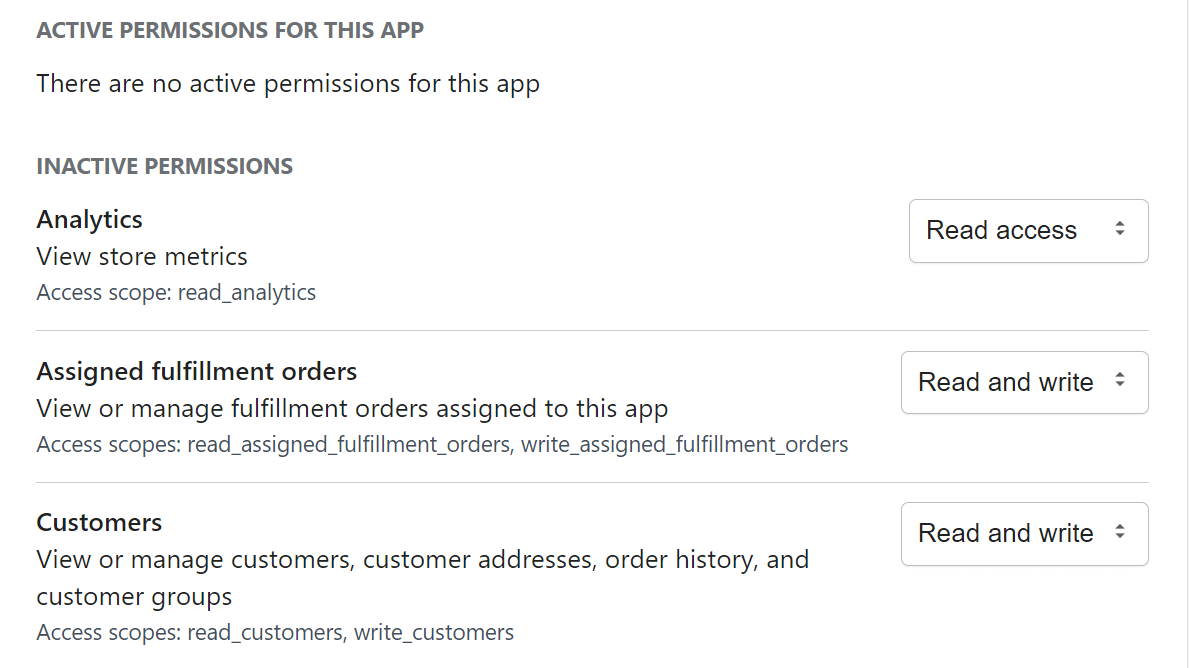
Next, scroll down to the permissions section and grant the app full access to each category. Choose Read and write permissions where possible, or select Read access if the write option isn’t available.
In general, it’s not recommended to grant full permissions to an app. However, in this case, as long as you keep the API key secure and remove the app once you’re done, it should be safe.
After setting permissions, choose the latest version available for the webhook API.
Click “Save” to create the app and confirm your selections in the prompt that appears. Once the app is successfully created, you’ll see its API password listed on the app’s details page.
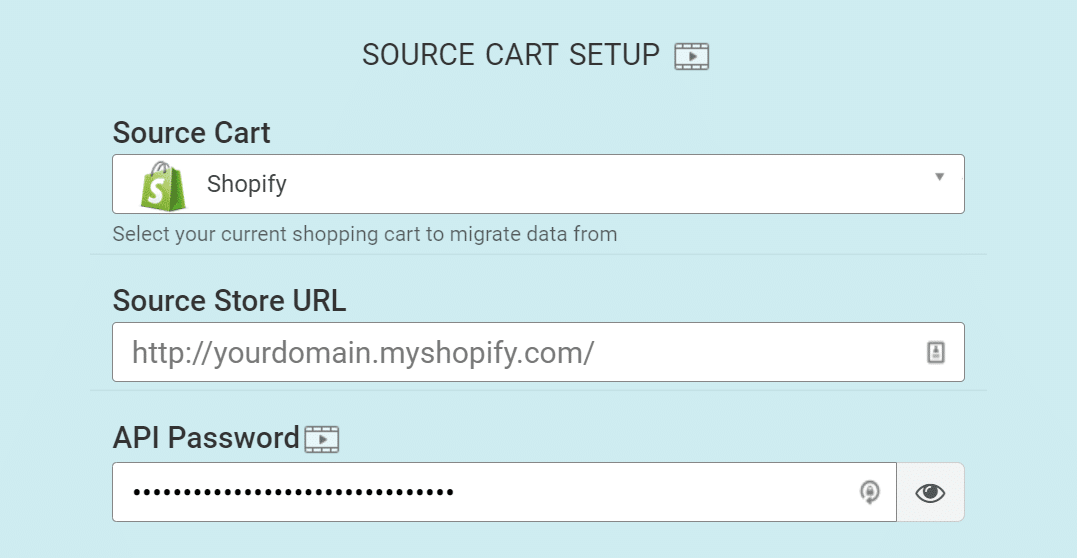
Copy that API password and paste it into the Cart2Cart migration setup. Don’t forget to enter your Shopify store’s URL as well.
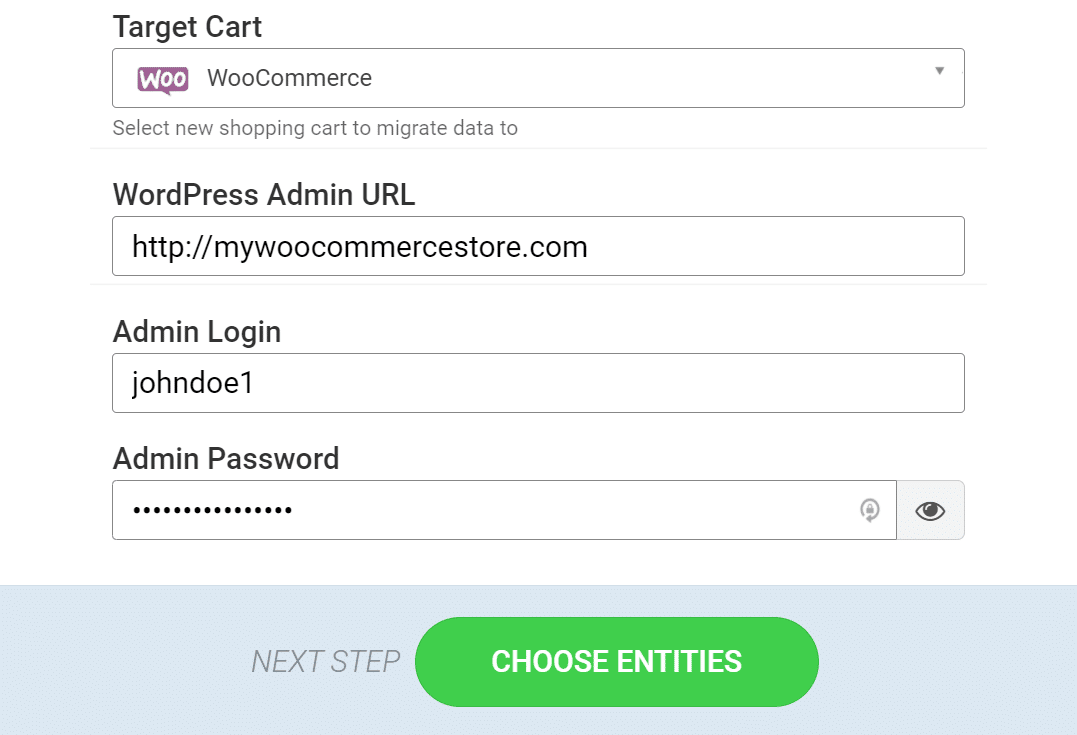
Setting up the target cart, which is your WooCommerce store, is a straightforward process. Simply provide your WordPress administrator login credentials, and the connection will be established.
Once you’ve entered the required information, click “CHOOSE ENTITIES” to proceed.
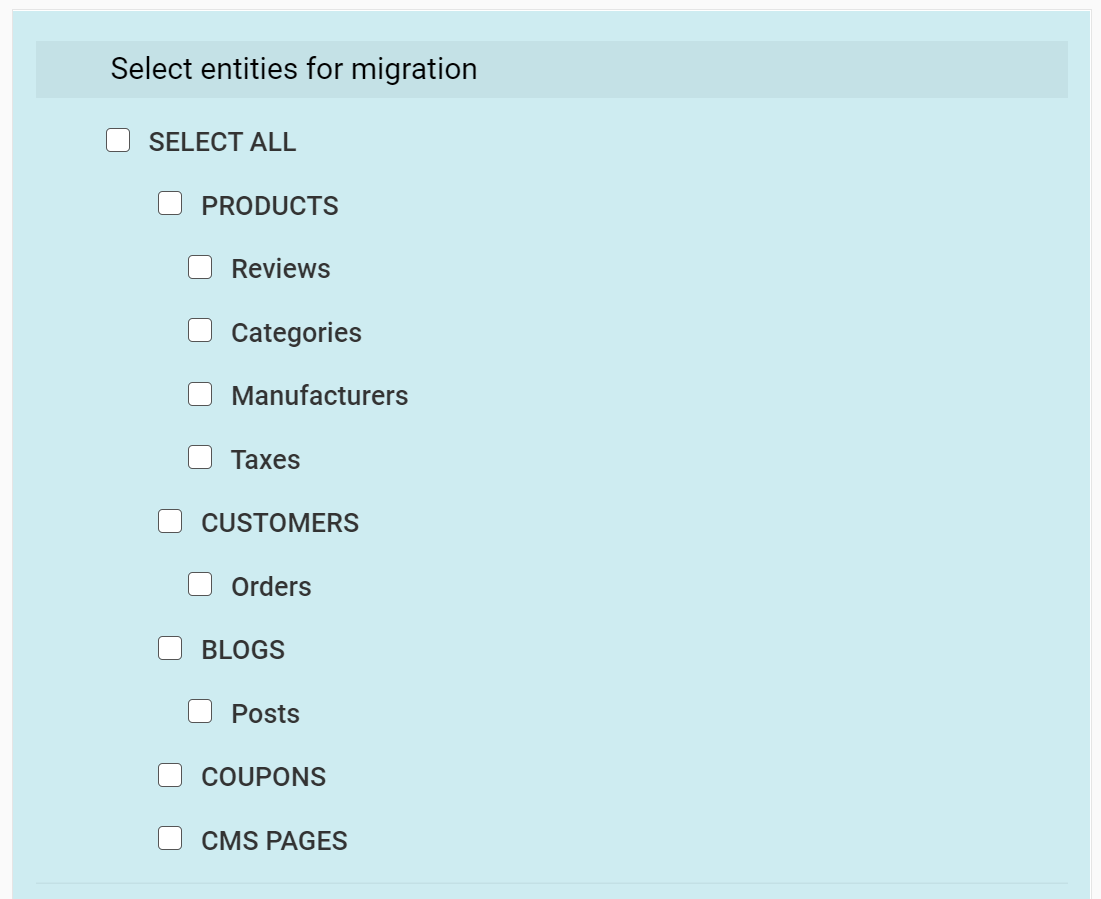
Cart2Cart will take a short time to set up the migration. If your login credentials are valid, you’ll be prompted to select the types of data you want to transfer from Shopify to WooCommerce:
Cart2Cart also provides several optional paid features for migration, such as transferring product images, order numbers, and other details. Choose the extras you want, then begin the migration process. Depending on the amount of data involved, it may take some time to complete.
Once finished, you’ll see a confirmation screen, along with a button that takes you directly to your WooCommerce store so you can review the imported data.
Step 5: Point your domain to WooCommerce
At this point, your WooCommerce store should be fully functional and include all the products from your Shopify catalog. However, there are still a few important steps to complete — one of them is updating your domain settings to direct visitors to your new hosting provider.
Right now, your domain is still linked to your Shopify store. Instead of registering a brand-new domain — which could impact your existing traffic and result in customer loss — it’s better to update the current domain to point to your WooCommerce store.
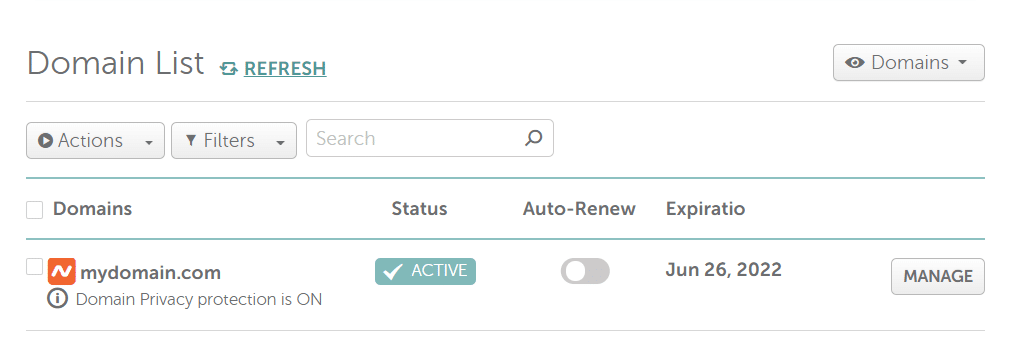
The exact steps for changing the domain direction depend on the service managing your domain. If you’re using a domain registrar, you’ll need to log in and adjust your DNS records accordingly. Each registrar has a slightly different interface and process for doing this.
Step 6: Configure Your WordPress Permalinks
WordPress gives you control over your website’s URL structure, including the URLs for your WooCommerce products. Typically, the default format for WordPress URLs looks something like this: “yourwoocommercestore.com/?p=534”.
This kind of URL isn’t ideal for users and doesn’t offer much benefit for SEO either.
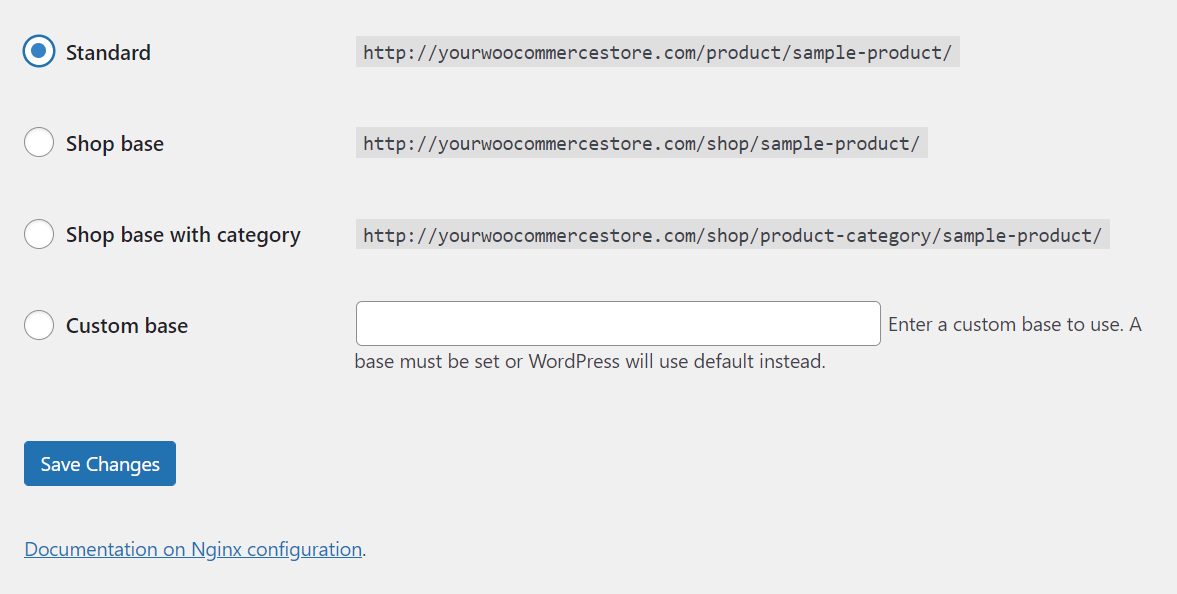
To improve your store’s URL structure, navigate to Settings > Permalinks > Product permalinks in your WordPress dashboard, then choose the format that best suits your needs.
In general, it’s best to stick with the Standard structure. This option formats your WooCommerce product URLs in a clean and simple way, such as: “yourwoocommercestore.com/product/sample-name”.
This URL format helps users understand which product they’re viewing by encouraging the use of clear, descriptive slugs. After selecting your preferred permalink structure, make sure to save your changes.
It’s crucial to set your permalink structure early in the setup process. Modifying it later can negatively affect your SEO and lead to broken links or other issues across your site. The sooner you define your URL format, the smoother your store will run in the long term.
Step 7: Recreate your old Shopify store’s design (or start over)
When you visit your WooCommerce store, you’ll likely notice that its appearance is quite different from your old Shopify site. That’s because your store is still using a default WordPress theme, which hasn’t been customized yet.
At this point, you have two main design directions to consider:
- Replicating the look and feel of your former Shopify store
- Designing your storefront from scratch using a new WooCommerce theme
Both options are completely valid. Rebuilding your Shopify design can provide a smoother experience for returning customers, helping maintain brand consistency.
Alternatively, starting fresh gives you the chance to fully leverage WordPress’s design flexibility. WordPress offers a wide range of customization tools, including popular page builder plugins that work seamlessly with WooCommerce and allow you to craft a storefront tailored to your vision.
You can also use WordPress’s built-in Block Editor along with a theme optimized for WooCommerce to personalize your store’s layout and features. Whichever path you choose, take advantage of the creative freedom WordPress and WooCommerce provide.
Step 8: Configure your WooCommerce settings
Bringing your products into WooCommerce and adjusting your store’s design are only the first steps. To start selling, you’ll also need to fine-tune several important settings, such as:
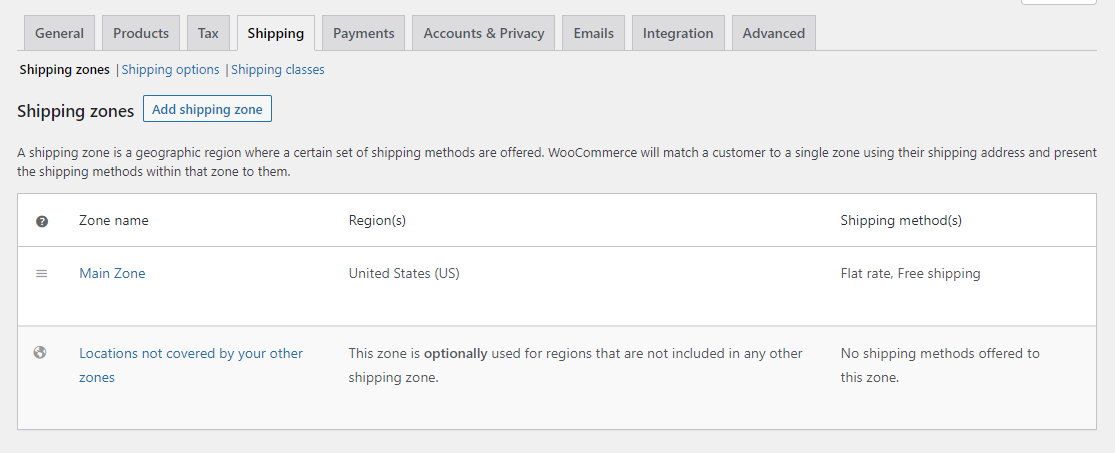
- Payment gateways and shipping methods
- Security configurations
- Email notification preferences
- Product display and inventory settings
- Tax setup
If you’ve worked with Shopify before, these settings may feel familiar. The key difference is that WooCommerce offers much greater flexibility and control over how you manage and customize your store’s operations.
You can find a comprehensive setup guide in the official WooCommerce documentation that walks you through configuring all the key settings. After you’ve finished adjusting your store’s setup, it’s a good idea to explore WooCommerce extensions to expand your store’s functionality.
Frequently Asked Questions
1. Why should I migrate from Shopify to WooCommerce?
Migrating from Shopify to WooCommerce gives you greater control over your online store. Unlike Shopify, WooCommerce is open-source and doesn’t charge monthly subscription fees. It also offers a higher level of flexibility in terms of design, functionality, and integration with third-party tools, allowing you to tailor your store exactly to your business needs.
2. Can I transfer everything from Shopify to WooCommerce?
You can transfer most of the essential data, such as products, orders, customers, and categories. However, your store’s design, layout, and theme from Shopify cannot be imported directly. You will need to rebuild the look and feel of your store using a WooCommerce-compatible theme and customization tools.
3. Is Cart2Cart free to use?
Cart2Cart offers a free demo migration that lets you test the process by transferring a small sample of data. For full migrations, you’ll need to pay a fee, which varies depending on the number of products, customers, orders, and other data you want to transfer. It’s a convenient option if you’re looking for a hands-off solution.
4. Do I need a developer to handle the migration?
Not necessarily. Many store owners complete the migration on their own using user-friendly tools. Services like Cart2Cart automate the process and require minimal technical knowledge. However, if your store is large or highly customized, working with a developer may ensure a smoother and faster transition.
Conclusion
Migrating from Shopify to WordPress WooCommerce is a strategic move that gives you more freedom to shape your store exactly the way you want. With greater control over design, features, and data, WooCommerce offers the flexibility many growing businesses need.
At Arestós, we specialize in WooCommerce development and consultancy. Our team delivers tailored solutions built for performance, scalability, and a seamless shopping experience. Whether you’re transitioning from another platform or building a WooCommerce store from the ground up, we’re here to guide and support you every step of the way.
Contact us today to find out how we can help you build a WooCommerce store that works smarter, grows faster, and fits your business perfectly.
Subscribe to our newsletter!
Get updated to
the lastest IT trends

