Back to featured insights
How to Migrate WordPress.com to Self-Hosted WordPress (Step-by-Step Guide)
Moving from WordPress.com to a self-hosted WordPress site gives you greater control over your website’s design, features, and performance. In this guide, you’ll learn how to migrate WordPress.com to WordPress.org step by step, from preparing hosting and exporting your content to importing data and setting up redirects.
Table of Content
Share
Migrating from WordPress.com to self-hosted WordPress is a common step for website owners who want more control over their sites. By moving to a self-hosted setup, you gain greater flexibility in customization, access to thousands of plugins and themes, and the ability to fully manage your website’s functionality.
This process is especially useful for bloggers, businesses, and website owners who want to scale their online presence. In this guide, you’ll learn how to migrate WordPress.com to a self-hosted WordPress step by step.
Why Migrate WordPress.com to Self-Hosted WordPress?
Migrating from WordPress.com to a self-hosted WordPress site gives you greater flexibility and full control over your website.
Many users choose this option as their website grows and requires more advanced features and customization.
- Full control over your website – With self-hosted WordPress, you own your website files and hosting, giving you complete control over how your site is managed.
- Access to thousands of plugins and themes – You can install any plugin or theme to extend functionality and customize your site’s design.
- Better customization options – Self-hosted WordPress allows deeper customization of layouts, features, and code.
- Greater monetization opportunities – You can freely run ads, affiliate programs, or eCommerce stores without platform restrictions.
- Improved SEO capabilities – Self-hosted WordPress gives you access to powerful SEO plugins and more control over technical SEO settings.
- Scalability for growing websites – As your website grows, you can easily upgrade hosting resources and add new features.
WordPress.com vs Self-Hosted WordPress: What’s the Difference?
Although WordPress.com and self-hosted WordPress are built on the same platform, they differ significantly in how they are managed and the level of control users have over their websites.
- Pricing
- Plugins and Functionality
- Storage
- Maintenance And Security
- Theme options
- E-commerce
- Hosting provider
Let’s take a closer look at how these two platforms compare across several important aspects.
Pricing
Let’s take a closer look at how the pricing of WordPress.com compares with WordPress.org.
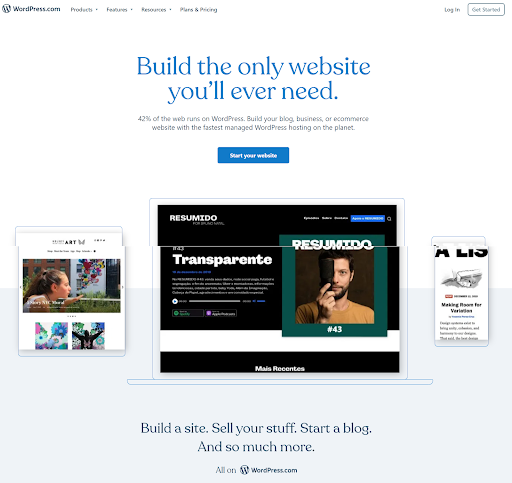
WordPress.com
If you choose the free version of WordPress.com, your website will have 3GB of storage space and will display ads placed by WordPress.com. These advertisements generate revenue for the platform, and website owners do not receive any share of that income.
In addition, the free plan includes WordPress.com branding in your domain, meaning your site will use a subdomain (for example: yoursite.wordpress.com). To remove this branding and use a custom domain, you will need to upgrade to a paid plan.
Besides the free plan, WordPress.com currently offers four premium pricing plans, each providing additional features, customization options, and greater control over your website.

WordPress.org
WordPress.org is completely free to use. However, to make your website accessible on the internet, you will need two essential components: a hosting plan and a domain name.
The cost of web hosting typically ranges from around $2.95 to $49.95 per month, depending on the provider and the resources included in the plan. After purchasing hosting, you can download WordPress and install it on your server. Many hosting providers simplify this process by offering one-click WordPress installation, and some even provide pre-installed WordPress, allowing you to start building your site immediately.
Security is another important factor when running a website. Most modern hosting providers include SSL certificates as part of their hosting packages, which help protect user data and improve website credibility. For example, some WordPress hosting plans from Bluehost include a free SSL certificate.
There are many reliable hosting providers you can choose from, including Hostinger, WP Engine, DreamHost, HostGator, and SiteGround, all of which offer hosting plans specifically optimized for WordPress.
In addition to hosting, you will also need to purchase a domain name, which serves as your website’s address on the internet. Domain names can be registered through providers such as Google Domains, Namecheap, Domain.com, or Hover. The average cost of a domain name usually ranges between $9 and $14.99 per year, depending on the registrar and domain extension.
Functionality
Functionality is another key aspect to consider, as it determines how many features and tools you can add to your website.
WordPress.com
WordPress.com places several limitations on what users can do with their websites, especially on the free and lower-tier plans. For example, you can only use the themes provided by the platform, and uploading custom themes requires upgrading to a higher plan.
In addition, WordPress.com retains control over the platform, meaning your website could be suspended or removed if it violates their terms and policies. Running a full eCommerce store is also restricted unless you subscribe to one of their dedicated eCommerce plans.
On lower-tier plans, users typically cannot:
- Upload free or premium themes
- Install third-party plugins
- Use tools like Google Analytics
- Run independent advertisements
- Upload unlimited products for an online store
- Remove WordPress.com branding
- Access advanced payment gateway integrations
- Fully control website files and settings
- Customize an online store freely
While many of these restrictions can be removed by upgrading to paid plans, self-hosted WordPress (WordPress.org) allows users to access these features without platform limitations, giving them complete control over their website.
WordPress.org
WordPress.org gives users complete control over their website’s data, features, and overall functionality. It is an ideal choice for building and managing an online store, allowing you to sell products, offer services, and accept payments through credit cards or other payment gateways. You can also integrate your website with popular shipping providers to manage product delivery more efficiently.
In addition, WordPress.org allows you to install both free and premium themes from various platforms such as the official WordPress theme directory, ThemeForest, or themes designed for WooCommerce. This flexibility makes it easier to customize the design and functionality of your website according to your needs.
Storage
Storage capacity is another important factor to consider when choosing between WordPress.com and self-hosted WordPress.
WordPress.com
Storage space on WordPress.com depends on the plan you choose. The free plan usually provides 3GB of storage, which is suitable for small websites or personal blogs. If your website requires more space for images, videos, or other media files, you will need to upgrade to a higher-tier plan that offers additional storage.
WordPress.org
With self-hosted WordPress, storage is determined by the hosting provider and the hosting plan you select. This gives you much greater flexibility because you can choose a hosting package with the storage capacity that suits your needs. As your website grows, you can easily upgrade your hosting plan to increase storage space.
Maintenance And Security
Maintenance and security are important factors when comparing WordPress.com and self-hosted WordPress, as they determine how much technical responsibility you need to manage.
WordPress.com
With WordPress.com, most maintenance and security tasks are handled by the platform itself. This includes software updates, security monitoring, backups, and performance optimization. Because these tasks are managed automatically, users do not need to worry about technical management, making WordPress.com a convenient option for beginners or those who prefer a hands-off approach.
WordPress.org
With self-hosted WordPress, you are responsible for maintaining and securing your website. This includes updating WordPress core files, themes, and plugins, as well as managing backups and security settings. However, this also provides greater control, as you can choose your own security plugins, backup solutions, and hosting configurations to protect your website.
Theme options
Theme options are another important factor to consider, as they determine how much freedom you have to design and customize the visual appearance of your website.
WordPress.com
WordPress.com provides a selection of pre-designed themes that users can choose from. However, the ability to install custom or third-party themes is limited on the free and lower-tier plans. To upload premium themes or access advanced design customization, users typically need to upgrade to higher subscription plans.
WordPress.org
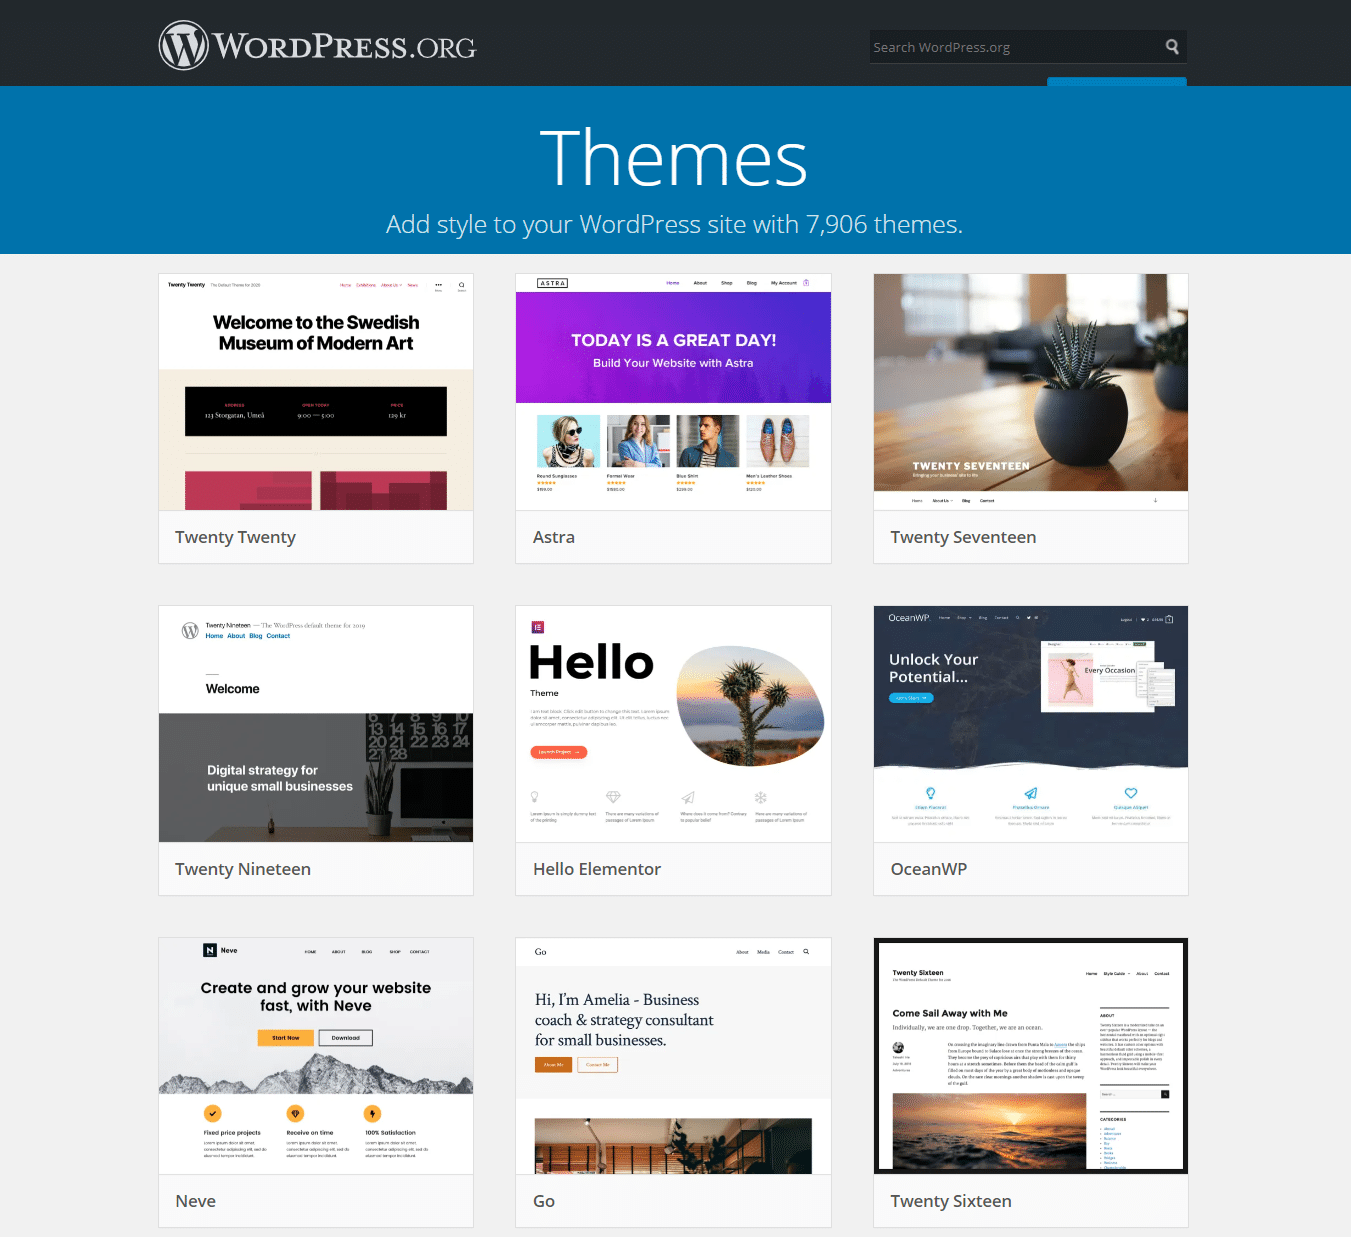
With self-hosted WordPress, you have complete freedom to install and customize themes. You can choose from thousands of free themes in the official WordPress theme directory or upload premium themes from marketplaces such as ThemeForest. In addition, you can fully modify theme files, styles, and layouts to create a unique website design.
E-commerce
E-commerce capabilities are an important consideration if you plan to sell products or services through your website.
WordPress.com
WordPress.com offers limited eCommerce functionality on its basic plans. To create a fully functional online store, users typically need to upgrade to higher-tier plans that support advanced eCommerce features. These plans allow you to sell products, accept payments, and integrate with certain payment gateways, but customization options may still be restricted compared to self-hosted WordPress.
WordPress.org
Self-hosted WordPress provides much greater flexibility for building an online store. By using plugins such as WooCommerce, you can create a fully customizable eCommerce website. This allows you to sell unlimited products, integrate multiple payment gateways, connect with shipping services, and customize your store’s functionality according to your business needs.
If you’re planning to build an online store, you may also want to explore other useful tools. Check out our guide on 10 Best E-Commerce Plugins for WordPress in Hong Kong to discover plugins that can help enhance your store’s functionality.
What to Prepare Before Migrating Your WordPress Site
Before starting the migration process, there are a few important things you should prepare to ensure the transition runs smoothly.
Choose a Reliable WordPress Hosting Provider
The first step is selecting a reliable hosting provider for your new self-hosted WordPress website. A good hosting service ensures stable performance, strong security, and fast loading speeds. Many providers also offer WordPress-optimized hosting plans and one-click installation to simplify the setup process.
If you’re not sure which hosting provider to choose, you can check out our guide on Top 10 WordPress Hosting Providers For Hong Kong Webs to compare some of the best options available.
Prepare Your Domain Name
Once you have chosen a hosting provider, the next step is registering a domain name for your website. Some hosting companies include a free domain registration for the first year with many of their hosting plans, making the setup process more convenient.
A domain name is an important part of your website’s identity and can influence how easily people find and remember your site. Although many domain names have already been taken, it is still possible to find a suitable .com domain if you spend some time exploring different options and variations.
If you prefer not to register your domain through your hosting provider, you can also purchase it from independent domain registrars such as Cloudflare, Namecheap, or Domain.com.
Install WordPress.org
Installing WordPress on your hosting account is usually a simple process. Many hosting providers offer one-click WordPress installation, which allows you to set up your website quickly through the hosting control panel. After logging into your hosting account, you just need to locate the WordPress installation option and follow the instructions provided.
During the setup process, you will also configure basic details for your website, such as the site title, administrator username, and password for accessing the WordPress dashboard.
Once these essentials are set up, your new WordPress site will be ready, and you can begin migrating your content from WordPress.com to your self-hosted WordPress website.
Step-by-Step Guide to Migrate WordPress.com to Self-Hosted WordPress
Once everything is ready, you can follow the five simple steps below to migrate your WordPress.com site to a self-hosted WordPress website.
- Step 1: Export Your WordPress.com Data
- Step 2: Import Your Content/Data to WordPress.org
- Step 3: Polish Up Your New WordPress.org Site
- Step 4: Redirect Your WordPress.com Site to the .org Version
Below is a detailed explanation of each step to help you complete the migration safely and efficiently.
Step 1: Export Your WordPress.com Data
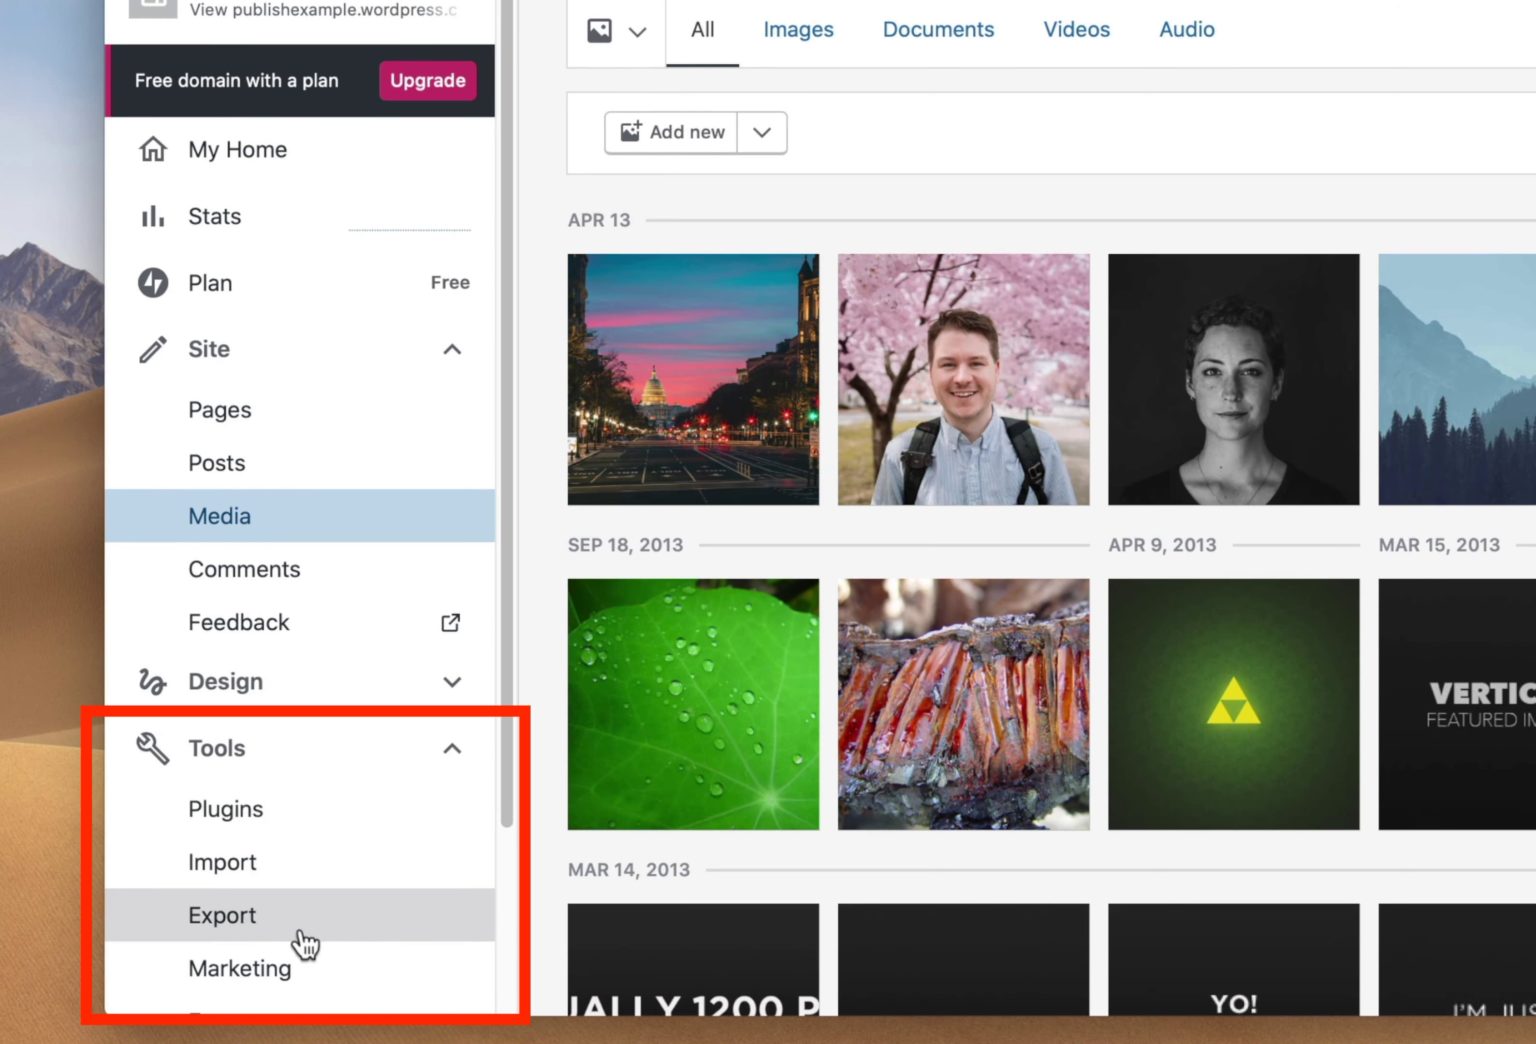
The first step in migrating your website from WordPress.com to WordPress.org is exporting your site’s data. Start by logging into your WordPress.com account and accessing your site dashboard. From there, go to the Tools section and select the Export option. This will allow you to download an export file that contains your website content, such as posts, pages, and other important data.
On the Export Content page, click the “Export All” button to download your website data. The process may take some time depending on the amount of content on your site. Once the export is complete, WordPress will provide a download link for the file directly on the page, and in some cases it may also send the link to your email.
The downloaded file contains your website’s posts, pages, and media information. It is typically provided as a compressed XML file that stores your site’s content for migration.
After successfully exporting your WordPress.com data, the next step is to import these files into your self-hosted WordPress.org website.
Step 2: Import Your Content/Data to WordPress.org
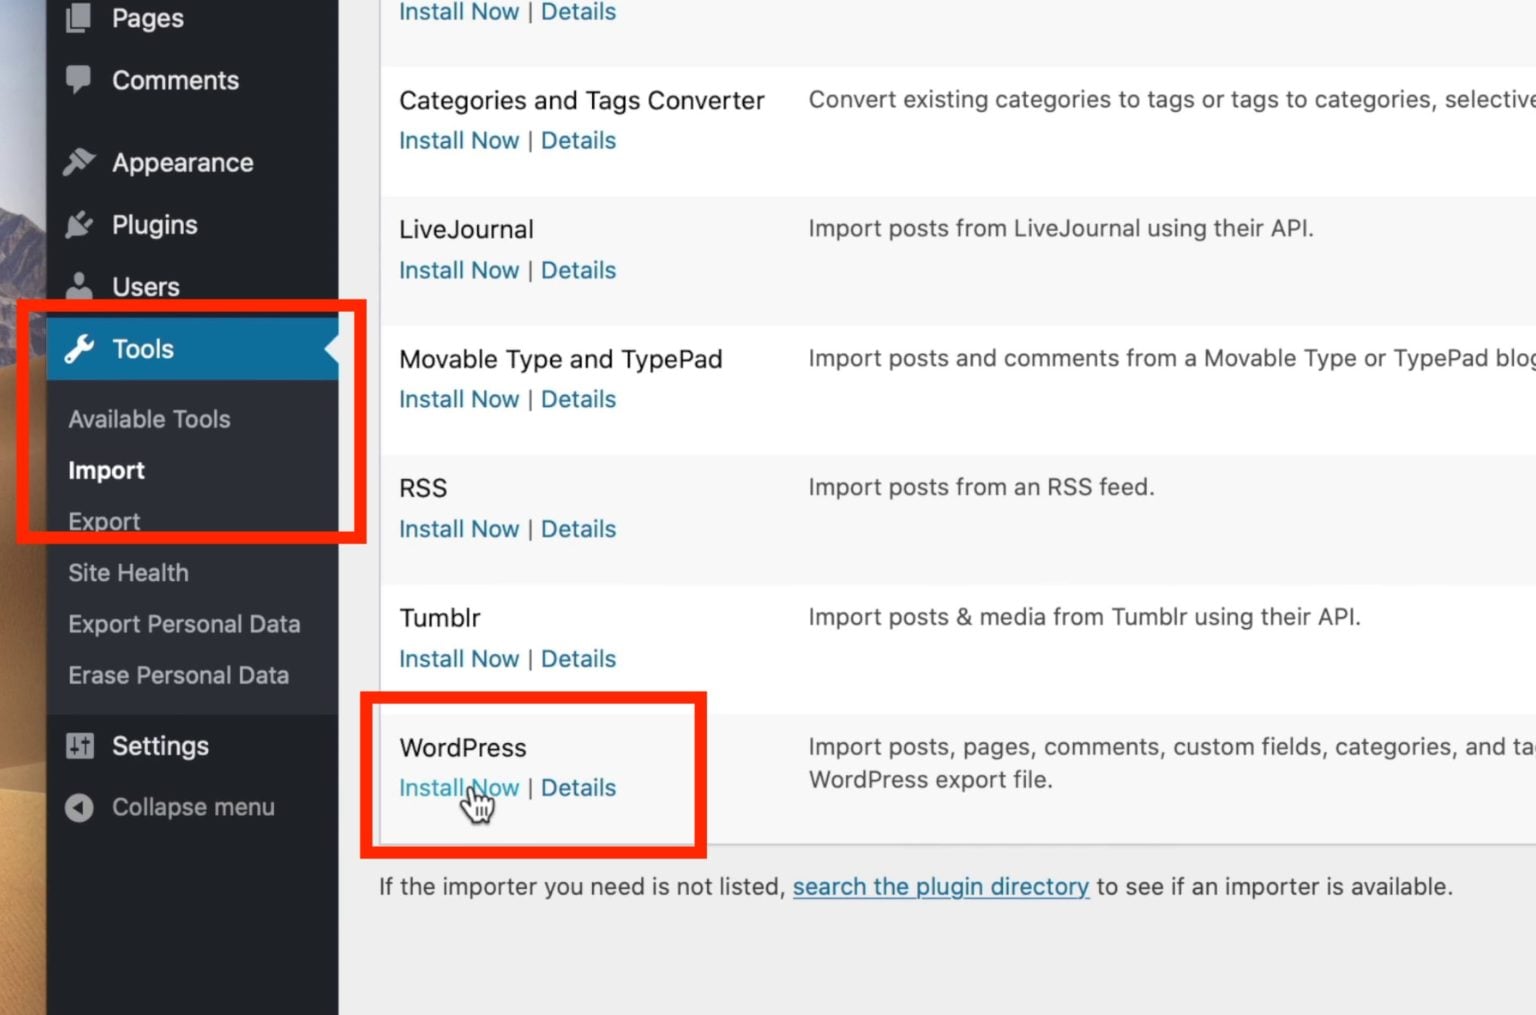
To import your WordPress.com content into your WordPress.org website, start by logging into your WordPress.org dashboard. From the dashboard menu, go to Tools and then select Import.
Before you can proceed with the import process, you will need to install the WordPress Importer tool. This tool allows your self-hosted WordPress site to upload and process the export file from WordPress.com.
Once the importer is installed, click the “Run Importer” option to begin the process. You will then be prompted to upload your XML export file.
Since the file downloaded from WordPress.com is usually compressed, make sure to unzip the file first before uploading it.
After that, go to the Import WordPress page and click the “Choose File” button. You can either select the unzipped XML file from your computer or drag and drop it into the upload area.
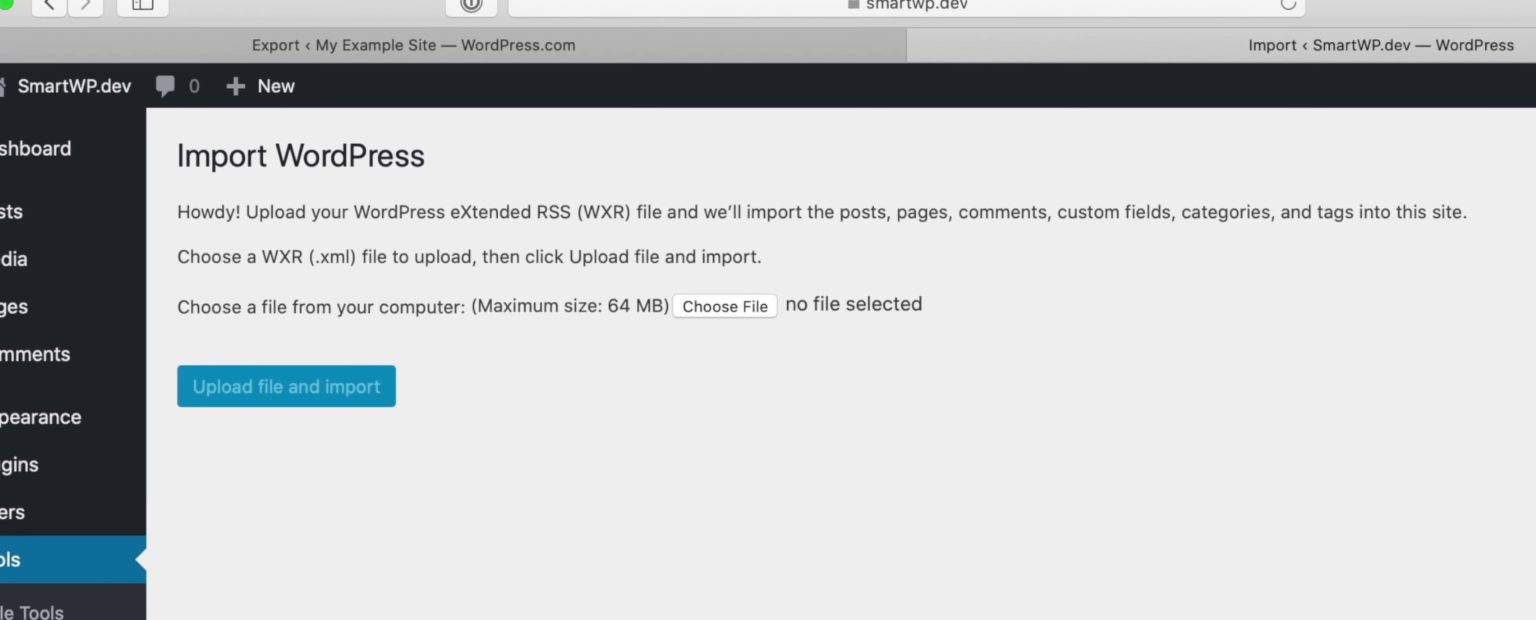
After selecting the unzipped XML file containing your WordPress.com data, click the “Upload file and import” button to continue. This will start the import process and take you to the next step, where you can assign authors to the imported content.
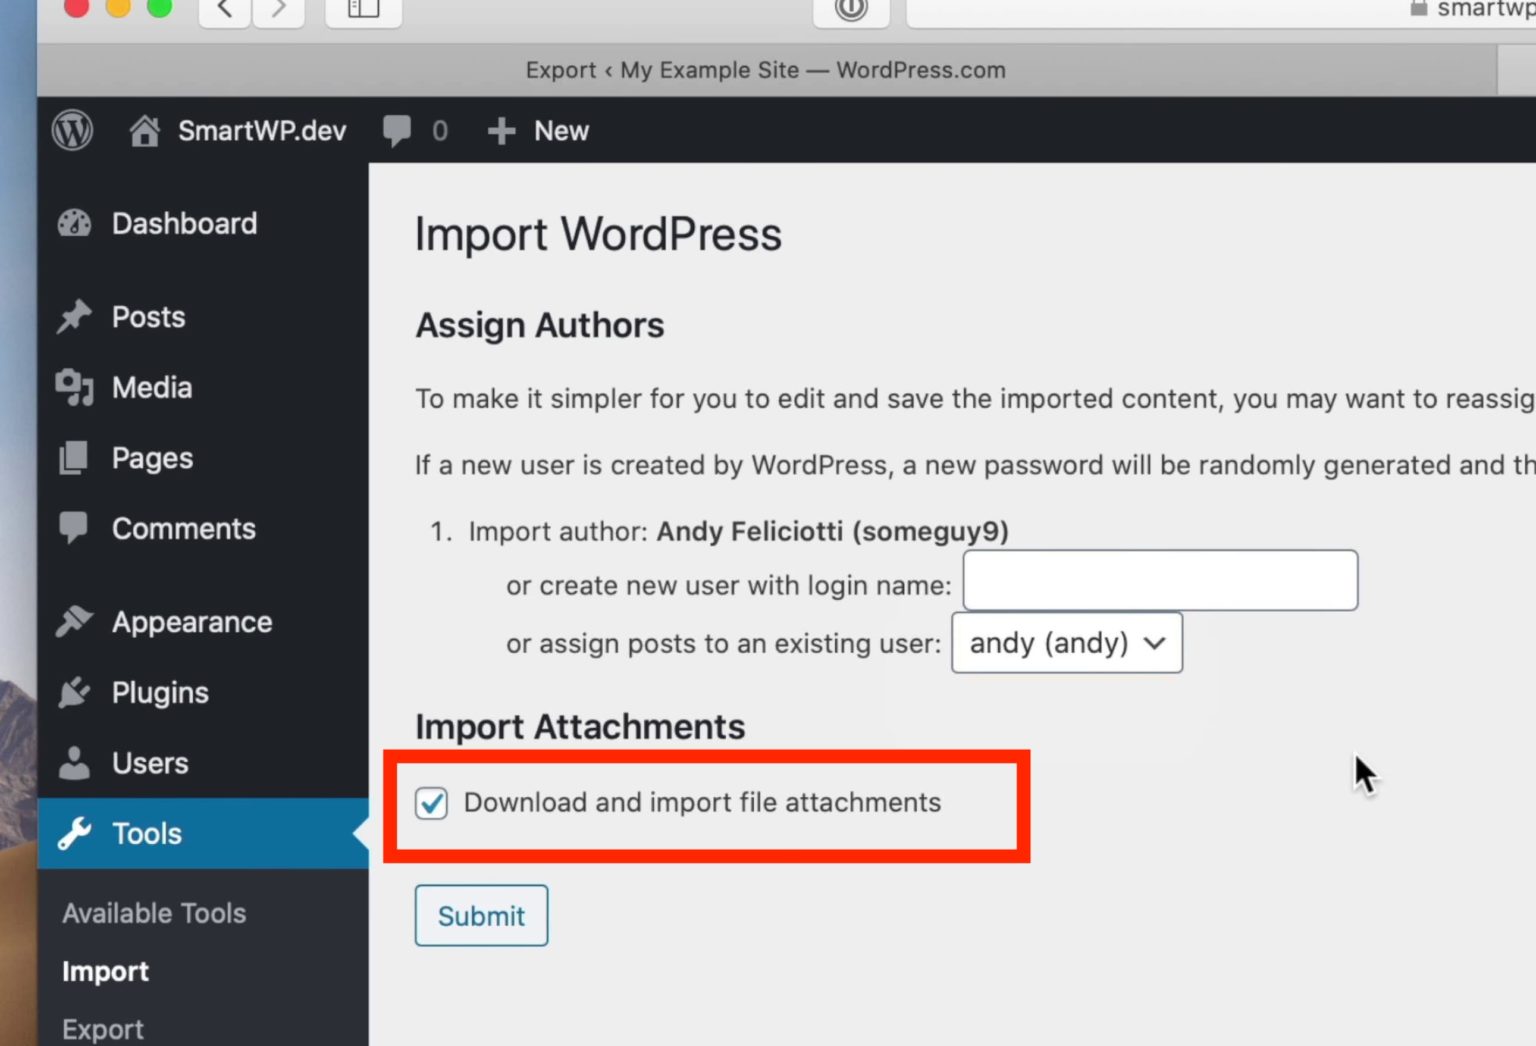
Before assigning authors, make sure to check the “Download and import file attachments” option. This ensures that your media files, such as images and other attachments referenced in your posts, are also transferred to your new website.
Next, you can assign authors to the imported content. You may keep the existing authors from your previous WordPress.com site or assign the content to new authors on your self-hosted website. If your site had multiple contributors, you will need to assign each author individually during this step.
After completing these settings, click the “Submit” button to begin the import process. Depending on the size of your website data, the process may take a few minutes to finish.
Note: If your website contains a large number of media files and you are familiar with FTP (File Transfer Protocol), you can also export and transfer your media library separately from the WordPress.com dashboard.
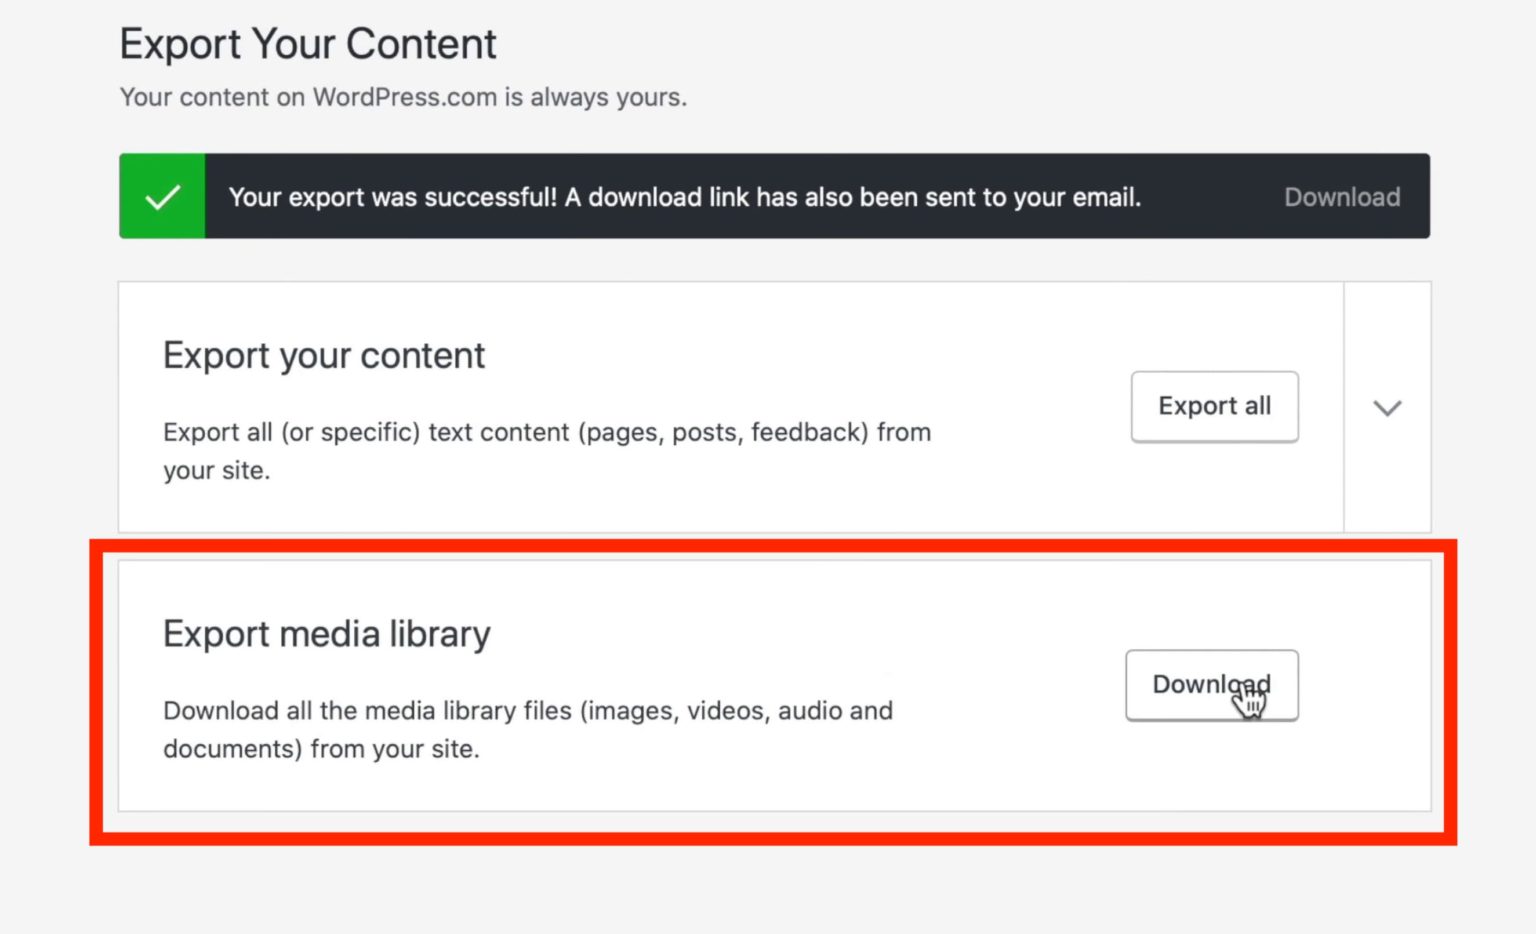
This process will generate a folder containing all your media files, which you can manually transfer to your WordPress.org website using FTP if necessary.
In some cases, it may appear that the export or import process has failed because the WordPress.org version of your website does not load immediately. However, this is usually normal and does not necessarily indicate a problem. Simply return to your WordPress admin dashboard and check the Posts section. You will likely find that your posts and media files have already been successfully imported from your WordPress.com site.
If the website does not load the first time, it may simply be due to a timeout during the loading process, which can happen when handling large files or large amounts of data.
Step 3: Polish Up Your New WordPress.org Site
Now that the import process is complete, visit your homepage to review your website. You should see that most of the content from your previous site has been transferred successfully, including your menus. However, you may still need to adjust or reorganize a few elements.
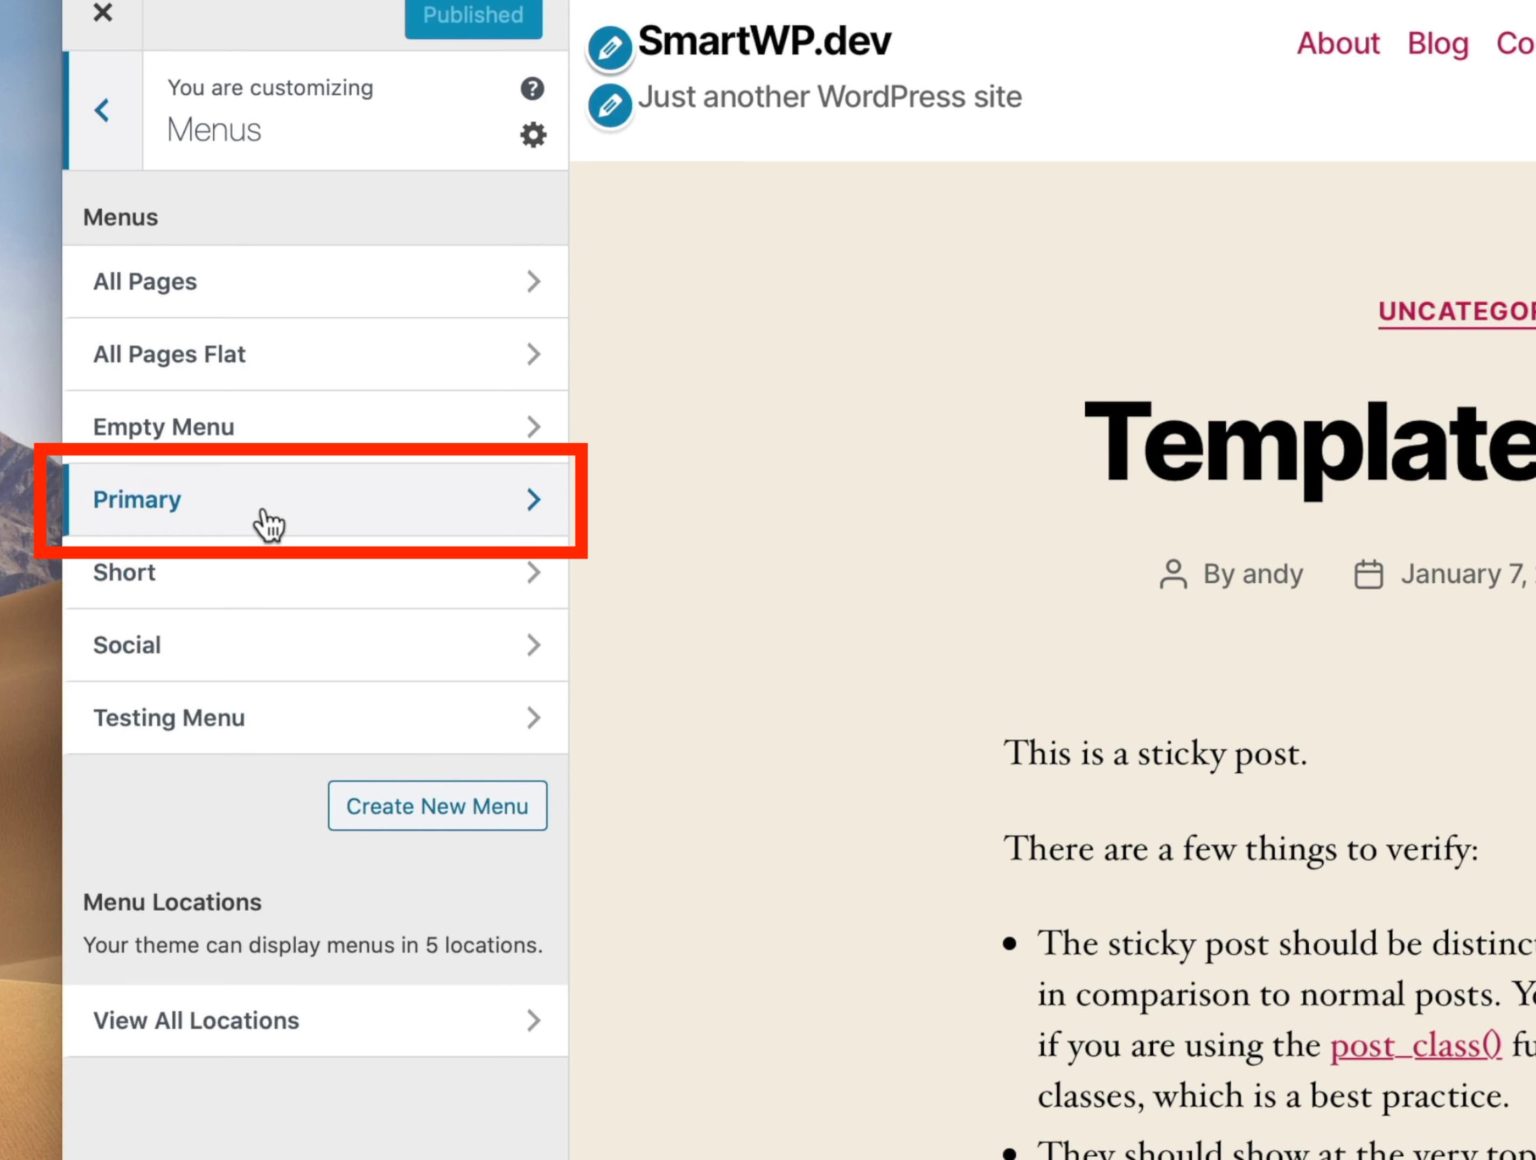
One of the first things you should update is the navigation menu. To edit it, go to the top bar of your website and click on “Customize.” This will open the WordPress Customizer, where you can modify your menu structure and adjust other design settings.
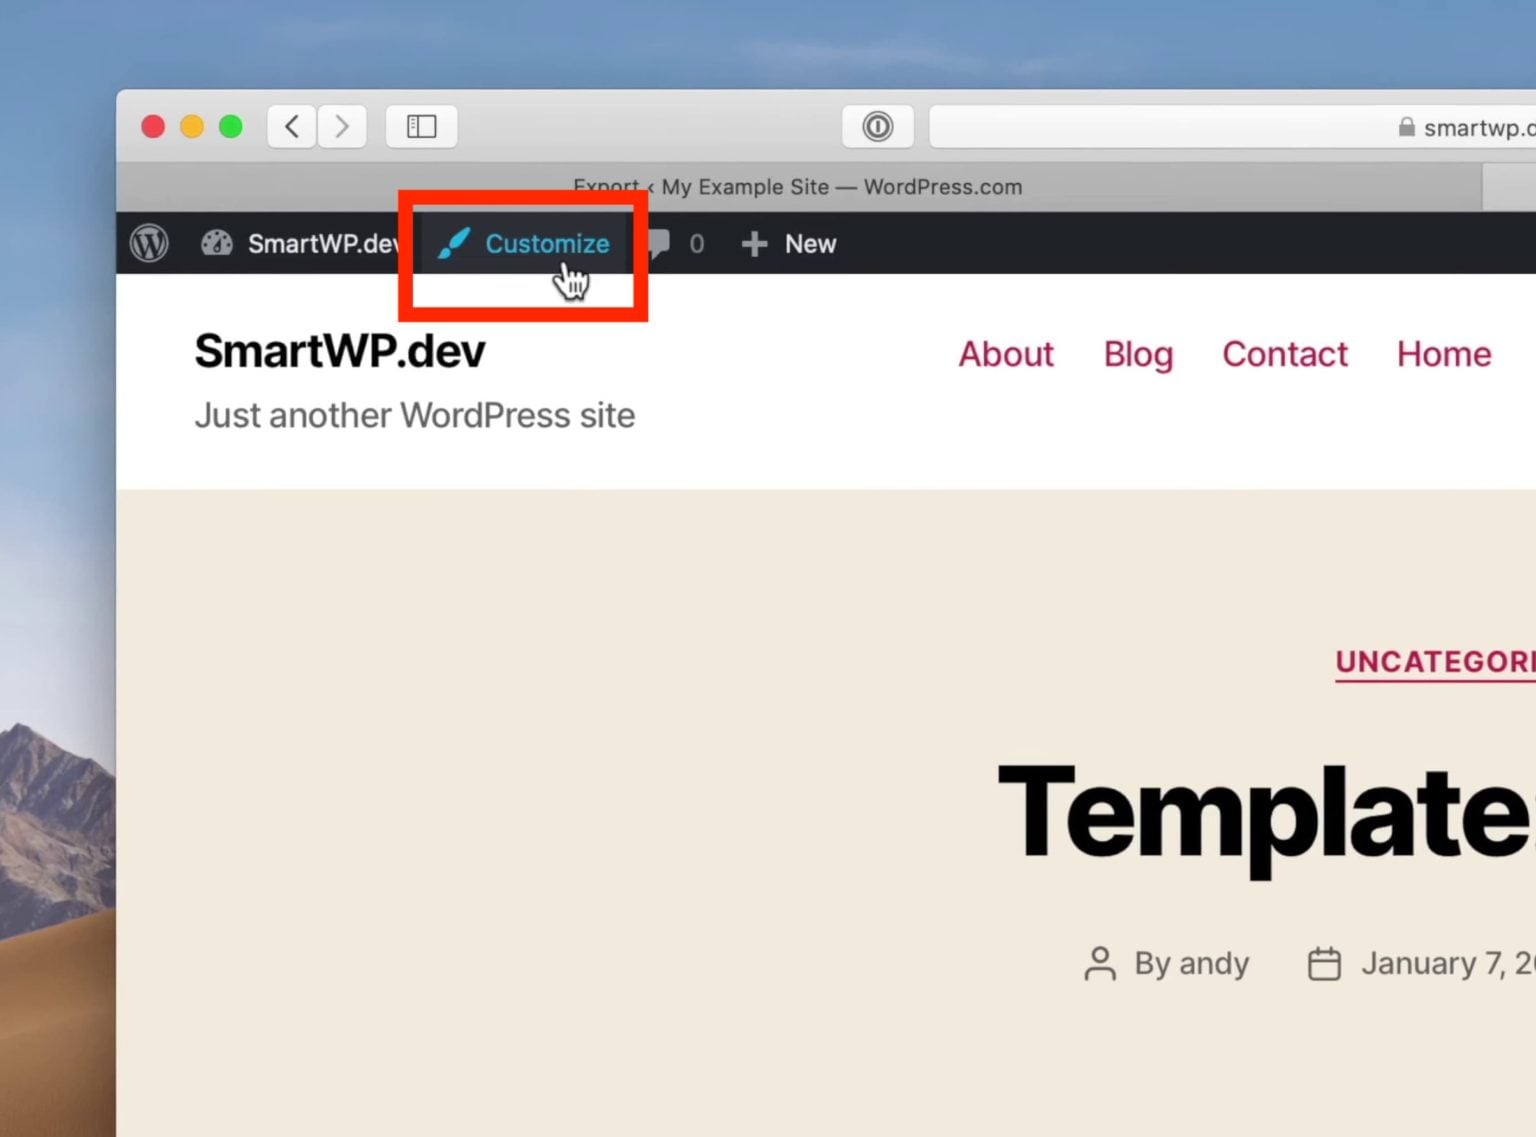
After clicking the “Customize” button, go to the “Menus” section. From there, select the “Primary” menu, as this is usually the main navigation menu used on your previous WordPress.com website. Once selected, you can review and reorganize the menu items to match the structure you want for your new site.
Since your new theme may not automatically recognize the Primary menu as the main navigation menu, you will need to assign it manually. To do this, select the appropriate menu location and check the option for “Desktop Horizontal Menu” so that your primary navigation appears correctly on the website.
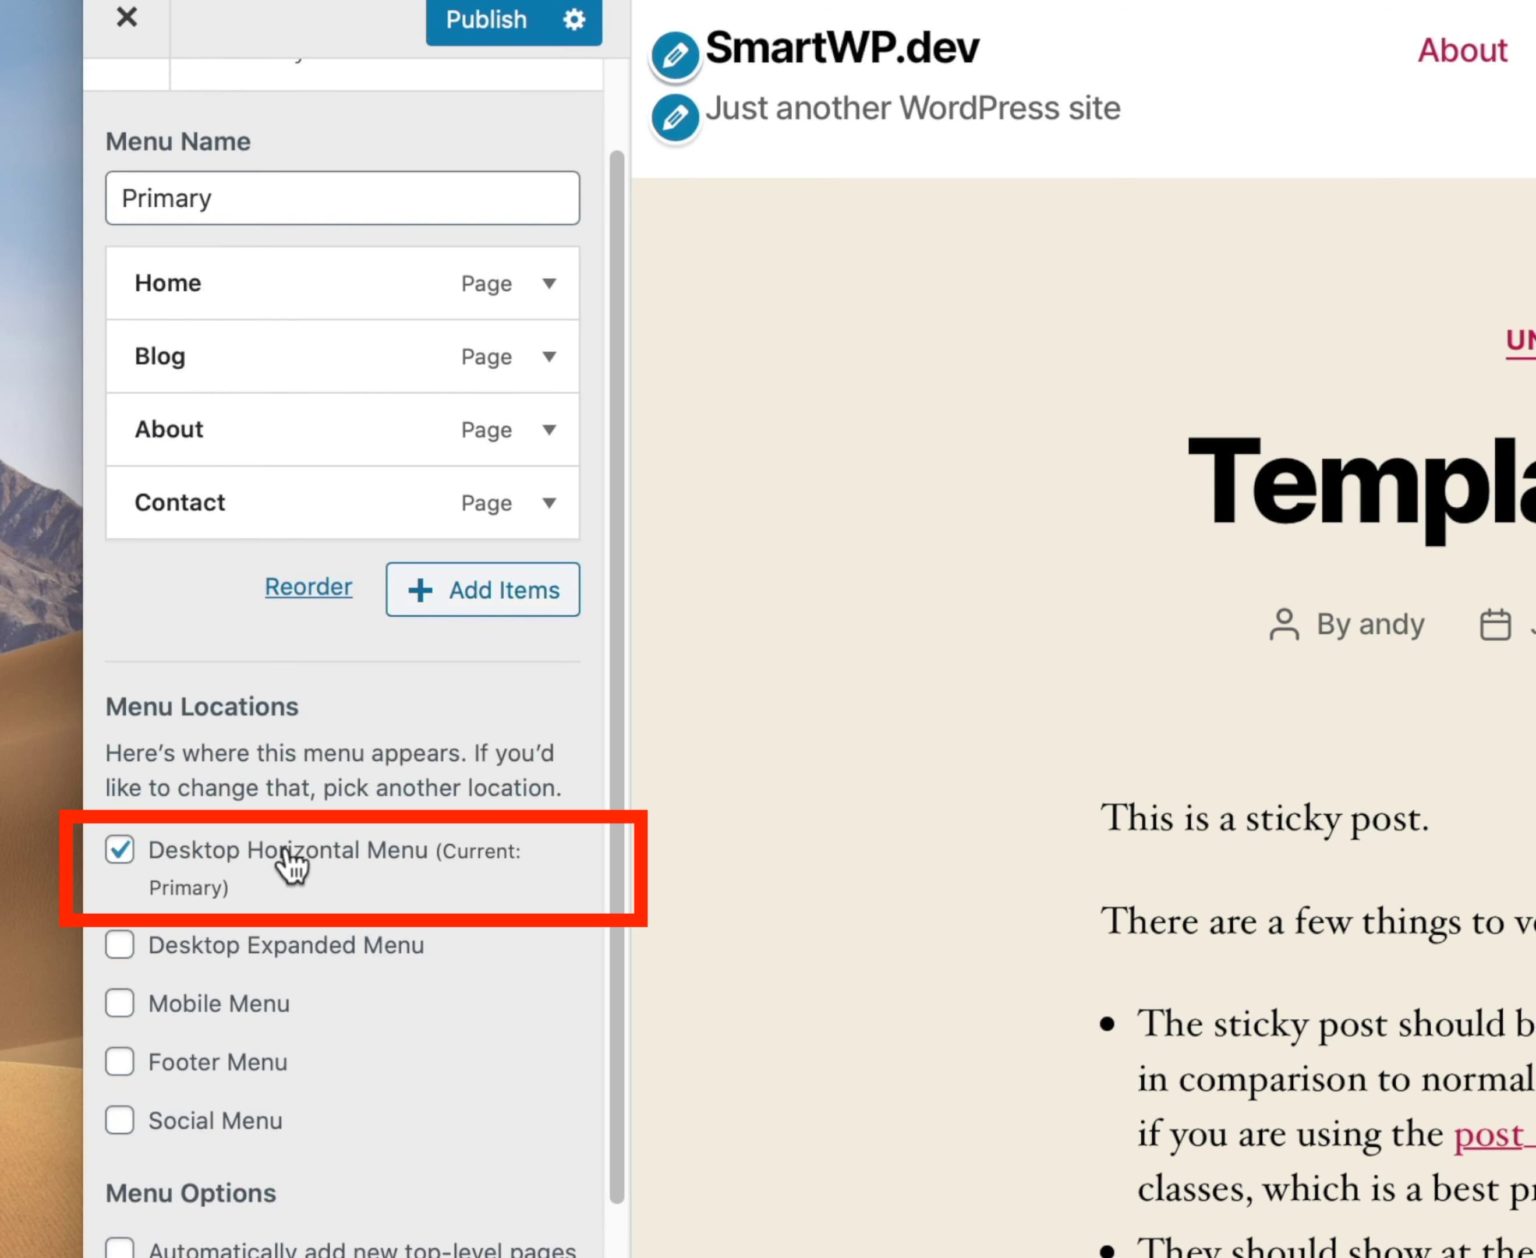
After making these adjustments, your new website will start to look more complete and ready for use.
Next, review other pages on your site, such as the About page. You may notice that some formatting does not appear exactly the same as it did on your WordPress.com site. For example, certain pages may have originally used a column layout that is no longer displayed correctly.
This usually happens because WordPress.com often uses built-in plugins, such as Layout Grid by Jetpack, to create structured page layouts. Installing this plugin on your WordPress.org site can help restore a similar layout and improve the appearance of your migrated pages.
To install the plugin, go to your WordPress dashboard, navigate to Plugins, and click Add New. From there, you can search for the plugin and install it on your site.
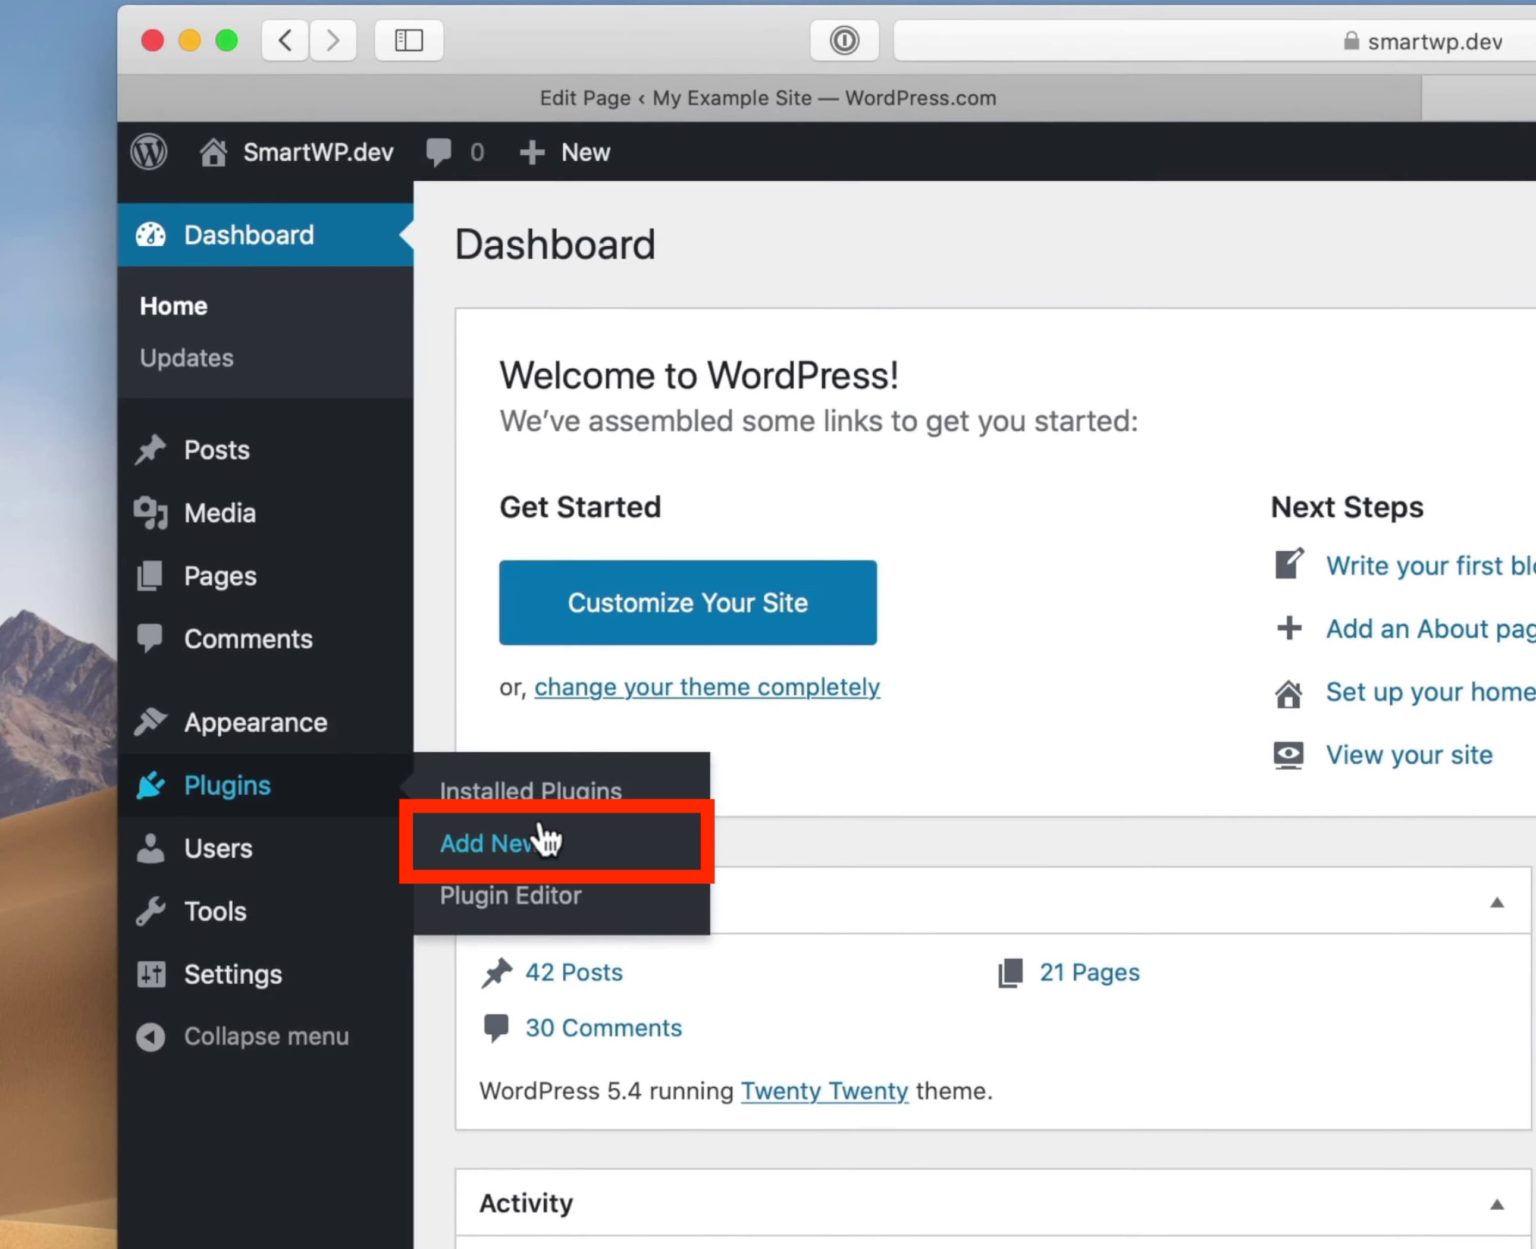
In the search bar, type “Layout Grid” and find the plugin called “Layout Grid Block by Automattic” (the company behind WordPress). Then click Install and Activate to enable it on your site.
After activating the plugin, return to your About page and check the layout again. You should see that the formatting now appears similar to the original version from your WordPress.com website.
Next, review the rest of your website pages to identify and correct any formatting issues that may have occurred during the migration. This is also a good opportunity to make additional customizations and design improvements, taking advantage of the greater flexibility available on your self-hosted WordPress site.
As you continue improving your website, you may also want to install additional plugins to enhance functionality. Check out our guide on Top 10 Must-Have WordPress Plugins For Your Site to discover useful tools that can help optimize your site.
Step 4: Redirect Your WordPress.com Site to the .org Version
At this stage, your original WordPress.com website will still remain online. This means visitors who search for your site may continue to find and access the WordPress.com version instead of your new self-hosted website.
To avoid confusion and ensure visitors reach your new site, you should set up a redirect from your WordPress.com site to your WordPress.org website.
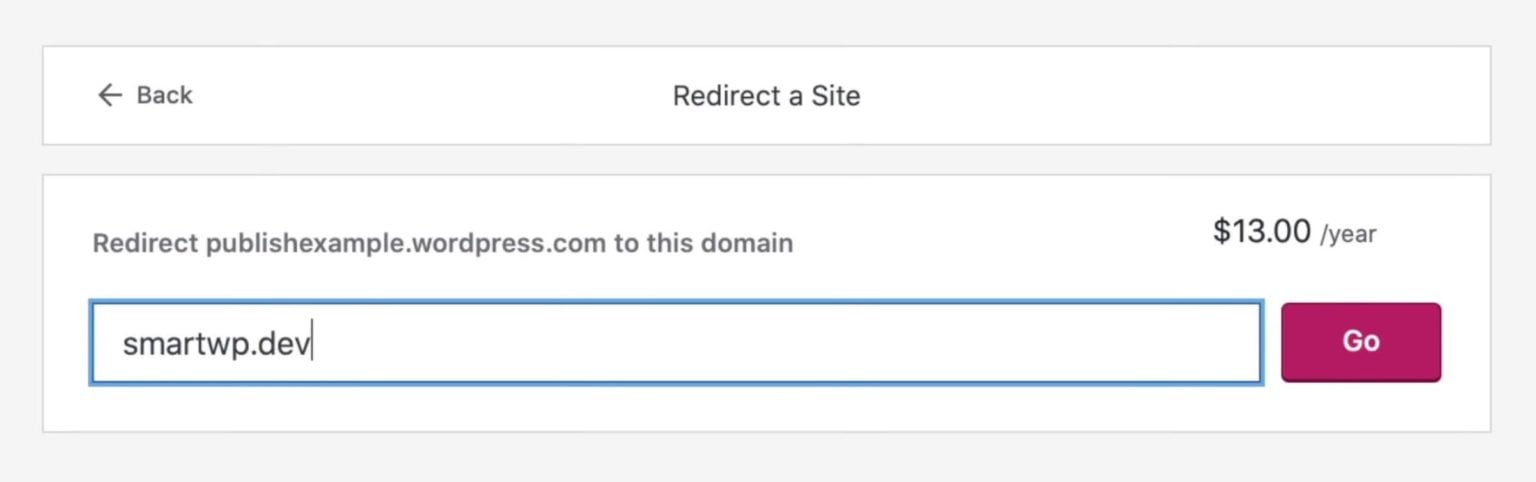
WordPress.com offers a Site Redirect service, which currently costs around $13 per year. Although it is a paid feature, it is recommended to keep the redirect active for at least one year. This allows search engines enough time to update their indexes so that users will eventually find your WordPress.org website instead of the old WordPress.com version.
To set up the redirect, log in to your WordPress.com admin dashboard, navigate to Manage, and select Settings. On the settings page, locate the Redirect option and follow the instructions to redirect visitors to your new website.
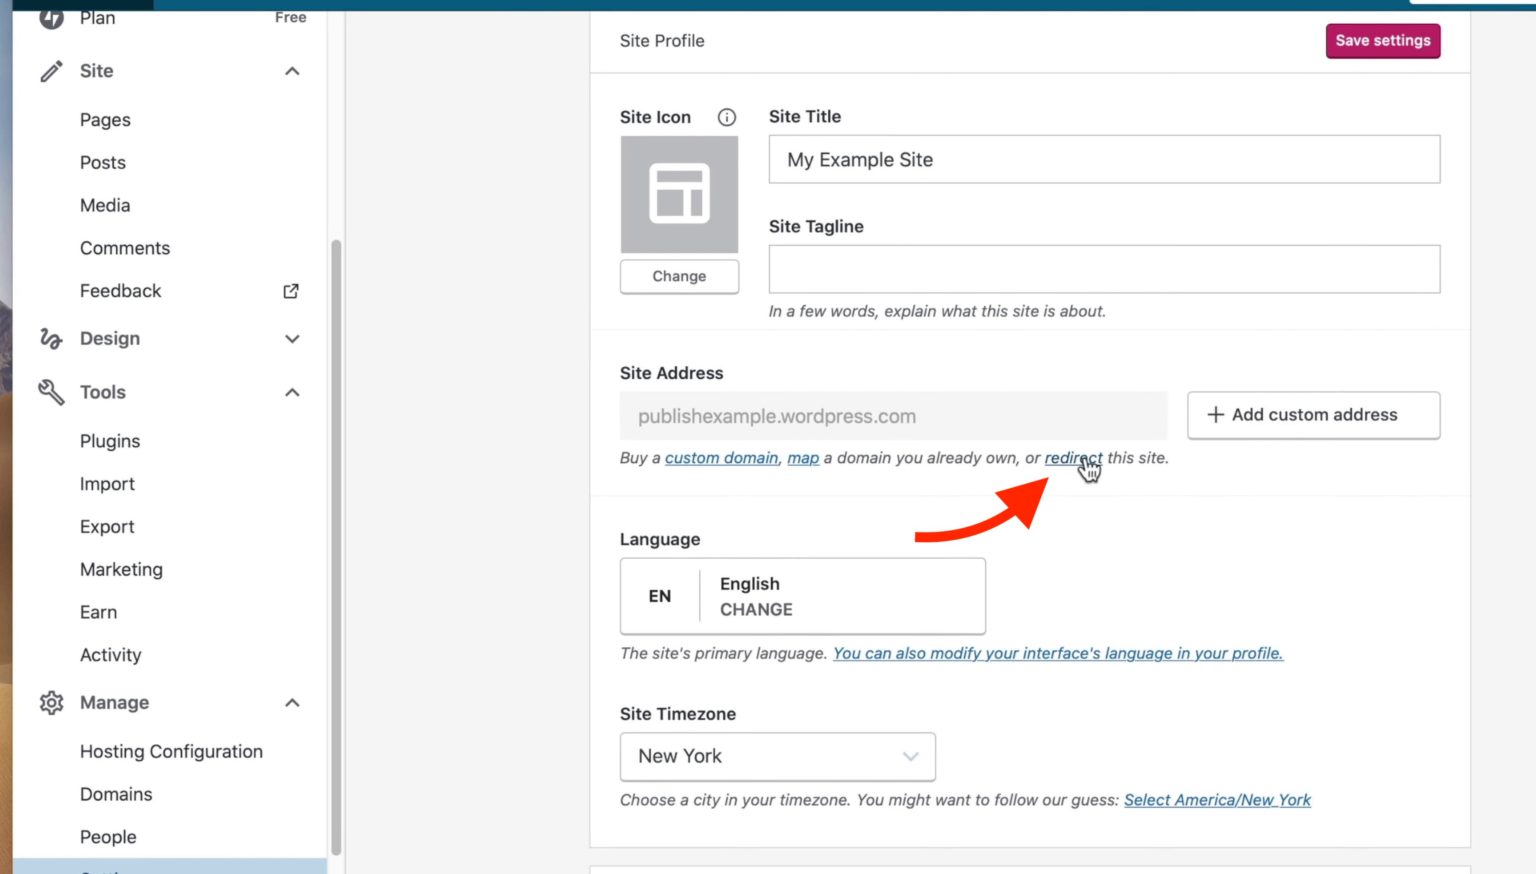
You will then be directed to a page where you can enter the URL of your new website, which is your WordPress.org site. After entering the address, you can proceed with purchasing and activating the site redirect service. Once the redirect is set up, visitors who access your old WordPress.com site will automatically be redirected to your new WordPress.org website.
And that’s it — you have successfully migrated your website from WordPress.com to a self-hosted WordPress.org site. Your content, structure, and media should now be available on the new platform, giving you greater control and flexibility to customize and grow your website.
Tips to Ensure a Smooth WordPress Migration
To avoid common issues and ensure a successful migration, it’s important to follow a few best practices during and after the process.
- Back up your website before making changes: Always keep a full backup of your WordPress.com content so you can restore your site if anything goes wrong.
- Test your new website after migration: Check your pages, posts, menus, and images to make sure everything was imported correctly.
- Update internal links: Replace any links that still point to your old WordPress.com domain to avoid broken navigation.
- Check media files and images: Ensure that all images and media files are properly transferred and displayed on the new site.
- Set up proper permalink structure: Match your old URL structure if possible to help maintain SEO performance.
- Monitor your site after launch: Track website traffic, SEO performance, and user experience to quickly identify and fix potential issues.
Frequently Asked Questions
1. Will migrating from WordPress.com affect my SEO?
Migrating your site can temporarily affect SEO if it is not handled properly. However, by setting up redirects from your old WordPress.com site to your new WordPress.org site and keeping the same domain name, you can minimize the impact. Over time, search engines will re-index your new site and your rankings should stabilize.
2. How long does it take to migrate a WordPress.com site?
The migration process itself usually takes 30 minutes to a few hours, depending on the size of your website and the number of posts, pages, and media files. Larger sites with more content may take longer to export and import.
3. Can I keep the same domain name after migration?
Yes, you can keep the same domain name. If you were using a custom domain on WordPress.com, you can connect or transfer it to your new hosting provider. This helps maintain brand consistency and reduces potential SEO disruptions.
4. Do I need technical skills to migrate WordPress.com?
Not necessarily. Most hosting providers offer one-click WordPress installation and clear instructions for importing content. While some basic familiarity with WordPress is helpful, beginners can usually complete the migration by following step-by-step guides.
5. Can I migrate my WordPress.com site for free?
Yes, the migration process itself is free if you export your content and import it manually into your self-hosted WordPress site. However, you will still need to pay for hosting and a domain name if you don’t already have one. Additionally, optional services like WordPress.com site redirect may have extra costs.
Conclusion
Migrating from WordPress.com to a self-hosted WordPress website gives you greater control over your site’s design, functionality, and overall performance. It allows you to customize your website more freely and expand it with powerful tools as your online presence grows.
If you want to simplify the process, Arestós offers professional WordPress services designed to help businesses build and manage high-performing websites. From WordPress migration and custom development to optimization and maintenance, our team ensures your website runs smoothly and is fully tailored to your needs.
Contact us today to get expert assistance with your WordPress migration and start building a website that can truly grow with your business.
Subscribe to our newsletter!
Get updated to
the lastest IT trends
Related Posts
Update the latest technology trends for your business