Back to featured insights
Webflow to WordPress Migration: Step-by-step Guide
Planning to move your site from Webflow to WordPress? This step-by-step guide walks you through the entire migration process, from exporting content to setting up SEO, ensuring a smooth and efficient transition without losing data or performance.
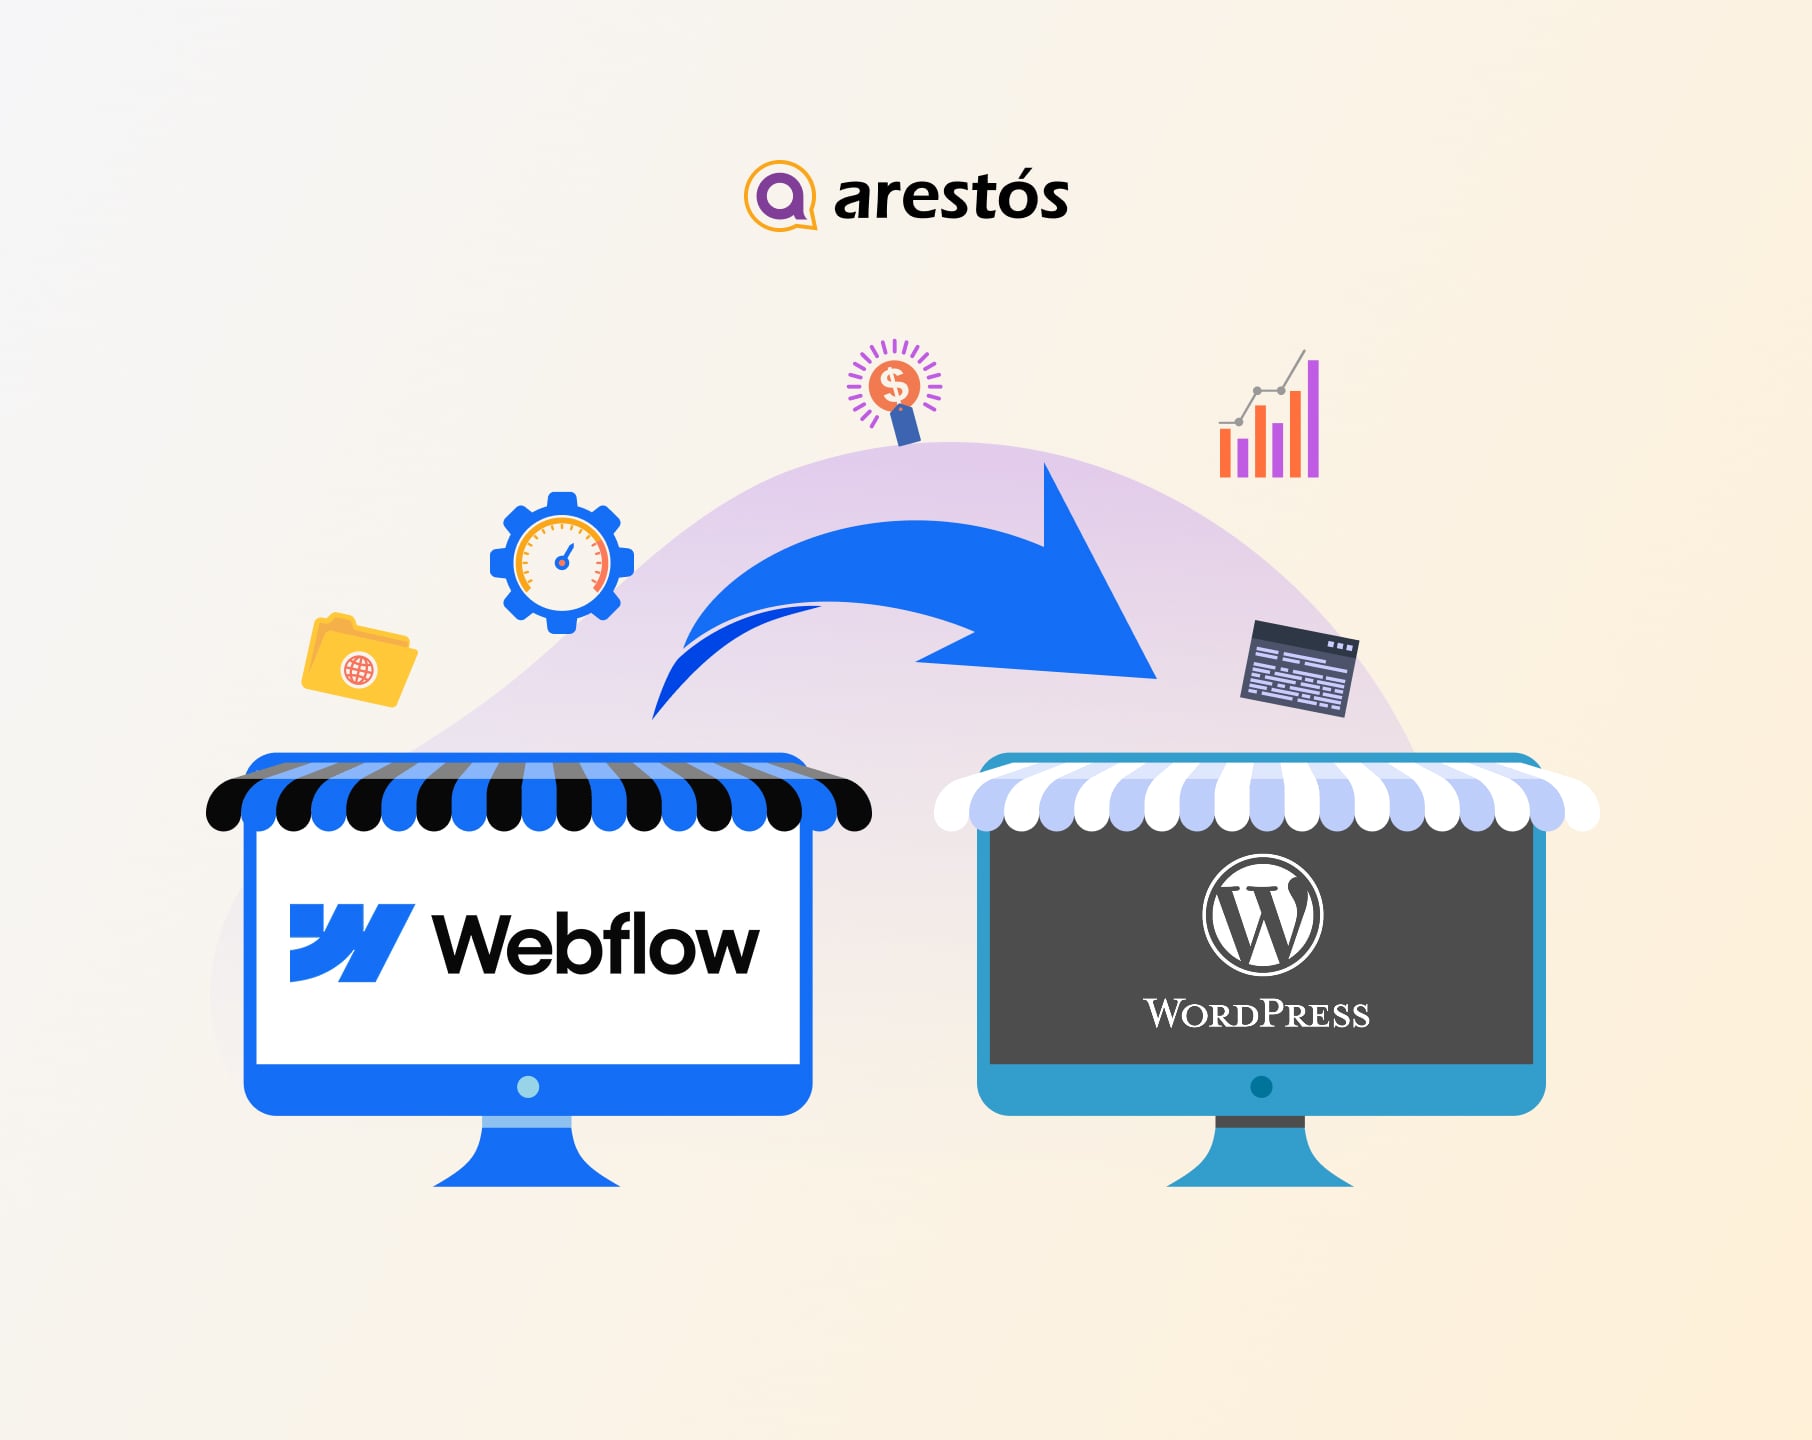
Table of Content
Share
Webflow to WordPress migration is a popular solution for website owners who want more flexibility and control over their site. By moving to WordPress, you can access powerful customization options, better scalability, and a wider range of plugins.
This guide is ideal for business owners, marketers, and beginners looking to switch platforms efficiently. In this article, you’ll learn the step-by-step process to migrate your website from Webflow to WordPress with ease.\
Why You Should Consider Moving From Webflow to WordPress?
There are several reasons why website owners choose to migrate from Webflow to WordPress. Below are some of the most common benefits of making the switch:
- Greater customization options: WordPress offers thousands of themes and plugins, allowing you to customize your website’s design and functionality more easily than on Webflow.
- A large plugin ecosystem: With a vast library of plugins, WordPress makes it simple to add features such as SEO tools, contact forms, e-commerce functionality, and performance optimization.
- More control over hosting and website data: Unlike Webflow, WordPress allows you to choose your own hosting provider, giving you greater control over performance, storage, and server settings.
- Better scalability for growing websites: WordPress is highly scalable, making it suitable for blogs, business websites, large content platforms, and even complex e-commerce sites.
- Strong community support: Because WordPress is widely used around the world, there is a large community, extensive documentation, and many developers available to help with customization or troubleshooting.
What to Prepare Before Webflow to WordPress Migration?
Before starting the migration from Webflow to WordPress, there are several important things you should prepare to ensure the process goes smoothly.
Finding a WordPress Web Host
Choosing the right web hosting provider is an important step when setting up a website with WordPress. A reliable host ensures that your site runs smoothly, loads quickly, and remains secure.
When selecting a hosting provider, you should consider factors such as server performance, uptime reliability, security features, and customer support. It is also helpful to choose a host that offers easy WordPress installation and scalable plans, so your website can grow without technical limitations.
You can explore our guide on Top 10 WordPress Hosting Providers to compare popular hosting options and find a suitable provider.
Prepare WordPress Domain
Another important step before starting the migration to WordPress is preparing the domain for your new website. In most cases, website owners keep the same domain previously connected to Webflow to maintain brand consistency. Before launching the new site, make sure the domain is ready to point to your WordPress hosting by updating the DNS settings.
After successfully moving your website to WordPress, you can also explore our guide How to Migrate a WordPress Site to a New Domain for more details about domain migration.
Backing Up Your Data
Before starting the migration from Webflow to WordPress, it’s essential to create a backup of your website data. This ensures that you have a safe copy of your content, media files, and important information in case anything goes wrong during the process.
Having a backup allows you to quickly restore your website and avoid data loss. It also gives you peace of mind while making changes, especially when dealing with content export and import.
To explore reliable backup solutions, you can also check out our guide 10 Best Backup WordPress Plugins.
Plan Your Website Structure
Before moving your site to WordPress, take time to rethink how your content is organized rather than simply copying the old setup from Webflow. This is a great opportunity to simplify navigation, group related content more effectively, and improve the overall flow of your website.
A clearer structure not only makes your site easier to use but also supports better SEO performance. By planning this in advance, you can avoid confusion during the migration and ensure your new WordPress site feels more intuitive and well-structured.
How to Migrate From Webflow to WordPress (in 6 Steps)
Once everything is ready, you can start the migration from Webflow to WordPress by following a few simple steps.
- Step 1: Set Up WordPress
- Step 2: Export Your Content From Webflow
- Step 3: Import Your Content Into WordPress
- Step 4: Choose a WordPress Theme
- Step 5: Configure Your WordPress Permalinks
- Step 6: Point Your Domain to WordPress
Now, let’s take a closer look at each step
Step 1: Set Up WordPress
There are two common options depending on your experience level and preferences:
Option 1: Use One-Click Installation
Most hosting providers offer a one-click WordPress installation feature. This is the easiest and fastest way to get started, as the hosting platform will automatically handle the setup process, including database creation and basic configuration.
Option 2: Install WordPress Manually
If you prefer more control, you can install WordPress manually by downloading it from the official website and uploading it to your hosting server. This method involves creating a database and configuring WordPress files, making it more suitable for users with some technical knowledge.
Step 2: Export Your Content From Webflow
Now that your WordPress site is ready, the next step is to gather content from Webflow for migration. Webflow provides a built-in export feature that allows you to easily extract key data from your website.
Keep in mind that not every element can be exported. Typically, you can download items such as pages, blog posts, text content, embedded elements, image galleries, and media files.
To begin exporting, open your Webflow Designer and navigate to the CMS Collections section, where all your site’s structured content is stored and available for download.

Choose the collection you want to export (for example, blog posts), then click the Export button at the top of the screen. The selected data will be downloaded to your computer as a .csv file. You can repeat the same steps for other collections to ensure all necessary content is exported from Webflow.
Step 3: Import Your Content Into WordPress
The next step is to import your content into WordPress. By default, WordPress supports importing files in XML format, while Webflow only allows content export as CSV files.
Because of this difference, you’ll need to use a migration plugin that can handle CSV imports. A popular and reliable option is WP All Import, which makes it easier to upload and map your content correctly into WordPress.

To install the plugin on your WordPress site, go to Plugins > Add New in your dashboard, then search for the plugin using the search bar.
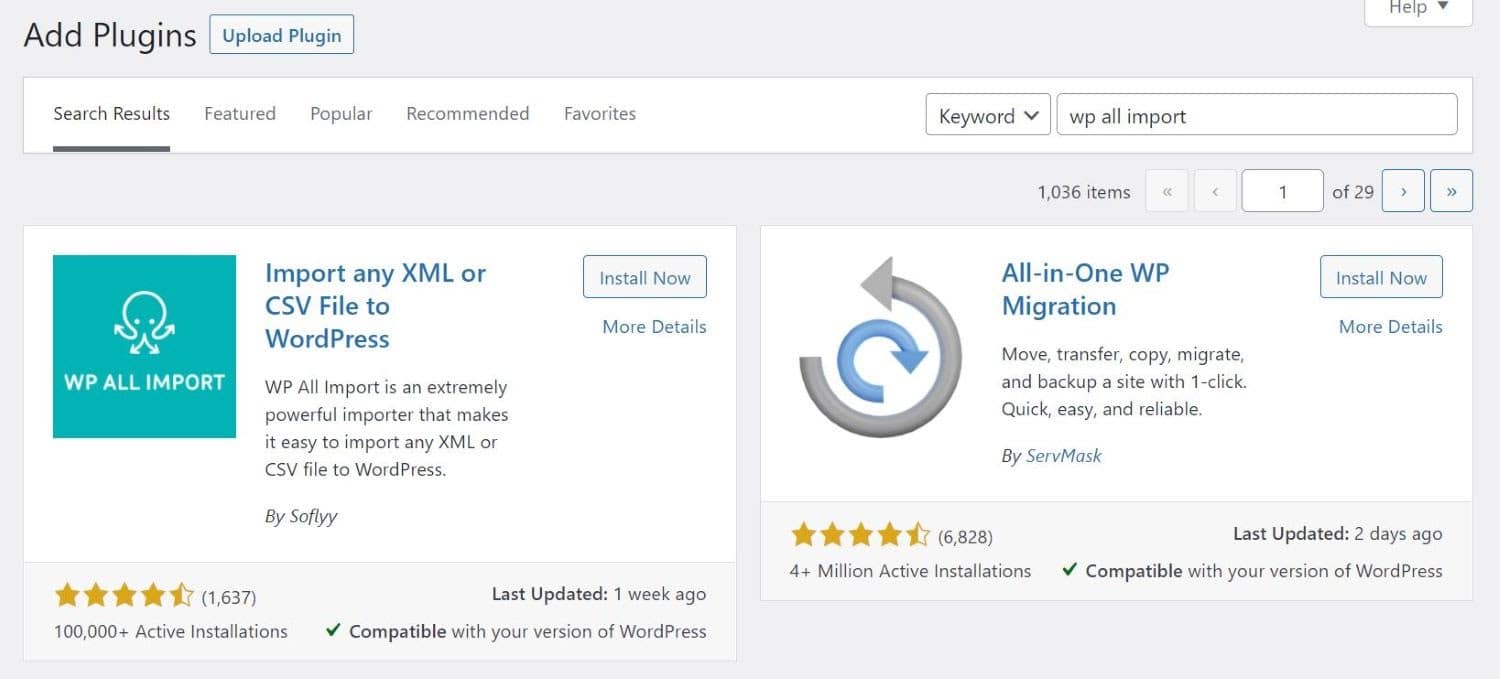
Then, click Install Now, followed by Activate. Once the plugin is activated, go to All Import > New Import in your WordPress dashboard to begin importing your data.

Click on the Upload a file option, then choose the CSV file you exported earlier. The plugin will guide you step by step through the import process in WordPress.
In this example, we’ll focus on importing blog posts from Webflow.

The plugin will prompt you to match your data by dragging and dropping elements into the appropriate fields using an intuitive drag-and-drop interface in WordPress.

For example, you’ll need to drag the post name (from the right panel) into the title field, and map the post body to the appropriate content area. You’ll also have options to assign taxonomies such as categories and tags, as well as configure additional settings like post status within WordPress.

Keep in mind that these settings will be applied to all posts in your file, so you won’t need to repeat the process for each individual post in WordPress.
Next, you’ll be prompted to set a unique identifier for your posts. You can simply click the Auto-detect button to let the system generate an ID automatically.

Finally, click the Confirm & Run Import button to complete the process and import your content into WordPress.

Once the import is finished, the plugin will display a notification confirming that the process has been successfully completed in WordPress.

Once everything is imported, you can review your content by going to Posts or Pages in your WordPress dashboard. If you exported multiple collections from Webflow, you’ll need to repeat the import process for each one.
Keep in mind that WordPress does not automatically import images from external platforms. This means you’ll need to upload images manually or use a plugin like Auto Upload Images to handle this task more efficiently.

This plugin scans your posts and pages for image URLs, then automatically downloads those images and uploads them to your WordPress media library, replacing the original links with locally hosted files.
Step 4: Choose a WordPress Theme
Unfortunately, you can’t directly transfer your site design from Webflow to WordPress. However, WordPress provides a wide range of themes, allowing you to easily choose a design that fits your brand and customize it to match your original website as closely as possible.

Themes in WordPress are highly customizable, allowing you to adjust layouts, colors, and features to match your needs. Many themes are free, while premium options are also available at reasonable prices.
It’s a good idea to spend some time exploring and customizing different themes to find the best fit for your website. Make sure to choose a responsive design, as this ensures your content displays properly across all devices.
For more inspiration, you can also check out our guide 15 Best WordPress Real Estate Themes for Realtors.
Step 5: Configure Your WordPress Permalinks
Next, you’ll need to configure your permalink settings in WordPress, as they determine the structure of your website’s URLs.
To access these settings, go to Settings > Permalinks in your dashboard.

As you can see, there are several permalink options available in WordPress. We recommend selecting Post name, as it creates clean URLs using your domain and the specific slug of each post or page.
Short and readable URLs can improve your site’s Search Engine Optimization (SEO) and make links more user-friendly. Once you’ve made your selection, click Save Changes and proceed to the final step.
Step 6: Point Your Domain to WordPress
Even after importing your site into WordPress, your domain (e.g., mysite.com) may still be pointing to Webflow’s nameservers. To keep using the same domain, you’ll need to update your DNS settings so it connects to your new hosting provider.
You can find your hosting provider’s nameservers in your hosting account. They usually look like:
- ns1.yourwebhost.com
- ns2.yourwebhost.com
- ns3.yourwebhost.com
If you registered your domain through a domain registrar, simply log in to your account to update the DNS settings. Some hosting providers also allow you to manage domains directly from their control panel.
Once the DNS changes are complete, visitors entering your domain will be directed to your new WordPress site. It’s best to perform this step only after your website is fully ready to go live.
What to Do After Webflow to WordPress Migration
After completing the migration from Webflow to WordPress, there are several important tasks you should complete to ensure your new website runs smoothly.
Set Up 301 Redirects
After completing the migration to WordPress, you should set up 301 redirects to handle any changes in your URL structure. A 301 redirect permanently directs users and search engines from old URLs (on Webflow) to the new ones on your WordPress site.
This step is essential to prevent broken links and 404 errors, while also preserving your existing SEO rankings and traffic. You can implement 301 redirects using plugins or by editing your server configuration, depending on your setup.
Select Essential WordPress Plugins
After setting up your website on WordPress, the next step is to install the essential plugins needed to support your site’s functionality. Plugins allow you to extend WordPress features without coding, making it easier to manage SEO, security, backups, and performance.
Choosing the right plugins ensures that your website runs efficiently and remains secure after migrating from Webflow. It is recommended to install only necessary and well-maintained plugins to avoid performance issues.
To explore useful plugin options, you can also read our guide Top 10 Must-Have WordPress Plugins For Your Site.
Integrations and Third-Party Tools
Before migrating your website from Webflow to WordPress, it is important to review any integrations and third-party tools connected to your site. These tools may include analytics platforms, marketing services, CRM systems, payment gateways, or email subscription tools.
Checking these integrations in advance helps ensure they can be properly reconnected or configured after the migration. This preparation helps maintain your website’s functionality and ensures that important services continue working smoothly on your new WordPress site.
For more technical details about connecting external systems, you can also read our guide How to Integrate an API in WordPress.
Test All Pages and Website Functionality
After completing the migration to WordPress, it’s important to thoroughly test your website to ensure everything is working as expected. Go through key pages such as your homepage, blog posts, and landing pages to check for broken links, missing content, or formatting issues.
You should also test important functionalities like contact forms, navigation menus, search features, and any third-party integrations to confirm they are operating correctly. This final check helps ensure a smooth user experience and prevents potential issues after launching your site.
Submit Your New Sitemap to Search Engines
Once your website is fully set up on WordPress, you should submit your new sitemap to search engines to help them crawl and index your updated website more efficiently. A sitemap provides a structured list of your site’s URLs, making it easier for search engines to understand your content.
You can generate a sitemap using an SEO plugin, then submit it through tools like Google Search Console. This step ensures your new pages are discovered quickly and helps maintain your search rankings after moving from Webflow.
Frequently Asked Questions
1. Is it difficult to migrate from Webflow to WordPress?
It depends on your experience level. The process can be straightforward if you follow the right steps and use migration tools, but beginners may find some parts (like data import or DNS setup) a bit technical.
2. Can I migrate my blog posts and CMS content from Webflow to WordPress?
Yes, you can export your content from Webflow as CSV files and import it into WordPress using plugins. Most CMS content such as blog posts, text, and images can be transferred, although some elements may require manual adjustment.
3. Will my website lose SEO rankings after Webflow to WordPress migration?
Not necessarily. If you properly set up 301 redirects, keep your URL structure consistent, and submit a new sitemap, you can maintain most of your SEO performance.
4. How long does a Webflow to WordPress migration usually take?
The timeline varies depending on the size and complexity of your website. A small site may take a few hours, while larger or more complex sites can take several days.
5. Do I need technical skills to migrate a website from Webflow to WordPress?
Basic technical knowledge is helpful, especially for tasks like importing content and configuring settings. However, many tools and plugins are available to simplify the process for beginners.
Conclusion
Migrating from Webflow to WordPress may seem complex at first, but by following the right steps, from preparing your content and setting up WordPress to importing data and optimizing your site, you can complete the process smoothly and efficiently. With proper planning, you can preserve your SEO, maintain functionality, and build a more flexible website for long-term growth.
If you’re looking for expert support, Arestós offers professional WordPress services, including website migration, custom development, and performance optimization. Our team ensures a seamless transition with minimal downtime and helps you get the most out of your new WordPress site.
Ready to make the switch? Contact us today and let our experts handle your Webflow to WordPress migration with ease.
Subscribe to our newsletter!
Get updated to
the lastest IT trends
Related Posts
Update the latest technology trends for your business