Back to featured insights
Migrate Weebly to WordPress: A Step-by-Step Guide
Thinking about moving your website from Weebly to WordPress? This guide explains the key steps involved in the migration process, from preparing your site to transferring content and setting up WordPress, helping you transition smoothly to a more flexible and powerful platform.
Table of Content
Share
Migrating from Weebly to WordPress is a common step for website owners who want more flexibility and control over their site. By switching to WordPress, you can access a wider range of themes, plugins, and powerful SEO features that help improve website performance and scalability.
This process is especially useful for bloggers, small business owners, and anyone looking to grow their website beyond the limitations of Weebly. In this guide, you will learn the step-by-step process to successfully migrate your Weebly website to WordPress.
What to Prepare Before Migrating from Weebly to WordPress
Before migrating your website from Weebly to WordPress, it is important to prepare a few essential things to ensure the process goes smoothly and without data loss.
Proper preparation will help you transfer your content efficiently and reduce potential technical issues during the migration.
- Choose a Reliable WordPress Hosting: First, select a reliable hosting provider that supports WordPress. A good hosting service ensures your website runs smoothly, loads quickly, and remains secure after the migration.
- Install WordPress: Once you have chosen your hosting, install WordPress on your server. Most hosting providers offer one-click WordPress installation, which makes the setup process quick and simple.
- Backup Your Weebly Website: Before starting the migration, make sure to back up your Weebly website. This helps protect your data in case something goes wrong during the transfer process.
- Prepare Your Website Content: Review your existing pages, blog posts, images, and media files. Cleaning up unnecessary content before migration can make the transfer process easier and more organized.
- Plan Your Website Structure: Take some time to plan your website’s structure on WordPress, including menus, categories, and page layouts. This will help you recreate your website more efficiently after the migration.
How to Migrate from Weebly to WordPress
Migrating from Weebly to WordPress can be completed in five main steps that guide you through the entire process of moving your website to the new platform.
- Step 1: Set Up Your WordPress Website
- Step 2: Export Your Weebly Content
- Step 3: Import Your Weebly Site into WordPress
- Step 4: Redirect Your Weebly Site to WordPress
- Step 5: Set Up Permalinks
Follow the steps below to successfully migrate your website from Weebly to WordPress.
Step 1: Set Up Your WordPress Website
Before migrating your content from Weebly, you need to set up a WordPress website. This involves installing WordPress on your hosting so you have a new platform ready to receive your website data. There are two common ways to install WordPress: manually or through your hosting provider.
Method 1: Install WordPress Manually
You can install WordPress manually by downloading the WordPress package from the official website and uploading it to your hosting server. After uploading the files, create a database and run the WordPress installation process through your browser. This method provides more control but requires some basic technical knowledge.
Method 2: Install WordPress via Hosting (One-Click Installation)
Most hosting providers offer a one-click WordPress installation feature through their control panel, such as cPanel or a custom dashboard. With this method, you simply choose your domain, click install, and the hosting service will automatically set up WordPress for you. This is the easiest and fastest option for most users.
Step 2: Export Your Weebly Content
In the past, transferring a website from Weebly to WordPress was quite challenging because exporting data from Weebly was not straightforward. To make the process easier, a free tool called the Weebly to WordPress Importer was created.
This online tool allows you to automatically retrieve content from your Weebly website and convert it into a format that can be imported into WordPress. It does not modify your existing Weebly site, so your original website remains completely safe.
To get started, simply visit the Weebly to WordPress Importer website and enter the URL of your Weebly site.
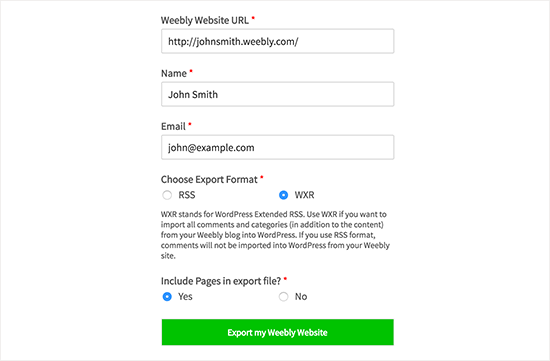
Next, you will be prompted to enter your name and email address, and choose an export format for your content. The recommended option is WXR format, which is the standard format used for importing content into WordPress, so it is best to keep this setting unchanged.
You will also see an option to include pages in the export file. By default, this option is set to “Yes.” Unless you have a specific reason to exclude your pages, it is recommended to keep the default setting.
Once everything is set, click the “Export My Weebly Website” button to continue.
The importer will then retrieve the content from your Weebly site and convert it into a file that can be easily imported into WordPress.
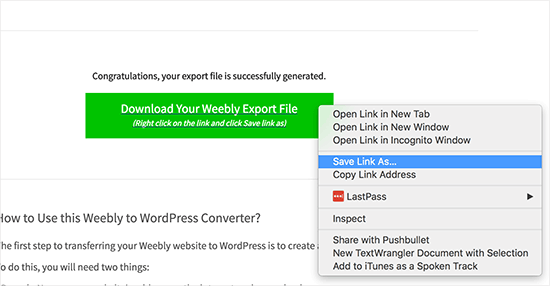
Once the export process is complete, a download button for your Weebly export file will appear. Right-click the button and choose “Save link as” from the menu to download the file. The file will be saved to your computer as export.xml, which you will later use to import your content into WordPress.
Step 3: Import Your Weebly Site into WordPress
Now that your Weebly content has been converted into a WordPress-compatible file, the next step is to import it into your WordPress website.
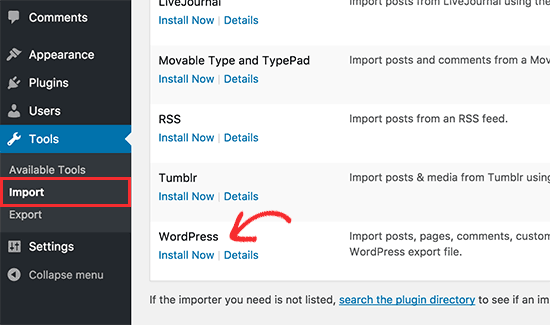
Start by logging in to your WordPress dashboard. Then navigate to Tools → Import in the admin menu.
You will see a list of import tools for different platforms. Scroll down until you find the WordPress importer, and click the “Install Now” link to install it.
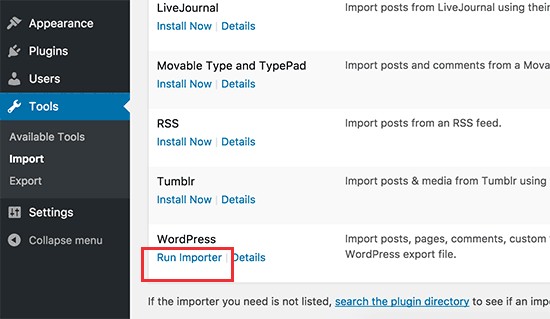
WordPress will automatically download and install the importer plugin on your site. Once the installation is complete, you will see a new option appear.
Click “Run Importer” to open the importer tool and continue with the process.
This will take you to the WordPress importer page. Click the “Choose File” button and select the export.xml file you downloaded earlier from your computer.
After selecting the file, click “Upload file and import” to proceed.
WordPress will then upload the file and begin processing the data. On the following screen, you will be asked to assign authors for the imported content.
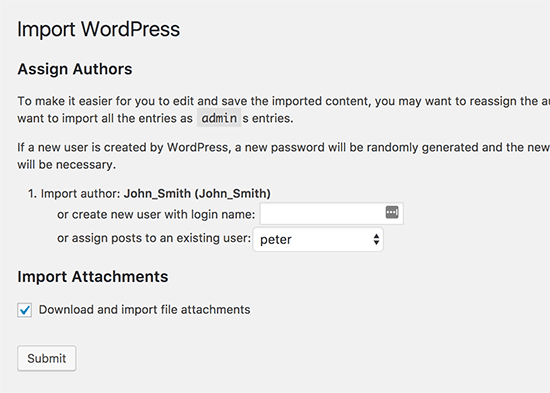
At this stage, you can choose how the imported content will be assigned. You may import the original author from your Weebly site, create a new author, or assign all the content to an existing WordPress user.
Make sure to check the option “Download and import file attachments.” This allows WordPress to retrieve images from your Weebly website and store them in your WordPress media library.
Once everything is set, click the “Submit” button to start the import process. WordPress will then transfer the content from the export file into your WordPress database and attempt to download the images used in your posts and pages.
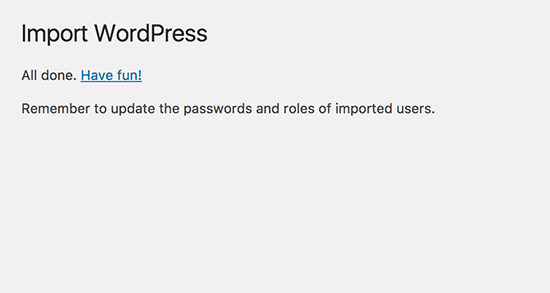
After the process finishes, a success message will appear confirming that the import has been completed.
Your Weebly content has now been successfully imported into WordPress. You can visit the Posts, Pages, and Categories sections in the WordPress dashboard to confirm that your content has been transferred correctly. It is also a good idea to check the Media Library to ensure that the images from your Weebly site were imported properly.
If the import process stops or fails before completion, you can simply run it again. The WordPress importer is designed to recognize duplicate entries, so it will skip content that has already been imported and only process the remaining items.
Step 4: Redirect Your Weebly Site to WordPress
If your Weebly website was using a custom domain (for example, yoursite.com), you will need to connect that domain to your WordPress hosting provider.
Start by logging in to your Weebly account and navigating to the Domains section. Select the domain you want to update, then locate the Nameservers setting and click the “Change” option.
Next, enter the nameservers provided by your WordPress hosting service. For example, if you are using Bluehost, the nameservers are ns1.bluehost.com and ns2.bluehost.com.
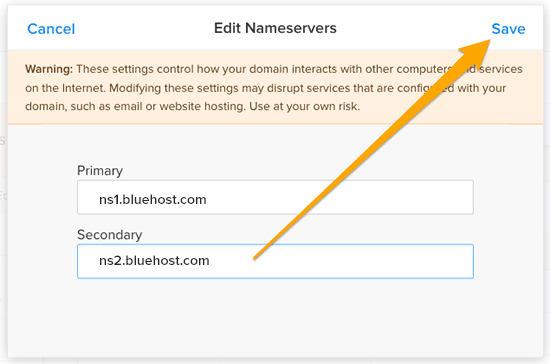
After entering the new nameservers, click the “Save” button to apply the changes.
Keep in mind that updates to nameservers may take some time to propagate across the internet. Once the update is completed, visitors who access your domain will be directed to your new WordPress website.
If your Weebly site was using a subdomain (for example, http://example.weebly.com), you will need to set up a redirect instead.
To do this, log in to your Weebly dashboard and open the website editor. Then go to Settings and select the SEO tab.
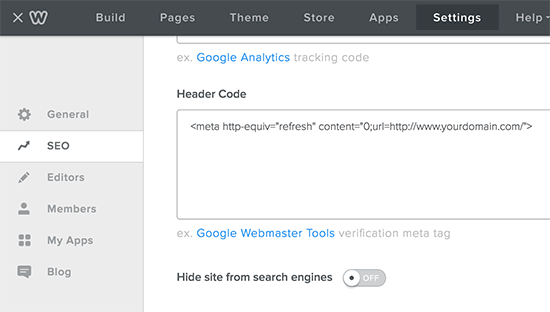
Next, scroll down to the Header Code section. Here, you can add a small piece of code that will redirect visitors from your Weebly subdomain to your new WordPress website.

Make sure to replace yourdomain.com with the actual domain name of your new WordPress website.
After adding the code, click “Save” and then “Publish” to apply the changes.
Once this is done, anyone visiting your old Weebly site will automatically be redirected to your new WordPress website.
Step 5: Set Up Permalinks
Your Weebly website may use a different URL structure for blog posts and pages. For example, blog posts might appear as http://example.com/blog/your-post-title/, while pages could look like http://example.com/page-title.html.
If you were using a custom domain on your Weebly site, visitors trying to access old blog posts may encounter a 404 error after the migration. To avoid this issue, you need to adjust your WordPress permalink structure so that it matches the old URL format as closely as possible.
To do this, go to Settings → Permalinks in your WordPress dashboard. Scroll down and select the “Custom Structure” option, then enter /blog/%postname% in the field provided.
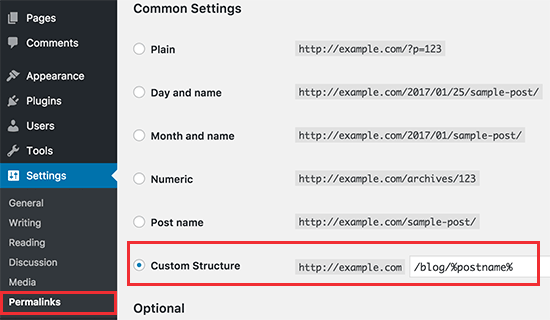
After entering the custom permalink structure, make sure to click “Save Changes” to apply the new settings.
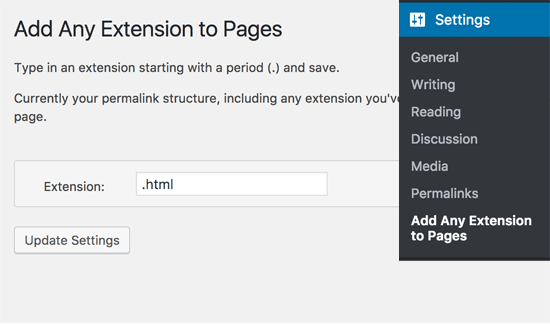
Next, you may want your WordPress pages to keep the same .html ending that was used on your Weebly site. To do this, you can install and activate the Add Any Extension to Pages plugin.
Once the plugin is activated, go to Settings → Add Any Extension to Pages in your WordPress dashboard. In the settings field, enter .html, then click “Update Settings” to save the changes.
Finally, go back to Settings → Permalinks in your WordPress dashboard and click the “Save Changes” button once again to refresh and apply the updated permalink structure.
What to Do After Migrating from Weebly to WordPress
After successfully migrating your website from Weebly to WordPress, there are several important tasks you should complete to ensure your new site runs smoothly and maintains its search engine performance.
The following steps will help you check your content, optimize your website, and make sure everything works properly on the new platform.
Check Your Content and Formatting
After importing your content into WordPress, review your posts and pages to make sure everything was transferred correctly. Check headings, images, text formatting, and page layouts. Sometimes formatting may change during migration, so it is important to adjust anything that does not display properly.
Test Internal Links
Next, go through your website and test internal links to ensure they direct visitors to the correct pages. Broken links can affect user experience and SEO, so make sure all navigation menus, buttons, and links inside posts are working as expected.
Set Up SEO Plugins
To optimize your website for search engines, install an SEO plugin such as Yoast SEO or Rank Math. These tools help you manage meta titles, descriptions, sitemaps, and other important SEO settings that can improve your website’s visibility in search results.
Set Up 301 Redirects
If your URL structure has changed after the migration, you should create 301 redirects from the old Weebly URLs to the new WordPress URLs. This ensures that visitors who access old links are redirected to the correct pages and helps preserve your search engine rankings.
Submit Your Sitemap to Google
Generating and submitting an XML sitemap helps search engines crawl and index your new WordPress site more efficiently. You can submit your sitemap through Google Search Console so that Google can quickly discover and update your website content.
Improve Website Performance
Website speed is important for both user experience and SEO. You can improve performance by optimizing images, enabling caching, and choosing a reliable hosting provider. A faster website helps reduce bounce rates and improves overall site performance.
For websites that require deeper performance improvements, WordPress Speed Optimization Services offered by Arestós can help enhance loading speed and optimize site efficiency.
Install Essential WordPress Plugins
WordPress plugins can add useful features and improve your website’s functionality. After migration, consider installing essential plugins for security, backups, caching, and spam protection. These tools help keep your website secure, stable, and optimized for long-term use.
For more recommendations, check out Top 10 Must-Have WordPress Plugins For Your Site, which introduces useful plugins that can enhance functionality and improve overall website management.
Frequently Asked Questions
1. Is it difficult to migrate from Weebly to WordPress?
Migrating from Weebly to WordPress is not too difficult if you follow the correct steps. With the help of migration tools and guides, most users can transfer their content, images, and pages without major technical challenges.
2. Will migrating from Weebly to WordPress affect my SEO?
If the migration is handled properly, the impact on SEO should be minimal. Setting up proper redirects, keeping a similar URL structure, and submitting a new sitemap can help maintain search engine rankings during the transition.
3. Can I keep my domain name after migrating to WordPress?
Yes, an existing domain name can still be used after migrating to WordPress. You only need to update the domain’s nameservers or DNS settings to point to the new WordPress hosting provider.
4. How long does it take to migrate a Weebly website to WordPress?
The migration time depends on the size of the website. Smaller websites may take only a few hours, while larger sites with many pages and media files may require more time to transfer and configure properly.
5. Do I need technical skills to migrate from Weebly to WordPress?
Basic technical knowledge can be helpful, but it is not always necessary. Many tools and tutorials make the process easier, and professional migration services are also available for those who prefer a more hands-off approach.
Conclusion
Migrating from Weebly to WordPress is a practical step for website owners who want greater flexibility, customization, and control over their site. By following the right process—from exporting content and importing it into WordPress to configuring permalinks and optimizing performance—you can successfully move your website while maintaining its functionality and search visibility.
For businesses that want a smoother transition or professional support, Arestós provides a range of WordPress services designed to help build, optimize, and maintain high-performing websites. From migration and development to performance optimization, these services help ensure that WordPress websites run efficiently and support long-term growth.
Contact us today to explore professional WordPress solutions tailored to business needs.
Subscribe to our newsletter!
Get updated to
the lastest IT trends
Related Posts
Update the latest technology trends for your business