Back to featured insights
How to Choose the right Payment Gateways for WooCommerce Hong Kong
Learn how to choose the right payment gateways and optimize them for your WooCommerce store in Hong Kong. This guide covers setting up WooCommerce Payments, testing transactions, and applying best practices to create a secure, seamless checkout experience for local and international customers.
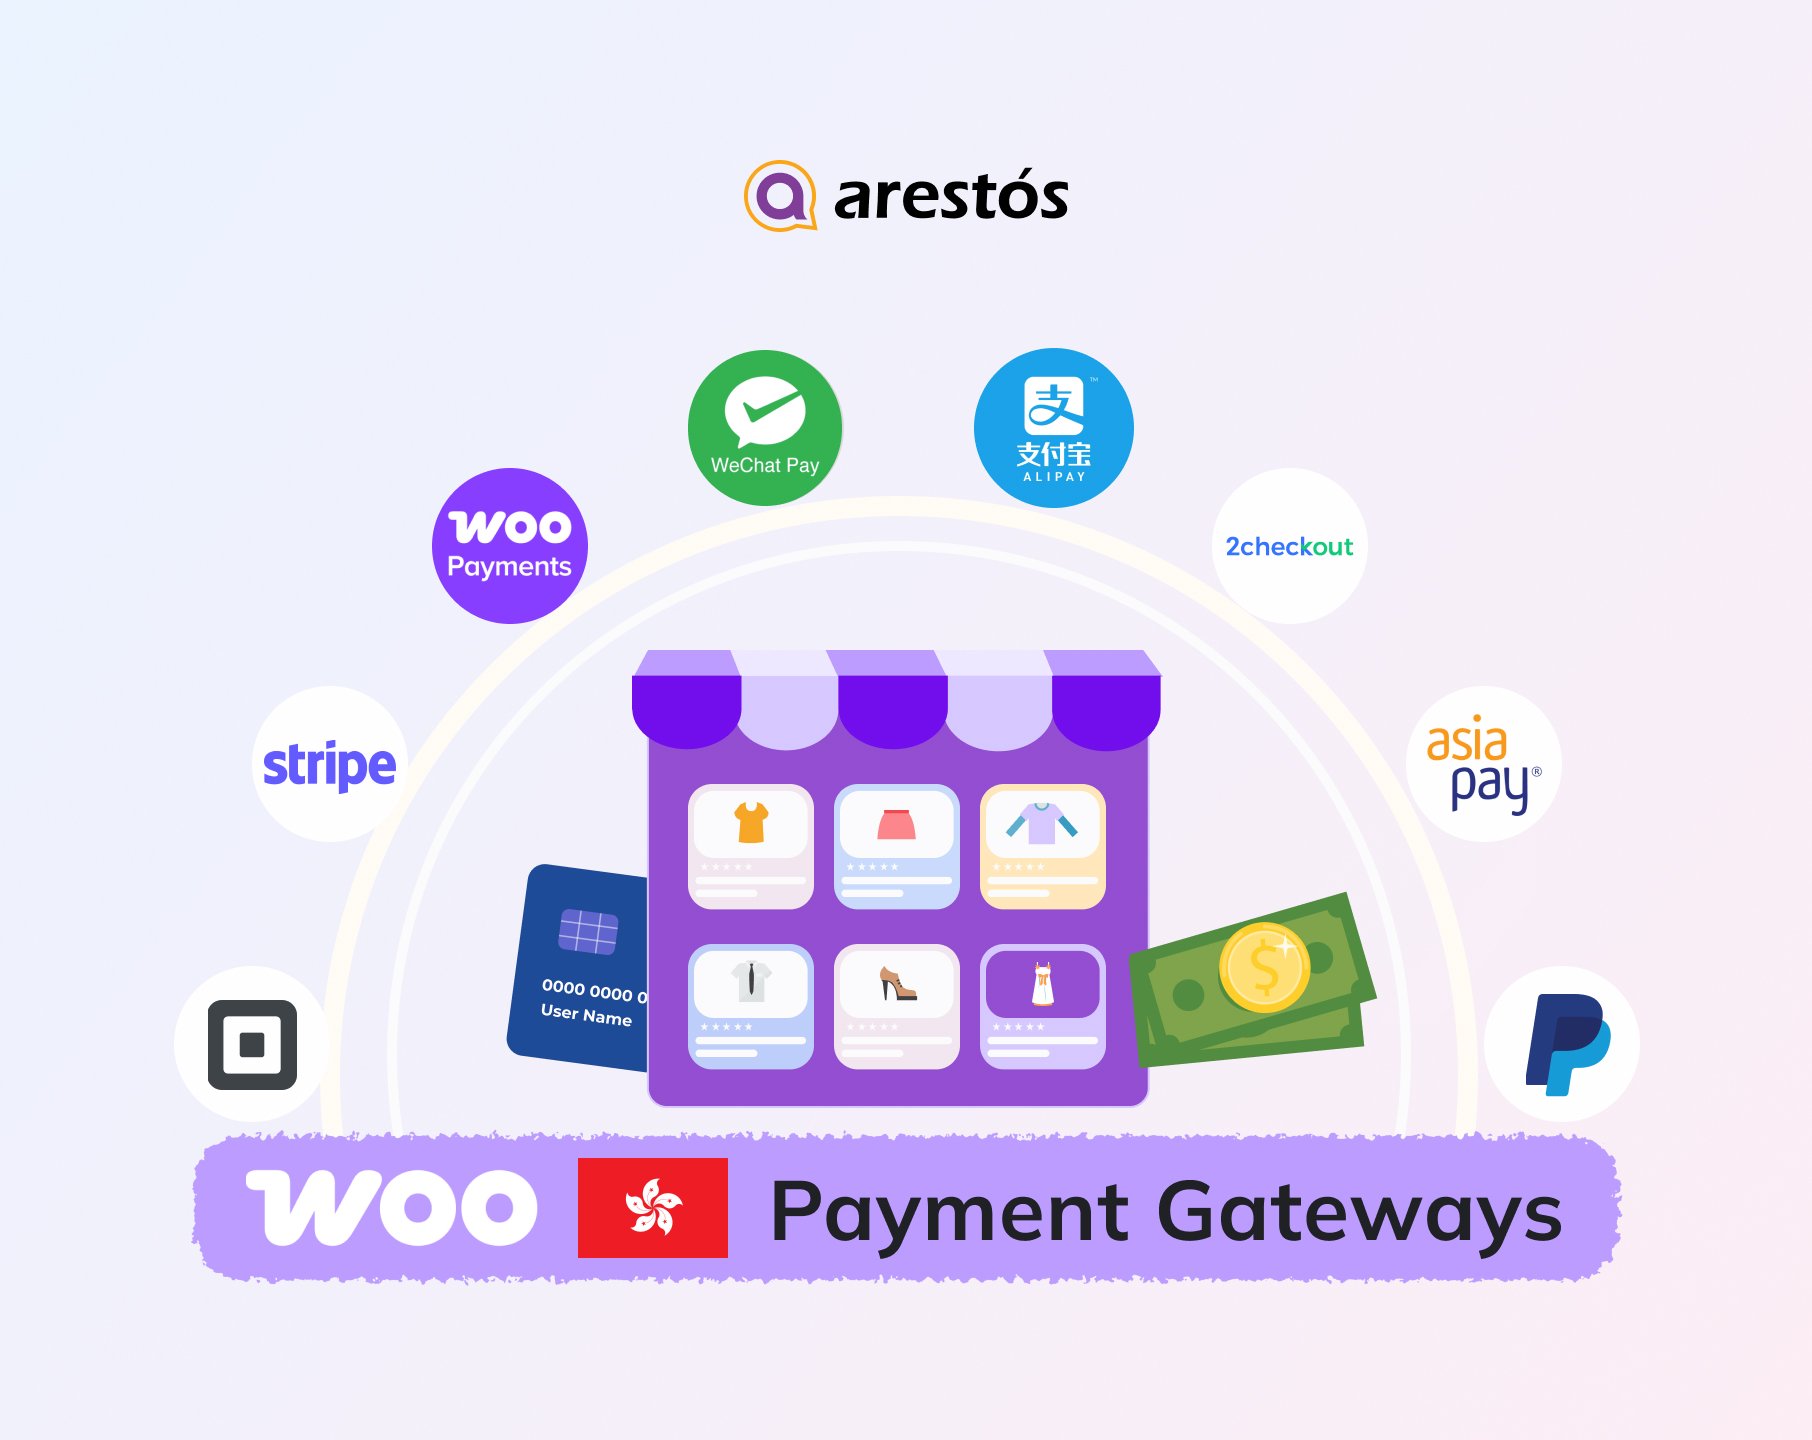
Table of Content
Share
Choosing the right payment gateway for your WooCommerce store in Hong Kong is essential to provide customers with convenient and secure checkout options. With localized payment solutions and global compatibility, you can attract both local shoppers and international buyers while improving trust and conversion rates.
In this article, we’ll cover step-by-step instructions, testing methods, and best practices to ensure smooth and reliable transactions.
Understanding Payment Gateways in WooCommerce
A payment gateway is a technology that enables online stores to accept and process digital payments securely. In WooCommerce, it functions as the connection between your store, the customer, and the financial institutions involved in the transaction.
Essentially, a payment gateway handles the entire flow of online payments — from collecting customer payment details to confirming a successful transaction. Its main features and functions include:
- Secure Data Encryption: Protects sensitive payment information (such as credit card numbers) through encryption and tokenization to ensure safe data transmission.
- Authorization and Verification: Communicates with the customer’s bank to verify funds and confirm whether the payment can be approved.
- Transaction Processing: Transfers approved payments to the merchant’s account while notifying WooCommerce of successful or failed transactions.
- Multi-Currency Support: Allows businesses to accept payments in different currencies — an essential feature for stores selling internationally.
- Integration with WooCommerce: Seamlessly connects to the WooCommerce checkout system through plugins or APIs, enabling automated payment handling without manual steps.
- Reporting and Reconciliation: Provides transaction records and analytics that help store owners monitor payments, refunds, and financial performance.
In short, a payment gateway ensures that every WooCommerce transaction is secure, fast, and reliable — giving both merchants and customers confidence in the checkout process.
Popular Payment Gateways for WooCommerce HK Stores
Here are some of the most trusted and widely used payment gateways for WooCommerce stores in Hong Kong:
- WooCommerce Payments: Native payment solution built by WooCommerce, offering easy setup, centralized management, and seamless integration for HKD transactions.
- Stripe: Leading global gateway supporting HKD, credit/debit cards, Apple Pay, and Google Pay with strong fraud protection and instant payouts.
- Square: Ideal for both online and offline businesses, providing unified payment management and easy syncing with WooCommerce POS systems.
- WeChat Pay: Widely used among Mainland Chinese customers in Hong Kong, enabling quick mobile payments via QR code — great for local and tourist-focused stores.
- PayPal: Trusted international gateway allowing customers to pay securely with PayPal balance, cards, or bank accounts — perfect for cross-border transactions.
- AsiaPay (PayDollar): Hong Kong-based gateway supporting multi-currency payments, local cards, and FPS with strong security compliance.
- 2Checkout: Global platform supporting multiple currencies and payment methods, ideal for WooCommerce stores targeting international buyers.
- Alipay: Popular Chinese mobile wallet offering fast, secure payments — essential for attracting Mainland Chinese consumers in Hong Kong.
Want to explore these options in more detail? Read our blog on Top 8 WooCommerce Payment Gateways For Your E-shop in Hong Kong
How to choose the right Payment Gateway for your WooCommerce Store
Selecting the right payment gateway depends on your store’s target audience, business model, and operational needs. Here are key factors to consider before making your choice:
- Transaction fees: Compare the fees per transaction, monthly charges, and currency conversion costs to ensure they fit your store’s budget.
- Supported currencies: Choose gateways that support HKD and other major currencies if you serve both local and international customers.
- Payment methods: Consider gateways that accept multiple payment options — credit/debit cards, FPS, Alipay, and WeChat Pay — to maximize convenience.
- Integration with WooCommerce: Ensure the gateway offers a dedicated plugin or seamless integration to simplify setup and maintenance.
- Payout speed: Check how quickly the provider transfers funds to your business account; faster payouts improve cash flow.
- Security and compliance: Look for PCI-DSS compliance, encryption, and fraud prevention tools to protect customer data and transactions.
- Customer experience: Prioritize gateways with a fast, mobile-friendly, and user-friendly checkout process to reduce cart abandonment.
- Customer support: Reliable 24/7 support (especially in your time zone) can help resolve payment issues quickly.
- Reputation and reliability: Choose established, well-reviewed providers with a strong track record in Hong Kong and the APAC region.
How to Set Up a Payment Gateway in WooCommerce
Setting up a payment gateway in WooCommerce is a simple process, but it’s essential to configure everything correctly to ensure smooth and secure transactions. Follow these basic steps:
- Step 1: Install and activate the WooCommerce Payments plugin
- Step 2: Configure your payment settings
- Step 3: Set a bank account to receive payouts
- Step 4: Set payment methods in WooCommerce Payments
- Step 5: Verify and test how WooCommerce Payments works
Let’s go through each step to make sure your payment gateway is set up correctly and ready to accept payments.
Step 1: Install and activate the WooCommerce Payments plugin
Log in to your WordPress dashboard, then go to the Plugins section and click “Add New.”

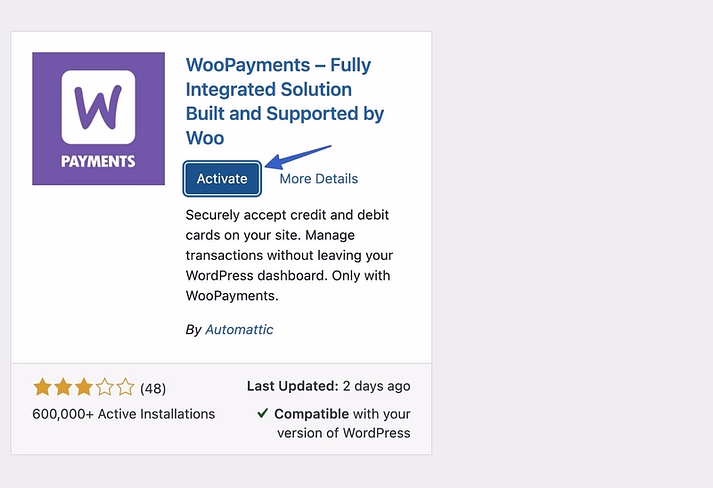
Search for “WooPayments” and click “Install Now.” Although the plugin has been renamed to WooPayments, many still refer to it as WooCommerce Payments — and it even appears under that name after installation.
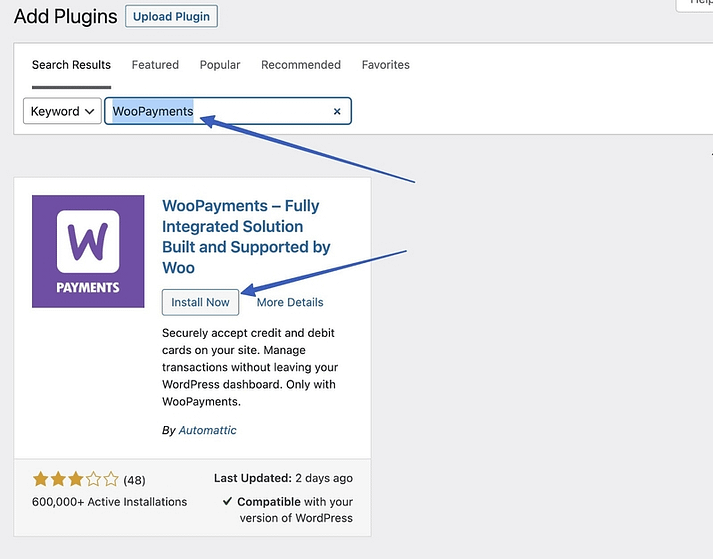
Click “Activate” to start the setup process, then continue to the next step to configure WooCommerce Payments.
Step 2: Configure your payment settings
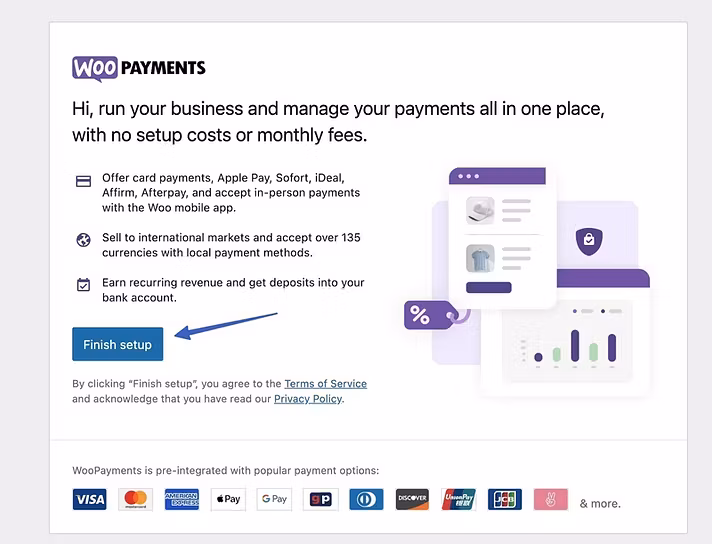
You’ll now see the WooCommerce Payments welcome screen, which highlights key features. Click “Finish Setup” to continue.
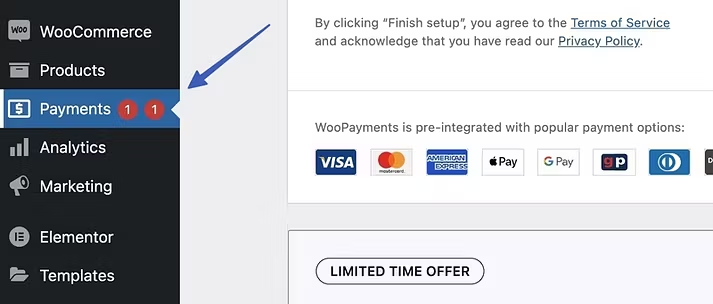
Alternatively, you can access WooCommerce Payments anytime from the new “Payments” tab in your WordPress dashboard.
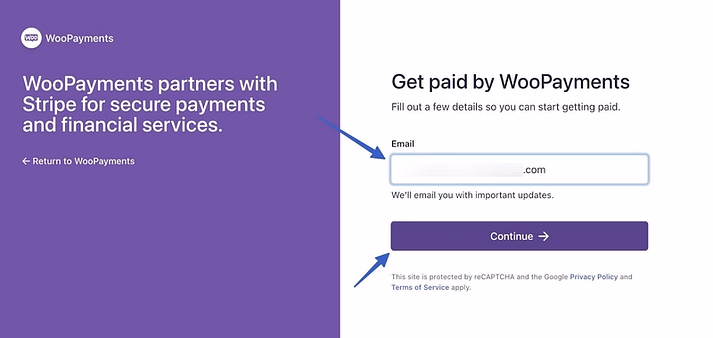
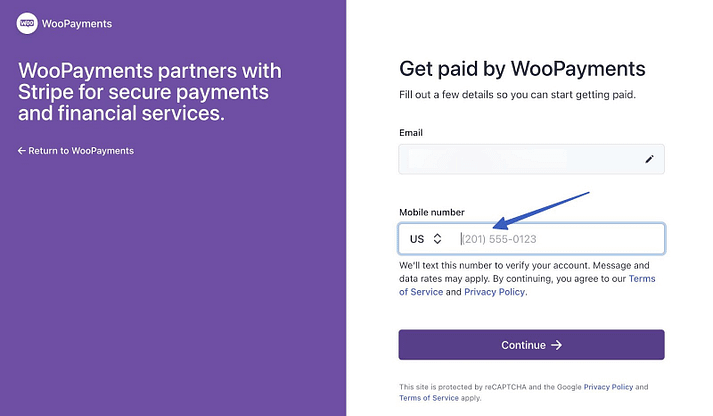
After clicking “Finish Setup,” WooPayments will open a setup wizard where you’ll create your WooCommerce Payments account — a white-labeled version of Stripe. Enter your email for configuration and click “Continue.”
Enter your mobile number — WooPayments uses this to verify your account. Click “Continue” to move forward. Then, check your phone for a verification code and enter it on the next screen to confirm your identity.
Follow the remaining setup steps to activate your account and confirm your basic payment settings.
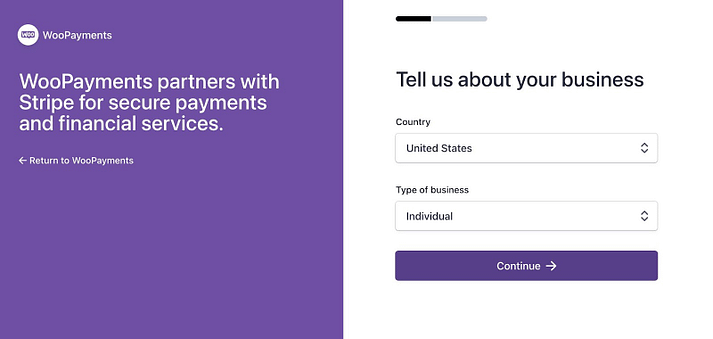
You’ll need to provide the following details:
- Your country and business type
- Legal name
- Email address
- Date of birth
- Home address
- Phone number
- Last 4 digits of your Social Security Number (or the full number if additional verification is needed)
- Your industry
- Your website
After completing these fields, you’ll move on to linking your bank account to receive payouts.
Step 3: Set a bank account to receive payouts
An essential part of setting up WooCommerce Payments is linking your bank account or debit card. This allows you to receive customer payments directly after checkout.
Your options include:
- Bank account: Choose from a list of supported banks or search for yours. Select your preferred bank, then sign in to your online banking to link the account.
- Debit card: Alternatively, open the Debit Card tab and enter your card number and expiry date to have payments sent directly to your card.
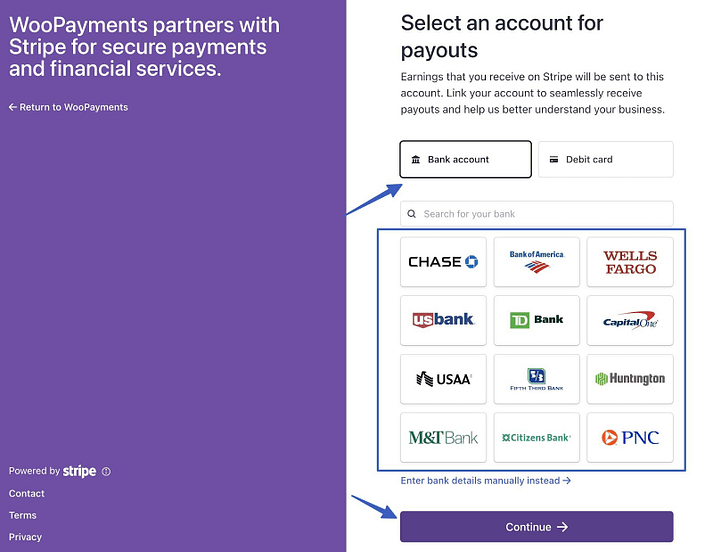
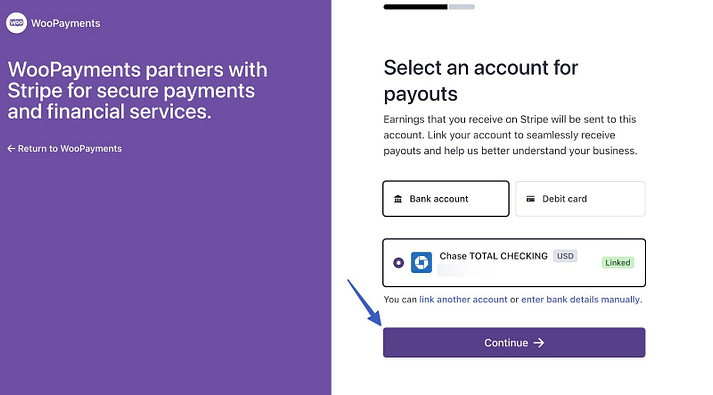
If you prefer not to connect automatically, you can manually enter your bank account information instead. Once your bank or debit card is linked, click “Continue” to move forward.
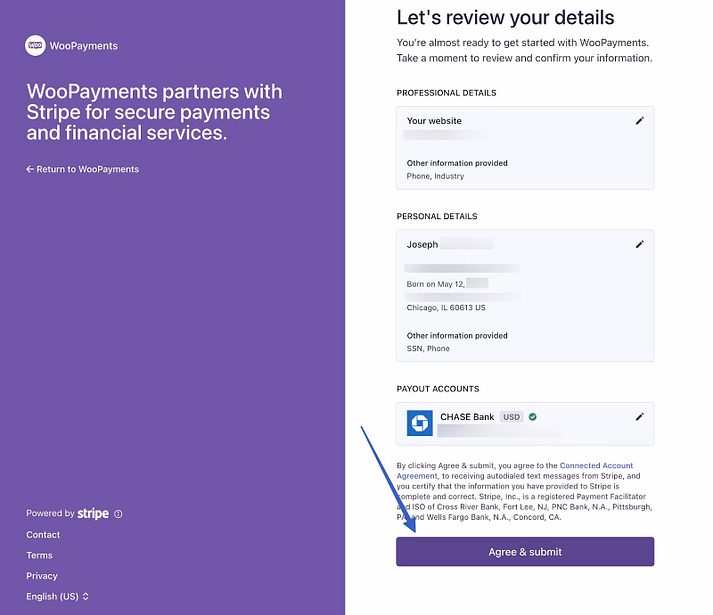
Review the page summarizing your personal, business, and payout information. Once everything looks correct, click “Agree and Submit” to continue.
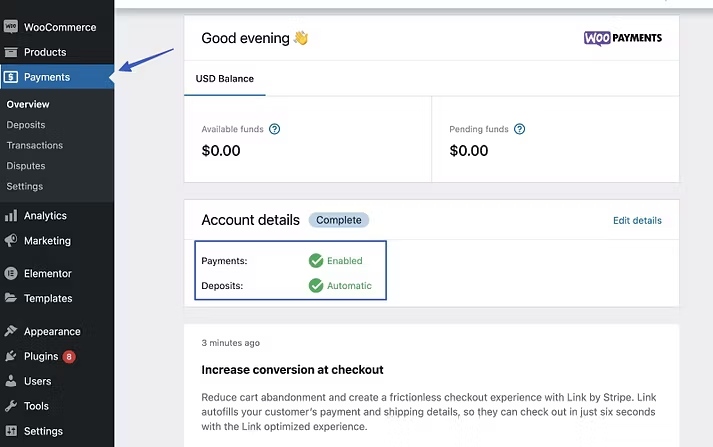
Go back to the main “Payments” page in your WordPress dashboard. You’ll now see a welcome screen showing your payment summary — including available and pending funds, as well as active features like Payments and Automatic Deposits.
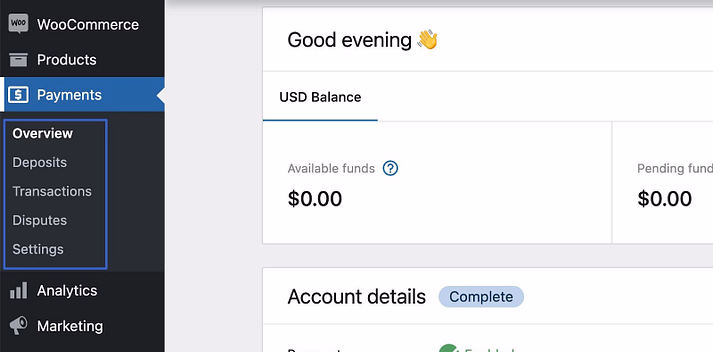
Under the Payments tab, you’ll find several additional sections, each offering different features:
- Overview
- Deposits
- Transactions
- Disputes
- Settings
Step 4: Set payment methods in WooCommerce Payments
The next step is to choose which payment methods you want to accept in your online store. Most merchants enable credit card payments by default, but you can also offer additional options such as Apple Pay.
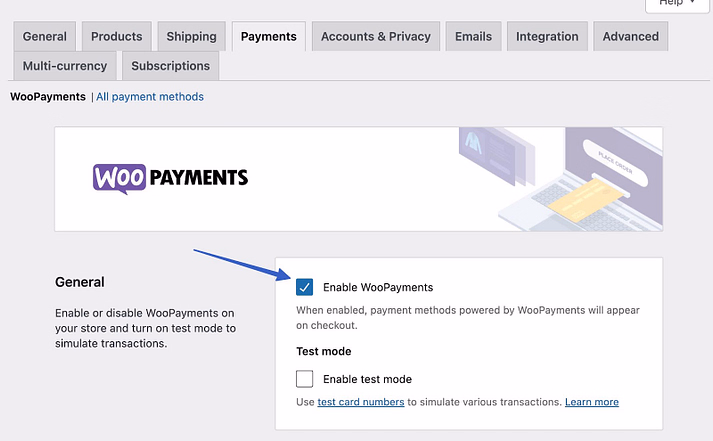
To do this, go to Payments → Settings (or WooCommerce → Settings → Payments). This will take you to the Payments tab within the WooCommerce settings panel.
Here, you’ll see a checkbox labeled Enable WooPayments. If you’ve already completed the setup wizard, this option should be checked automatically. If not, make sure to enable it now before proceeding.
Scroll down to the section titled “Payments Accepted on Checkout.”
Here, you can select which payment methods you want to offer to your customers and display during the checkout process.
Simply toggle on the options that best suit your store — for example, Credit/Debit Cards, Apple Pay, or Local Payment Methods — to make them available at checkout.
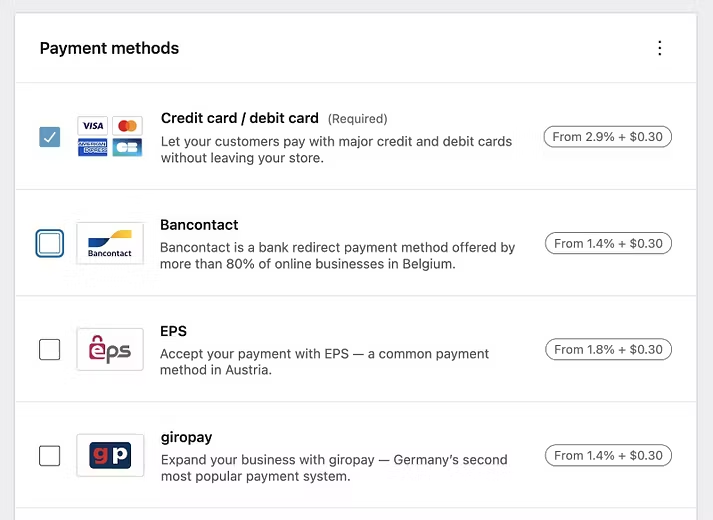
Options include:
- Credit card/debit card: The default processing method from WooPayments, powered by Stripe. It’s the most common option in the US.
- Bancontact: A popular bank redirect payment system in Belgium.
- EPS: A commonly used payment gateway in Austria.
- Sofort: A direct payment transfer service available in Spain, Austria, Belgium, Germany, Italy, and the Netherlands.
You can also enable other country-specific payment gateways. If your store operates internationally, consider enabling multiple gateways to serve global customers.
Review the transaction fees for each payment method on the same page to ensure you’re getting the best possible rates.
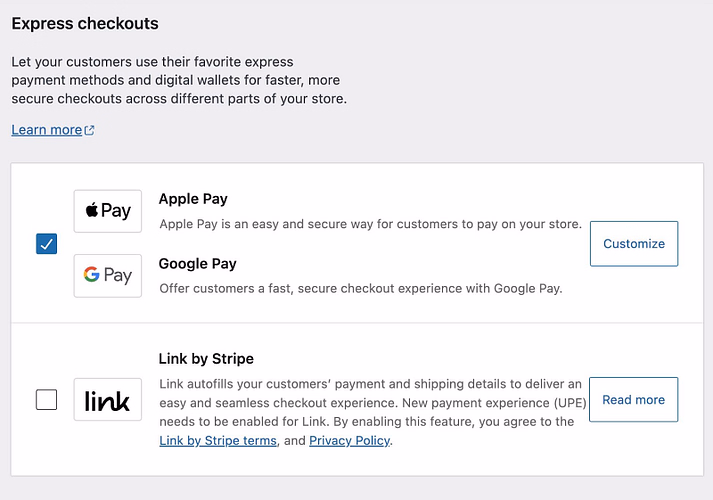
Next, scroll down to the Express Checkouts section.
These solutions provide fast and secure checkout experiences by automatically filling in customer information.
They only appear at checkout if the customer has activated them on their device.
Options:
- Apple Pay
- Google Pay
- Link by Stripe
Other settings on this page include:
- Transaction preferences: Enable payments using saved cards and decide when to authorize card payments. You can also customize what appears on customers’ billing statements when they make a purchase from your store.
- Deposits: Manage your payout account details and review deposit timelines. Typically, WooCommerce Payments holds the first payout for seven days, which later shortens to two business days once your account is established.
- Fraud Protection: Reduce chargebacks by adjusting fraud protection and security levels. You can choose between Basic or Advanced risk settings, depending on your store’s needs.
- Advanced Settings: Turn on multi-currency support, public key encryption, and subscriptions. This section also allows you to log error messages for troubleshooting.
Always click the Save Changes button after updating your settings to ensure your configurations are applied.
Step 5: Verify and test how WooCommerce Payments works
After you’ve learned how to set up WooCommerce Payments, it’s essential to test the user interface and verify that your store can successfully process payments.
That’s where Test Mode in WooCommerce Payments becomes useful. It allows you to simulate transactions without using real money — ensuring everything works smoothly before going live.
To enable Test Mode:
- Navigate to Payments → Settings in your WordPress dashboard.
- Under the General section, check the box for Enable Test Mode.
- Click Save Changes at the bottom of the page.
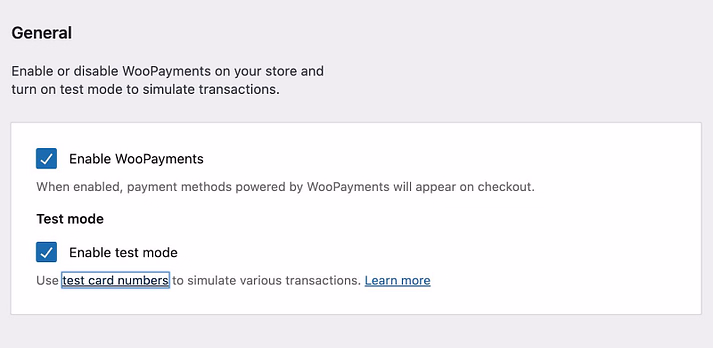
Test Mode activates a simulated shopping environment, allowing you to test the full checkout process, including payment processing, email receipts, and thank-you pages, without any real money being transferred.
Once Test Mode is enabled, go to the frontend of your store and add a few products to your cart.
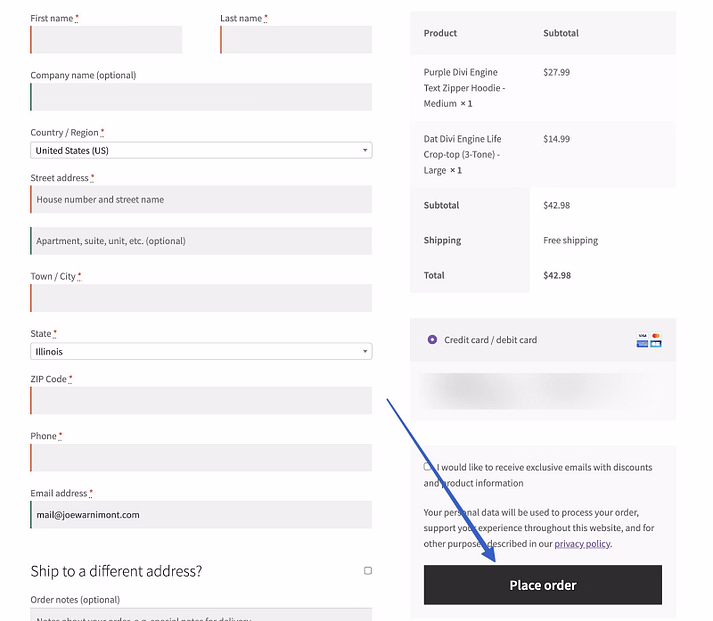
Then, proceed to the Checkout page to continue testing.
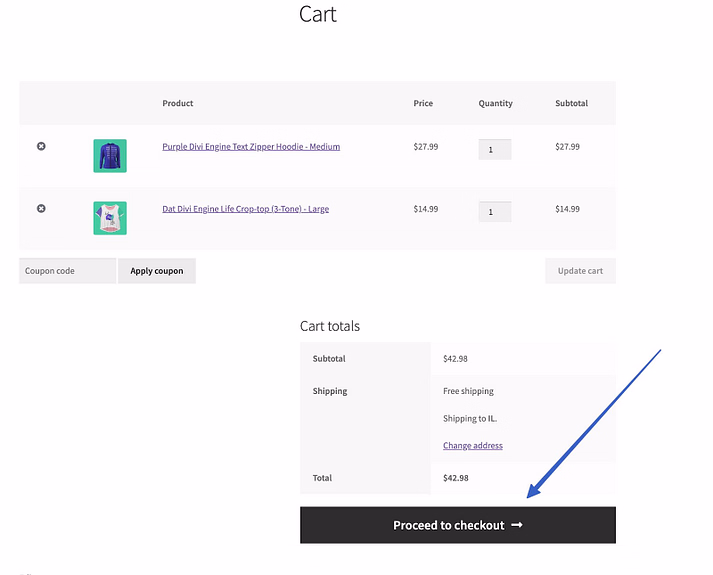
Fill in the payment details, choose a payment method, and click “Place order”. For card payments, use one of the test card numbers supplied by WooCommerce Payments (found in the plugin’s test mode documentation).
We encourage you to process several test orders before officially launching your store. Doing so helps ensure that your checkout system, notifications, and fulfillment process are working correctly.
After each test order, review and understand:
- The fulfillment process (how orders are handled after payment)
- Order statuses and their transitions
- Payouts to verify payment flow
- Automated order emails sent to customers
- Redirect pages displayed after order completion
- Customer registration during checkout
- Follow-up communications such as abandoned cart reminders and marketing emails
Finally, once everything works as expected, run a few real transactions to confirm that funds are being properly deposited into your account.
Payment Gateway Best Practices for WooCommerce HK
To ensure smooth transactions and build trust with Hong Kong customers, it’s essential to follow these best practices when managing payment gateways for your WooCommerce store.
- Offer multiple payment options: Include popular local and global methods such as AlipayHK, WeChat Pay, PayPal, and credit cards to serve diverse customer preferences.
- Display prices in HKD: Always show prices and receipts in Hong Kong Dollars (HKD) to avoid confusion and improve transparency.
- Enable multi-currency support: If your store serves international customers, allow payments in multiple currencies while keeping HKD as the default.
- Ensure PCI DSS compliance: Use gateways that comply with security standards to protect customer payment information.
- Use SSL certificates: Secure your checkout page with HTTPS to build credibility and prevent data breaches.
- Test regularly: Perform test transactions periodically to verify that all payment methods function properly.
- Set up fraud protection tools: Enable advanced fraud detection features and monitor suspicious activities to reduce chargebacks.
- Optimize for mobile payments: Ensure your checkout process works smoothly on mobile, as many Hong Kong customers use mobile wallets.
- Provide clear refund policies: Display your refund and return terms clearly to improve customer trust and reduce disputes.
- Monitor analytics and reports: Regularly review payment reports to identify failed transactions, monitor revenue flow, and optimize payment performance.
Supporting Local and International Customers
Running a WooCommerce store in Hong Kong means serving both local buyers and international shoppers. To maximize sales and customer satisfaction, your payment gateway strategy should accommodate both audiences seamlessly.
- Offer local payment methods: Support popular Hong Kong options such as AlipayHK, WeChat Pay, FPS, and Octopus to appeal to domestic customers.
- Enable global gateways: Integrate international gateways like PayPal, Stripe, and 2Checkout to serve overseas buyers who prefer credit cards or global wallets.
- Provide multi-currency checkout: Allow customers to view prices and pay in their preferred currency while automatically converting to HKD on your end.
- Use localized language and messaging: Display checkout and payment instructions in both English and Traditional Chinese to improve clarity and user experience.
- Handle cross-border taxes and fees transparently: Clearly show shipping costs, conversion fees, and taxes to avoid confusion for international shoppers.
- Offer multiple shipping options: Combine local couriers (SF Express, Hongkong Post) with international carriers (DHL, FedEx) for better flexibility.
- Enable international fraud protection: Use fraud detection tools that recognize cross-border transactions to keep payments secure.
- Provide responsive customer support: Offer live chat or multilingual support to help both local and global customers resolve payment issues quickly.
Frequently Asked Questions
1. Which payment gateway is best for WooCommerce in Hong Kong?
Popular and reliable options include Stripe, PayPal, Alipay, WeChat Pay, and HSBC PayMe. Each offers good integration with WooCommerce and supports HKD.
2. Are there any transaction fees for WooCommerce payments?
Yes, most gateways charge transaction fees (typically between 2.9%–3.5% per transaction). Check your gateway’s pricing structure for exact rates.
3. Can I use both local and international gateways?
Absolutely. Many Hong Kong businesses combine local options (PayMe, AlipayHK, WeChat Pay) with global ones (Stripe, PayPal) to offer flexibility to both local and overseas customers.
4. What should I do if a payment fails?
Check your gateway dashboard for failure logs or declined transaction reasons. Common causes include incorrect card information, insufficient funds, or unsupported cards.
Conclusion
Setting up a reliable payment gateway is one of the most crucial steps in building a successful WooCommerce store in Hong Kong. From choosing the right provider to configuring and testing your setup, every step ensures that your customers enjoy a smooth, secure, and seamless shopping experience. By following the steps and best practices outlined above, you can streamline your payment process and boost your store’s performance in the Hong Kong market.
At Arestós, we specialize in developing, optimizing, and maintaining WooCommerce stores. Our team helps businesses integrate secure payment gateways, enhance website performance, and create a user-friendly shopping experience that drives conversions and builds trust.
Contact us today to learn how we can help you build or optimize your WooCommerce store with the best payment solutions.
Subscribe to our newsletter!
Get updated to
the lastest IT trends
Related Posts
Update the latest technology trends for your business